

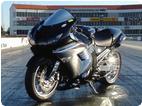


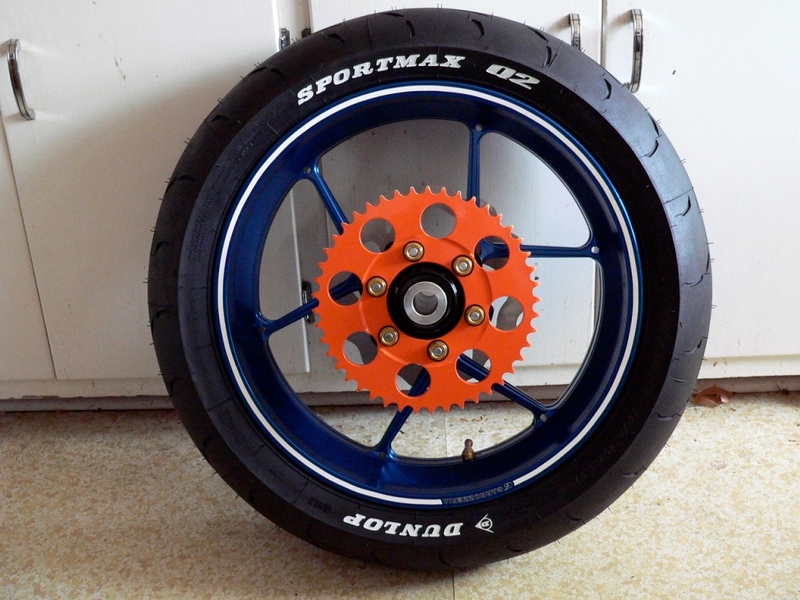
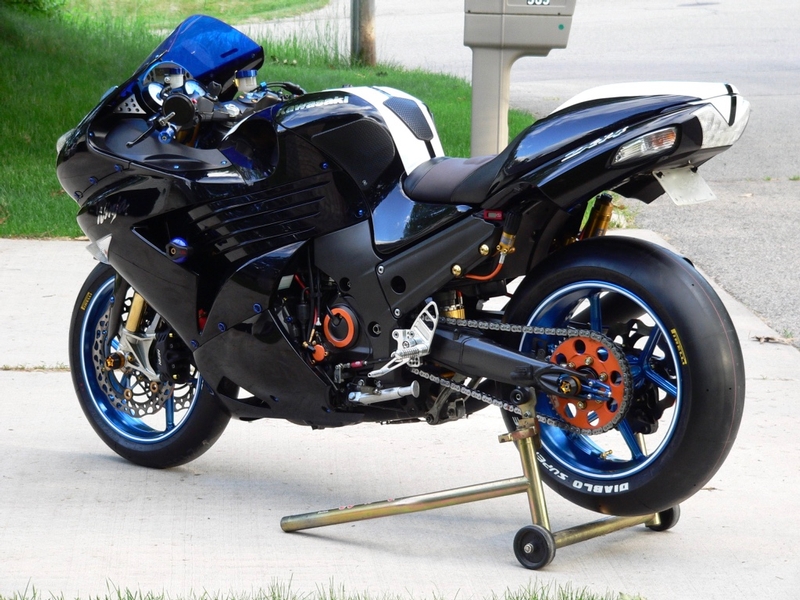
Painting -- Rear Sprocket
The Process of Painting
The process of painting a sprocket is basically the same as painting any other metal surface. In this tutorial, I will outline the entire process noting a few situations that are specific to the painting of sprockets.
Prep the metal surface to improve the adhesion of paint. First clean any dirt or oil off of the sprocket. Use solvent if necessary. Scuff sand the entire surface to create a tooth that will help the paint grip onto the metal. Wash away the dust with Dawn dish soap and water. Finally, clean the surface with denatured alcohol to remove any trace of fine residue that may be left on the surface.
A brand new sprocket should have minimal runout when checked with a dial gauge. By painting the sprocket you may alter the runout reading if the paint is not applied perfectly even. It may seem like a rather fine point but to maintain as much precision as possible in future runout tests of the sprocket, I suggest masking off the surface of the sprocket that contacts the sprocket carrier on the rear wheel (this is covered in steps 1,2 and 3, below).
I fashioned wire stilts to hold the sprocket above the work surface while the sprocket was sprayed and left to dry (As shown in step 4). You may wish to try hanging the sprocket rather than using stilts. Stilts will keep the paint from sticking to the work surface that the stilts rest upon but they also allow overspray to waft back upward, depositing a slight grainy texture on the downward facing side of the sprocket. Dust is also more likely to be blown up off of the work surface and into the wet paint if the sprocket is close to the work surface. Slight coarseness in the finish will be unnoticeable with satin or mat finishes. Grainy texture can be polished out later if it is considered objectionable.
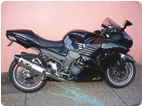
I used Valspar interior/exterior primer and Valspar interior/exterior gloss paint to coat the sprocket. The paint has held up perfectly well for ten thousand miles of use. The sprocket can heat up during operation of the motorcycle so you may wish to use a high temp paint though it appears that regular exterior paint is sufficiently durable.
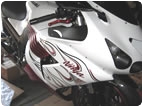
Choosing a color of primer that is closest to the top coat of paint is generally considered best so that the top coats will easily cover the primer color. Using white primer may cause top coats to appear more vibrant but white is not always the easiest color to cover. I chose white primer for my sprocket to maximize the intensity of the bright orange top coat I applied. A tan primer would have been acceptable.
A very heavy film of paint can be less durable than a film of average thickness. For this reason, it is best to avoid applying more primer than is necessary to produce a continuous film of even tone. Primer is only meant to provide an intermediary layer that will adhere to both the metal and the top coat of paint.
Apply paint in temperatures of 65 to 90 degrees fahrenheit. The relative humidity should be below 85% and the the ambient air temperature should be at least four degrees fahrenheit higher than the dew point. Always avoid painting at dawn and dusk when there will be a rapid change in humidity. Condensation will negatively impact the adhesion of paint and it may even affect the appearance of the dried film. Avoid painting in direct sunlight.
Shake the can thoroughly to mix up the contents before applying. Also, shake the can often while applying the paint. It’s a good practice to turn the can upside down and press the button until the spray stops so that the valve is cleared of paint when done painting. This trick does not work on some brands of paint that have spray valves designed to function at all angles.
The first coat of primer will have a tendency to bead up on non porous surfaces like metal. For this reason, the first coat of primer is very light. A mist that dries almost immediately after contact is desirable. Solid coverage is not at all necessary for the first application of primer. The idea is to create a hazy film that the next layer of primer will grip onto rather than collect in droplets. Apply two or three more coats of primer. Spray the primer on, overlapping the edges of the strokes so that the surface is wet but not so much that the paint pools or runs. Turn the sprocket over between coats as needed to paint both sides. Allow each coat to dry no more than five minutes between applications to promote maximum adhesion between layers.
Primer films have little binder in them so they dry to a slightly coarse texture that is ideal for top coat adhesion. It is not necessary to sand a primer coat. Since I planned to polish my top coat to an ultra smooth surface, I chose to sand the primer coat before applying the top coat. This was to avoid the possibility of any tiny grains of primer showing through after the top coat was polished down. Wait at least an hour before sanding the primer coat. Sand very gently with 1000 grit sandpaper. The primer coat is extremely vulnerable to abrasion. Take care to not sand right through it and avoid sanding edges and sharp corners. Dust will inhibit adhesion of the top coat. Use water to wash away all dust from sanding and allow the water to thoroughly dry before applying the top coat.
Spray the top coat on wet like the primer layers were applied. Turn the sprocket over between coats to paint both sides. Wait five minutes between coats. Apply two to three layers of top coat. If you plan to polish the surface to perfection after it has cured, apply four coats. Most paints will be dry to the touch within an hour. This does not mean that they will not be sticky and vulnerable to being pulled off by contact with another surface for more than a few seconds. The Valspar top coat that I used was especially slow to dry to the point that I could handle it.
Different paints will require different amounts of time to cure to a durable surface. Most paints will not cure to maximum hardness for several months. While the fresh paint is curing to max permanence, avoid allowing any solvents to come into contact with it. You can wipe grease and grime away from the sprocket with a dry rag and clean it with soap and water. DO NOT allow chain cleaning solvents or other harsh liquids to run over the uncured paint for a couple months, at least.
I have heard the suggestion to bake the fresh coat of paint in oven to hasten curing and cause the paint to flow to a level surface. I have not tried this. Be aware that baking a paint film may affect the color and the durability of the paint film.
Properly applied spray paint dries to a very level finish but if you wish to polish the paint to a glass like surface, you will need to wait until the paint has cured to a state of hardness where you are able to hold it for at least 30 seconds without having it stick to you fingers (the Valspar paint I used required about two weeks of curing and it was still slightly tacky). Use a microfiber cloth and lightly polish the surface with a very mild compound. Be extra careful to not overdo it, the paint will come off quite readily with even the mildest of abrasives. You will see the paint color come off on the microfiber cloth. I suggest you test the materials and technique on the sprocket teeth where the paint will wear off with use anyway. Try to avoid polishing pointed edges and corners because the paint will strip through easily on those areas. Use water to flush away the polishing compound as you work. Use your bare finger tips and more polishing compound to rub out the last of the swirls left by the cloth. The polishing technique takes the gloss down slightly but smooths the coat to a perfectly level surface that still has a high sheen.
If you wish to apply additional colors or paint embellishments, you cannot do that by applying masking tape or adhesive film to the uncured paint. Those will stick to the paint permanently. You will need to use a brush instead without any masking any edges. Artists squirrel hair brushes or other soft natural hair bristle brushes work best. If you reduce your paint a little bit with a paint thinner, a perfect edge can be painted with greater efficacy. However the paint film will be easily removed by scuffing or solvents even after it has cured if it is applied in a much reduced state. Hand painting is a challenge if you have never done such work. You should try your hand at it on some other surface before committing to your perfectly painted sprocket.
Special Materials
Airbrush Masking Film
This is a clear plastic film with a low tack adhesive back. The product name is Frisket and it is available in different sized rolls from art supply and airbrush suppliers. Frisket lends itself exceptionally well to lifting and repositioning yet it sticks down to the surface during painting. It is not designed for use with solvents such as those in spray paint. Any loose pieces of Frisket that protrude beyond the edge of the surface will curl up when contacted by solvents but the portion that is is adhered to the surface will work to good effect. Frisket removes easily after the paint is dry. I would avoid using contact paper as a substitute for Frisket. Contact paper will be a mess to remove. It will stick tenaciously after it has been applied for a short time especially after sprayed with solvent based paint.
Natural Hair Brushes
Available from art material suppliers, these brushes have soft, naturally flagged (natural taper of that hairs intact) bristles that are well suited to precise hand manipulations. It is not necessary to buy the most expensive but do not use the cheapest ones. Very cheap brushes may have bristles that fall out or they may have tips that have had most of the natural flags trimmed off.
Polishing Compound
You can find these at the auto supply store. They all seem to work but there is a dramatic difference in the amount of abrasion some of these products will offer. The coarser ones, often called “rubbing compound” will leave a dull, sanded appearance. They are more to be used to to level out a paint surface that has a deep scratch rather than as a final finishing polish on a glossy surface. The best polishing compounds for finishing I have used are 3M scratch remover or Turtle Wax Liquid Clay Bar.
Tools:
Dawn dish soap and water
Sharpie marker
320 grit sandpaper
airbrush masking film
burnishing tool or other hard, rounded object
x-acto knife
cotton ball
denatured alcohol
steel wire
wire cutters
pliers
exterior primer spray paint
1000 grit sandpaper
exterior top coat spray paint (high temp if you like)
microfiber cloth
very mild scratch removing polishing compound
fine point marker
template
liquid enamel paint
paint thinner
Artists squirrel hair brushes or other soft natural hair bristle brushes
waxed paper
1. Prep the metal surface to improve the adhesion of paint. First clean any dirt or oil off of the sprocket. Use solvent if necessary. Make sure visible grime is removed from the sprocket and then wash it with soap
and water. Loosely install the rear sprocket to the wheel. Use a Sharpie marker to trace the edge where the sprocket carrier contacts the sprocket.
2. Scuff sand the entire surface of the sprocket with 320 grit sandpaper to create a tooth that will help the paint grip onto the metal. Wash away the dust with Dawn dishsoap and water.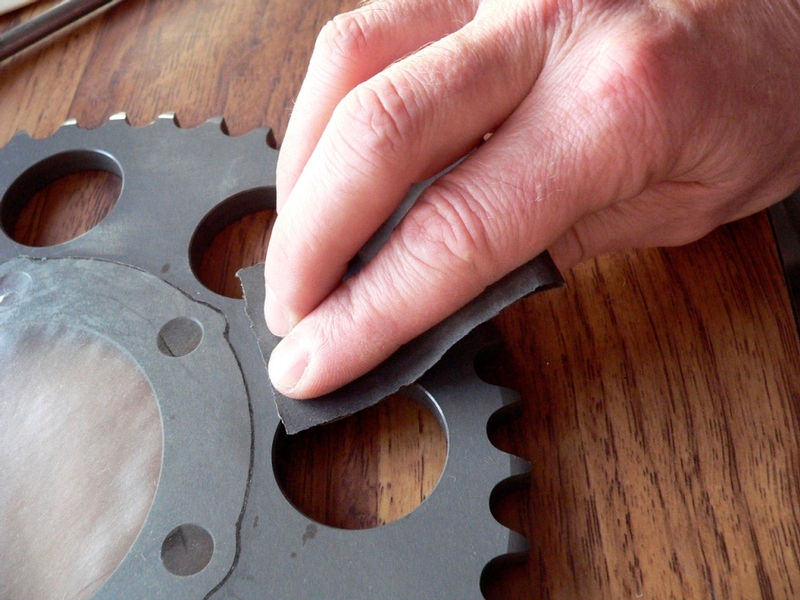
Don’t worry too much about sanding between the teeth of the sprocket. The painted finish will be worn away from that area by the drive chain in a short time.
3. Apply a piece of airbrush masking film over the traced line on the back of the sprocket. Burnish the film down with a burnishing tool or other hard, rounded object so that the film is adhered securely. Cut the film gently with an x-acto knife. Clean the surface with a cotton ball and denatured alcohol to remove any trace of fine residue that may be left on the surface as well as any marker that is not under the masking film. 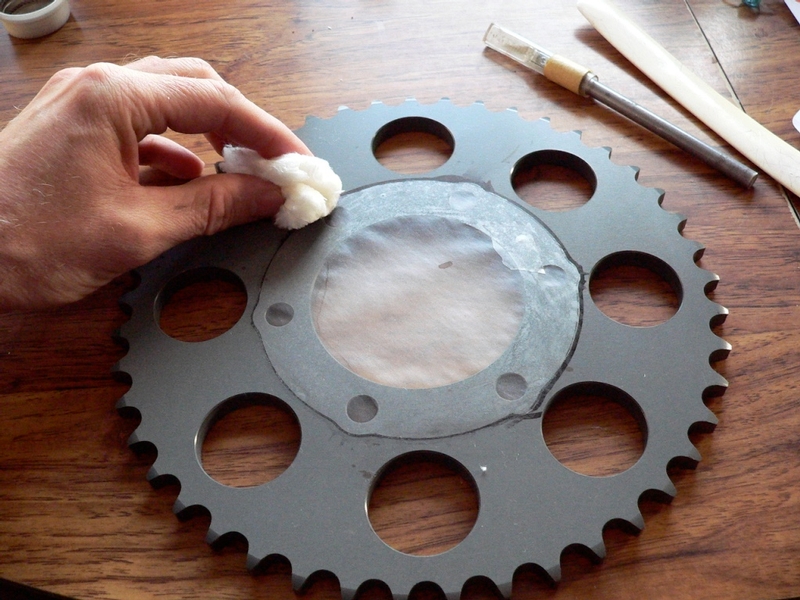
4. Plan some way to suspend the sprocket so that the freshly painted surface does not need to be lain against another surface. I used steel wire, wire cutters and pliers to make three short stilts. The stilts fit in the sprocket bolt holes and held the sprocket above the work surface the by about one inch. 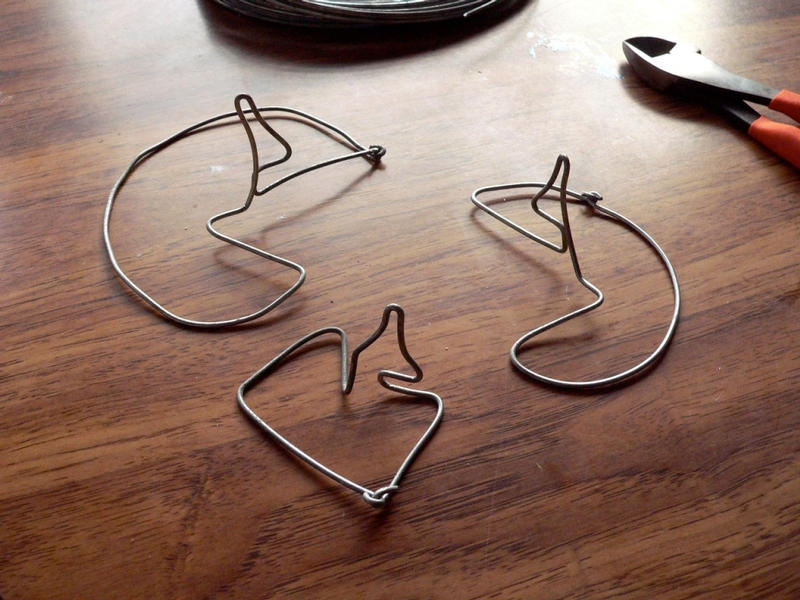
5. Spray exterior primer paint on the sprocket, turning it over as necessary to paint both sides. 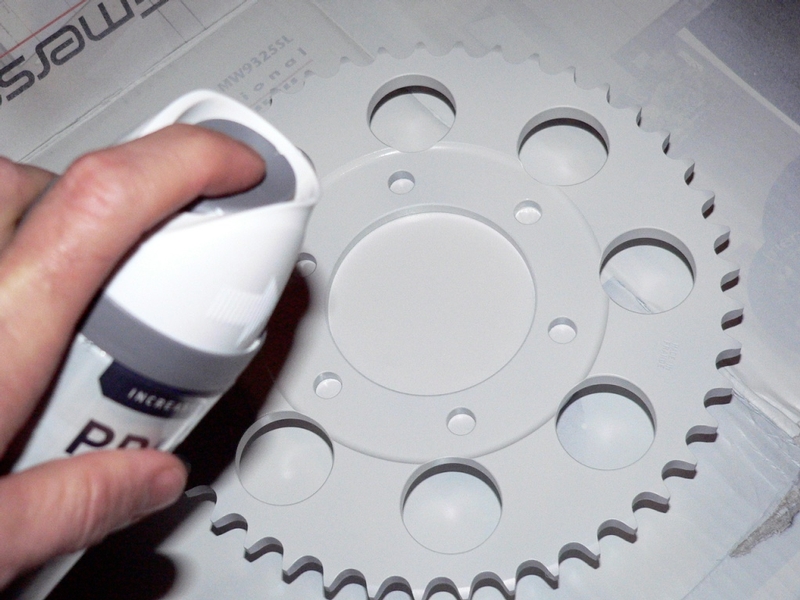
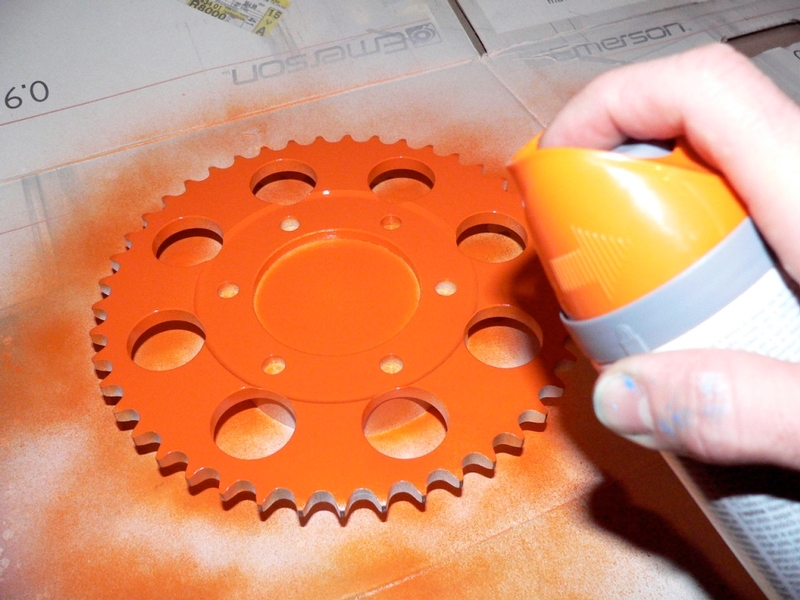
6. Apply exterior top coat paint (high temp if you like) to both sides of the sprocket. You might want to paint the back of the sprocket first so that the overspray that floats up will stick there rather than the front. Allow the paint to cure for at least several days. You may install the sprocket to the wheel at this point if you are satisfied with the finish.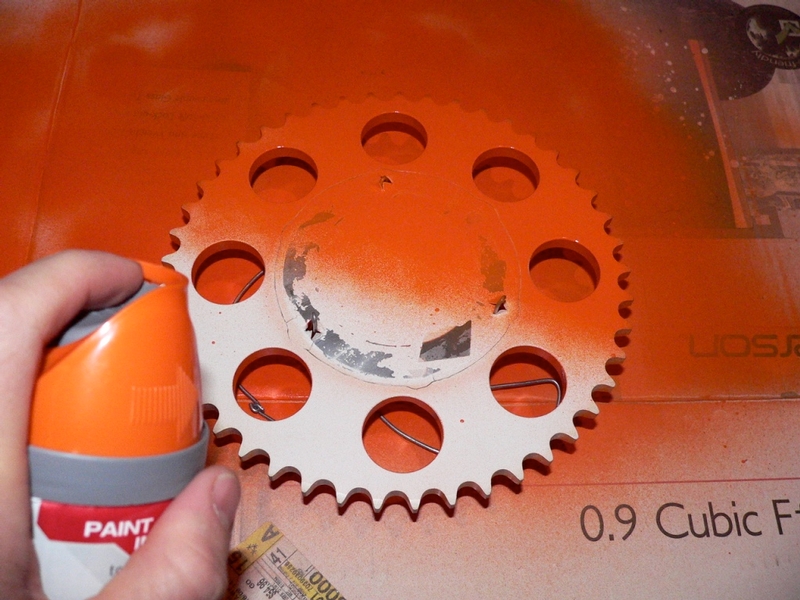
7. When the paint has hardened enough, use a microfiber cloth and a very mild scratch removing polishing compound on it. If there are any finger prints or scuffs from handling the fresh paint, it will be repaired during this step. Use water to flush away the polishing compound as you work and polish out the last of the swirls with your finger tip and fresh compound.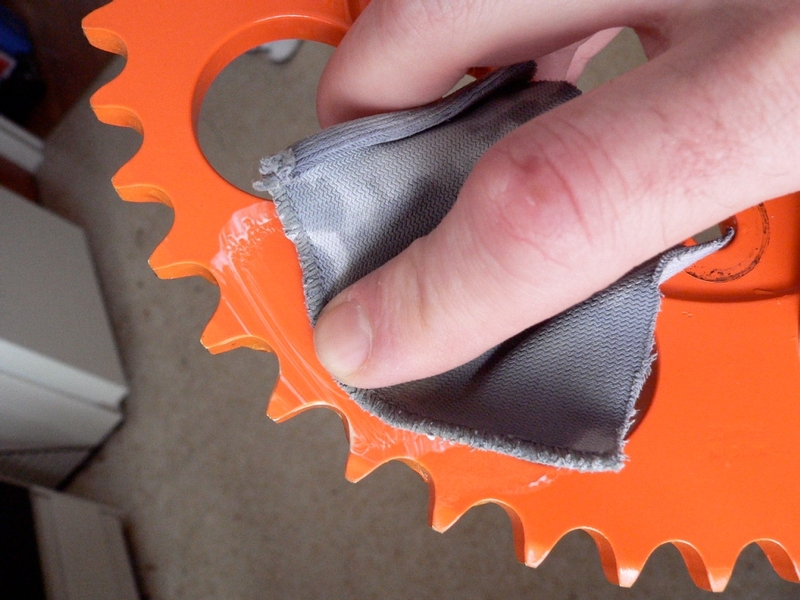
8. Draw on your pattern for embellishments with a fine point marker and any kind of template that is suitable.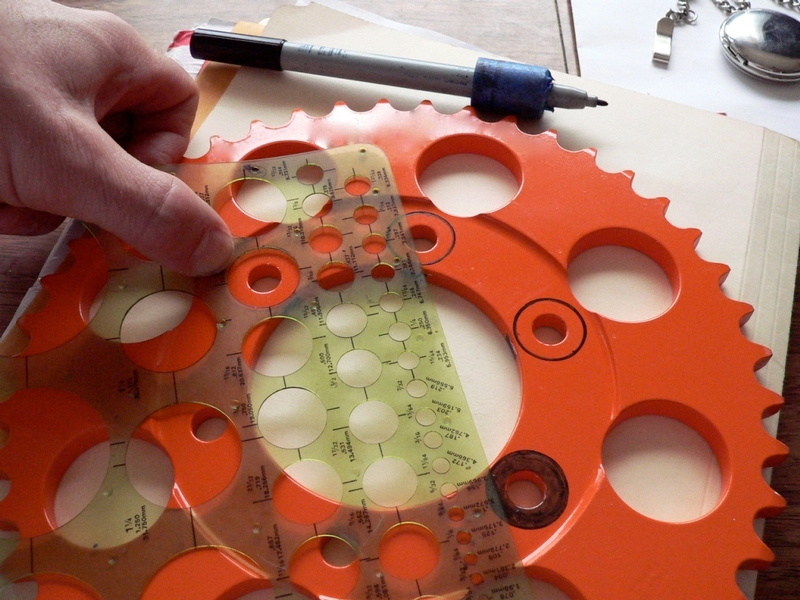
9. Use a soft natural bristle brush and liquid enamel paint reduced with paint thinner to finish the design by hand. 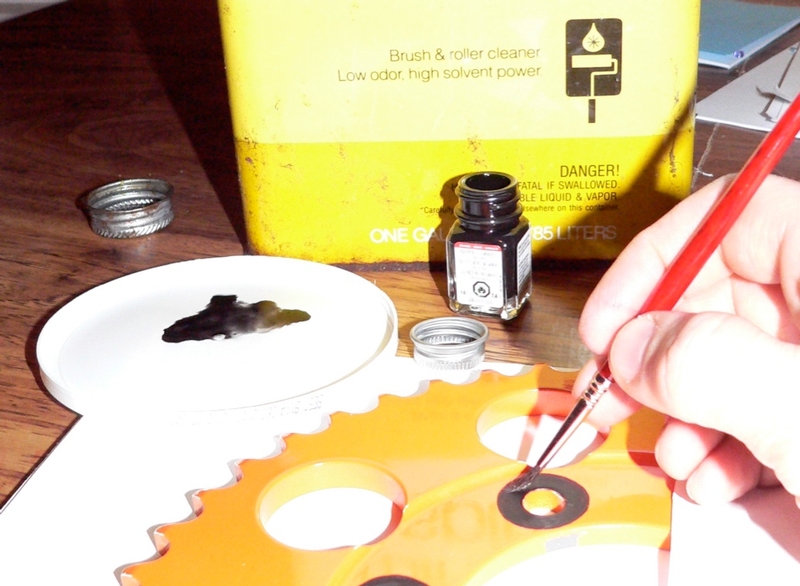
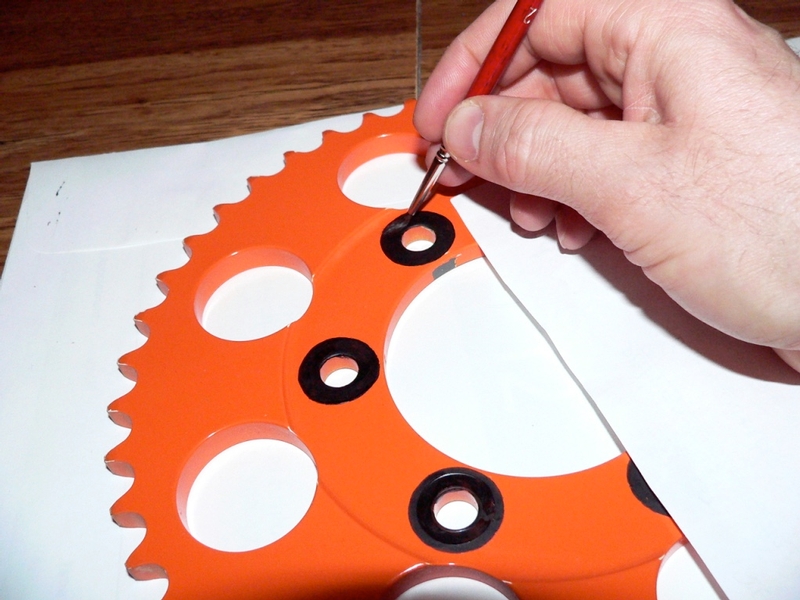
Lay the sprocket on a piece of waxed paper. Rest your hand upon a second piece of wax paper. Move the wax paper often to be sure it does not stick to the uncured paint.
10. Let the fresh paint dry as long as you can before installing. You can wipe grime away from the sprocket and clean it with soap and water. DO NOT allow chain cleaning solvents or other harsh liquids to run over the uncured paint for at least a couple of months. 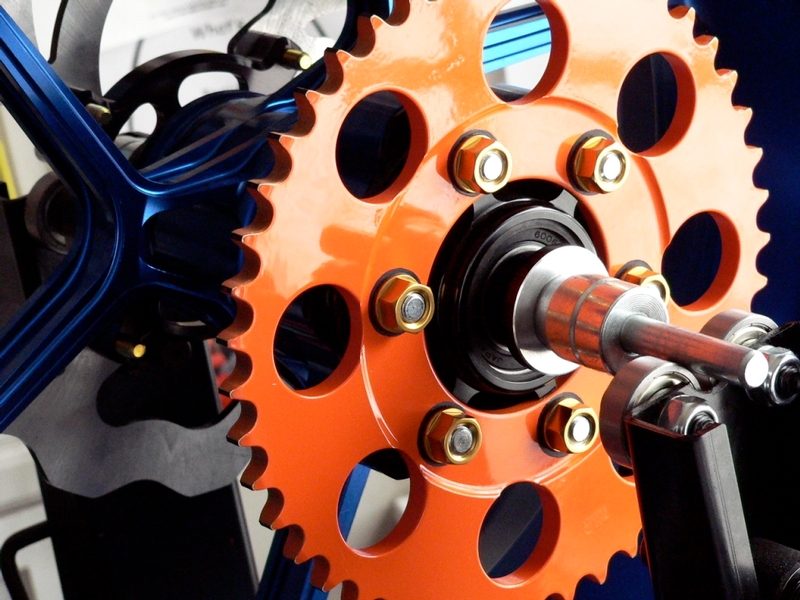
* Last updated by: Rook on 4/16/2018 @ 9:19 AM *