


Clutch Slave Cylinder Removal
The clutch slave cylinder needs to be removed or partially unbolted to separate the sprocket cover from the engine case. In this situation, it is usually ok to leave the clutch fluid undrained and the line connected or leave the slave bolted to the sprocket cover or both. The Clutch slave cylinder may also be removed to access the clutch pusher rod or to replace a part that is causing leakage or some other malfunction.
Tools:
pail of water and rag
8mm socket
3” C-clamp
molybdenum disulfide grease
nonpermanent locking agent
new clutch slave cylinder spacer (optional)
Removal
1. Have a pail of water and rag ready so that any clutch fluid that might escape during removal of the clutch slave cylinder can be quickly flushed away. If the clutch slave cylinder is not leaking beforehand, it probably will not loose any fluid unless the cylinder is permitted to extend far enough to fall out of the housing.
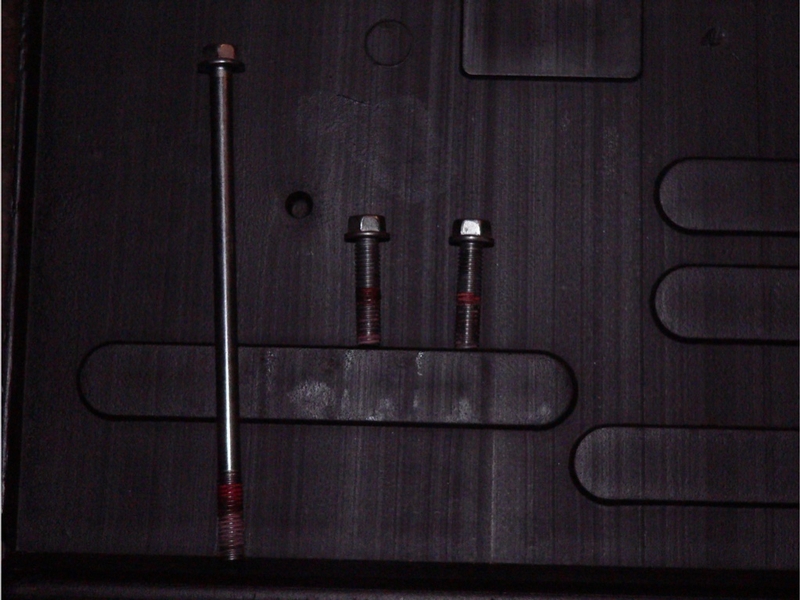
2. The clutch slave cylinder is mounted with three bolts. The two bottom bolts (S) are short and only hold the slave cylinder to the sprocket cover. The top bolt (L) is a long bolt that passes through the sprocket cover and draws the sprocket cover and slave cylinder up to the engine case.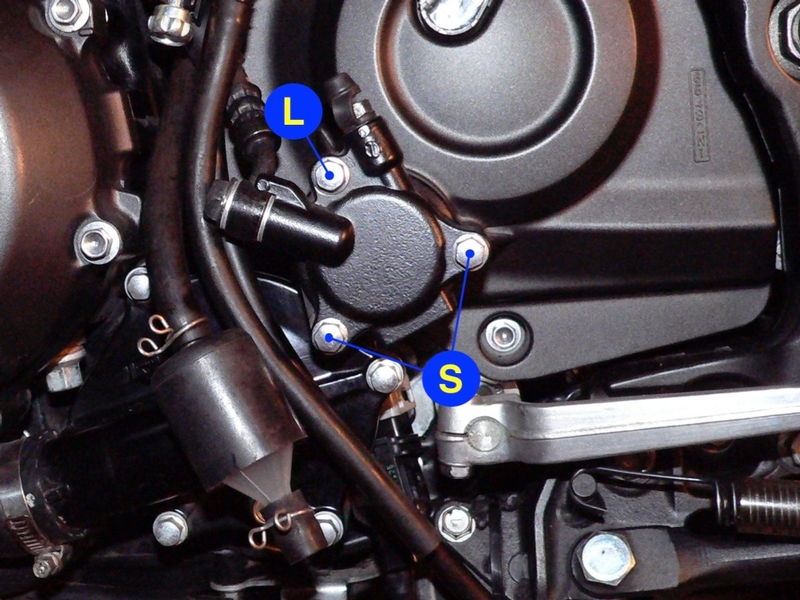
Option A—To clear the clutch slave cylinder with the sprocket cover:
Use an 8mm socket remove the top bolt (L). Leave the two bottom bolts (S) untouched. The two short clutch slave bolts will hold the clutch slave cylinder to the sprocket cover.
Remove the sprocket cover bolts (SPROCKET COVER REMOVAL, step 1).
Both sprocket cover and slave cylinder can be cleared to the side while hanging on the clutch fluid line.
OR
Option B—To clear the clutch slave cylinder only:
Remove all three clutch slave cylinder mounting bolts. 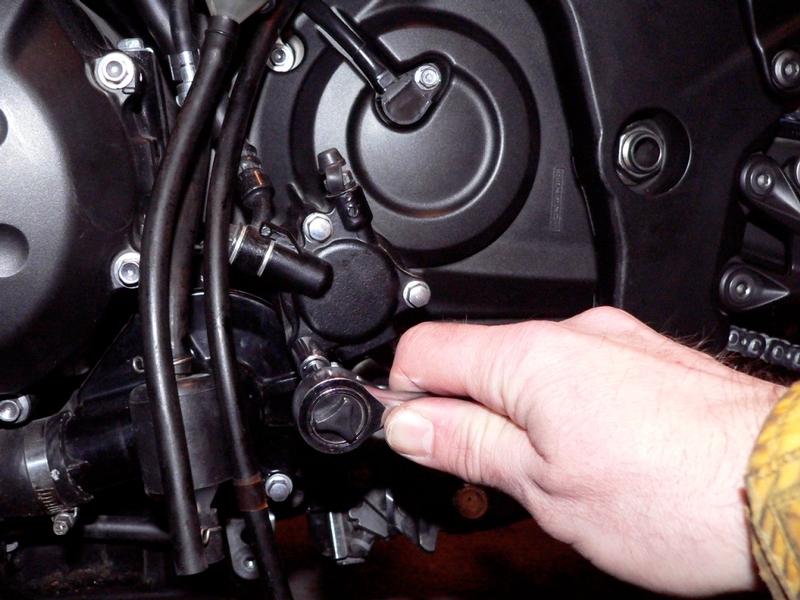
Pull the clutch slave cylinder out of the sprocket cover. Do not lose the black plastic spacer [A] on the back side.
The inner cylinder will slowly extend out of back of the clutch slave cylinder housing under fluid pressure in system. The inner cylinder will fall out and clutch fluid will escape if the inner cylinder extends too far. Maintain pressure against back of the inner cylinder to prevent fluid leakage.
Apply a 3” C-clamp (I used a 2” and it just barely opened wide enough) to keep the inner cylinder compressed. Place a 1” square of cardboard or similar protective barrier under the C-clamp to protect the finish on the outer cover of the clutch slave cylinder.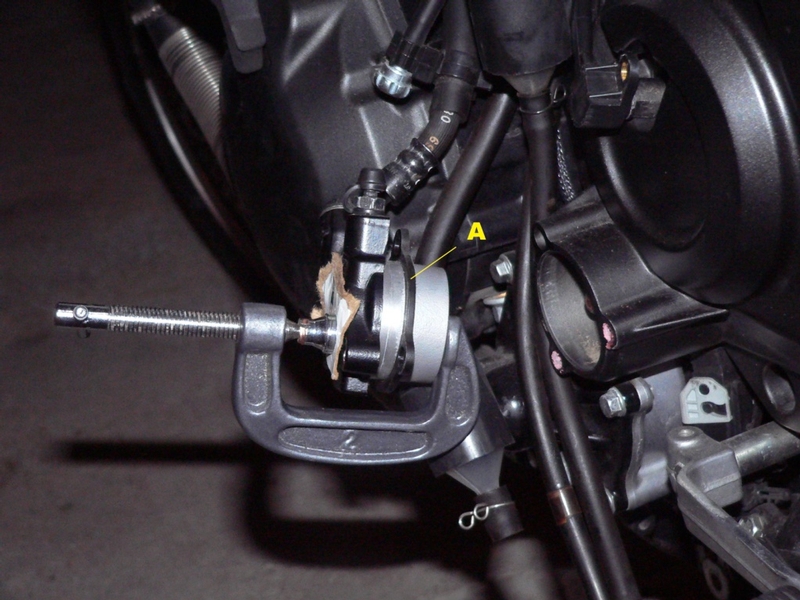
Option C—To completely separate the clutch slave cylinder only
Purge all clutch fluid and disconnect the clutch fluid line from the clutch slave cylinder (see Clutch Fluid Line Removal, steps 2, 3, 4 and 9).
Remove all three clutch slave cylinder mounting bolts.
Remove the slave cylinder and plastic spacer.
OR—To completely separate the clutch slave cylinder with the sprocket cover:
Option D. Purge all clutch fluid and disconnect the clutch fluid line from the clutch slave cylinder (see Clutch Fluid Line Removal, steps 2, 3, 4 and 9).
Remove the top clutch slave mounting bolt (L).
Leave the two bottom clutch slave mounting bolts (S) tight.
Remove the sprocket cover (SPROCKET COVER REMOVAL, step 1) with the slave cylinder attached.
3. Pull the pushrod out through the hole in the clutch slave cylinder mount on the sprocket cover.
Installation
4. Apply molybdenum disulfide grease to one butt end and slide the push rod back in with the greased end pointed toward the inside.
The push rod functions the same regardless of which end faces in. 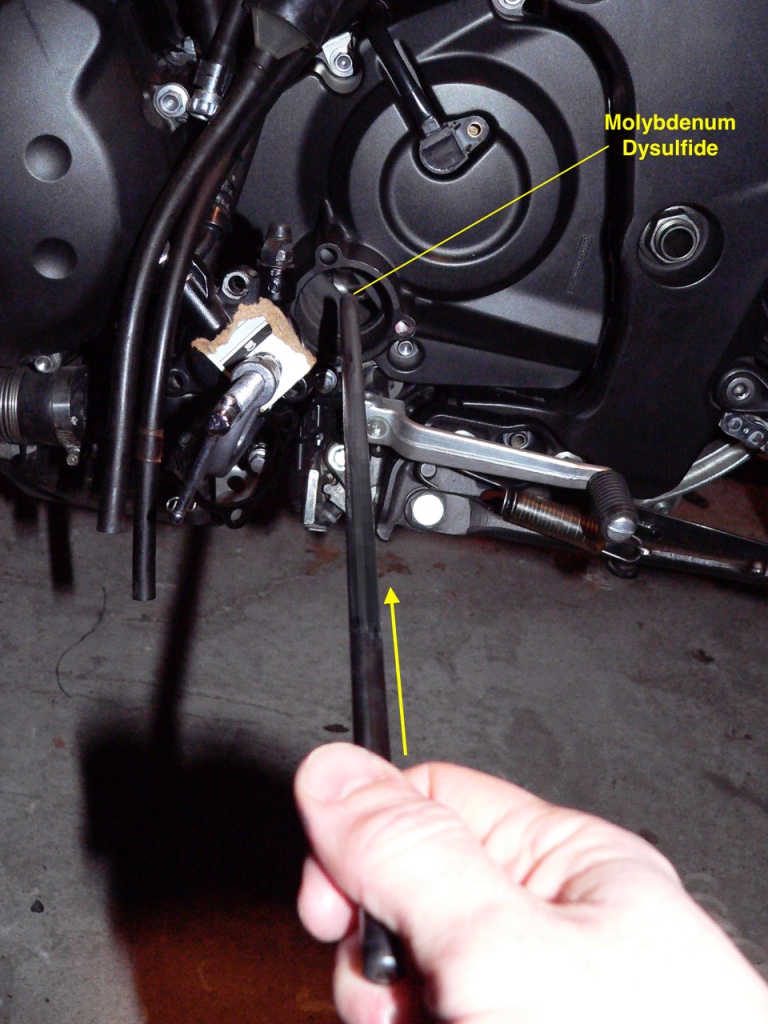
5. It is recommended that the plastic spacer be replaced each time the clutch slave cylinder is removed. I reused mine a couple of times now.
Install the plastic spacer. Around each screw hole in the spacer, there is a slightly raised surface. The raised surfaces should point outward, toward the back of the clutch slave cylinder. The smooth side of the plastic spacer is installed against the edge of the sprocket cover hole.
6. Apply nonpermanent locking agent to the clutch slave cylinder screws.
Tighten the clutch slave cylinder bolts with a 8mm socket. Not too tight or the spacer will crack.
Torque: Clutch Slave Cylinder Bolts - 87 inch lbs
I go snug and let the thread locking agent hold the bolts.
7. If the clutch fluid line was disconected, reconnect it (Clutch Fluid Line, steps 12, 16, 23, 24 and 25).
* Last updated by: Rook on 2/4/2018 @ 8:34 AM *