


Gen1 Sprocket Cover Removal
The sprocket cover needs to be removed to inspect and remove the front sprocket. You may also eliminate some weight from the sprocket cover by removing some nonessential parts.
Do First:
Remove left lower fairing (see Fairings Removal, Lowers).
Remove the speed sensor (see steps 1 through 5, Speed Sensor Removal).
Clear the clutch slave cylinder with the sprocket cover (see Clutch Slave Cylinder Removal, steps 1 and 2, Option A recommended for most situations).
OR
Option B—clear the clutch slave cylinder only.
OR
Option D—completely separate the clutch slave cylinder with the sprocket cover.
Tools:
8mm socket and 4 1/2” extension
nonpermanent locking agent
torque wrench
Removal
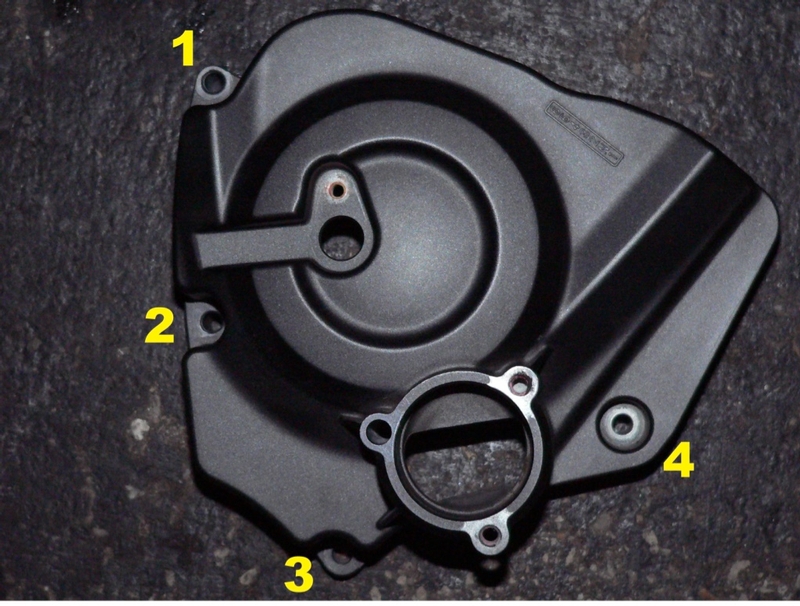
1. Use 8mm socket and 4 1/2” extension to remove the four bolts that fasten the sprocket cover. Bolt #3 is difficult to get to with your hand. If you reach in and press your fingertip against the bolt head as you withdraw it with the socket, you can avoid dropping #3 on top of the water pump.
Remove the sprocket cover or clear it to the side and hang it on a string if the clutch slave cylinder has not been removed.
!!!!There are two dowel pins on the inside of the sprocket cover. The pins may stick to the bolt holes in the cover, the bolt holes in the engine casing or they may fall out.
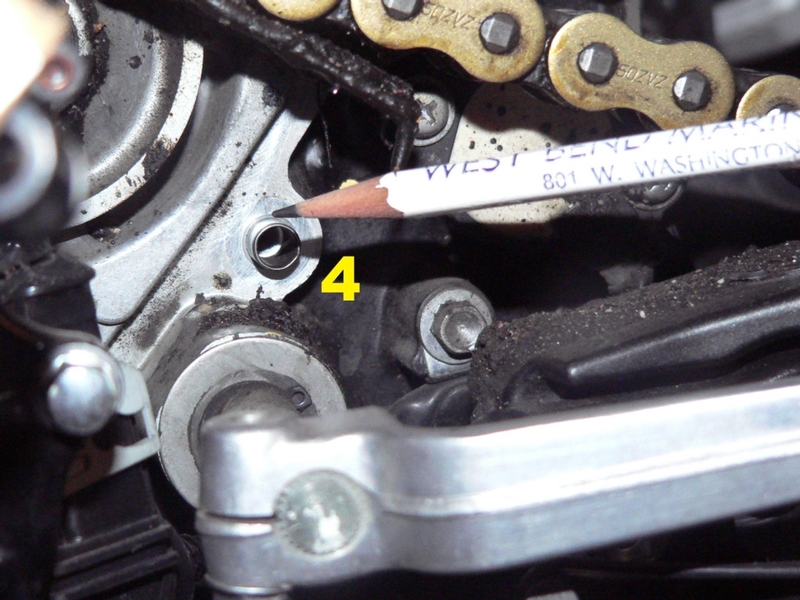
DO NOT LOSE THE DOWEL PINS. They fit in holes #2 and #4. I left them on the engine case as shown in the photos below.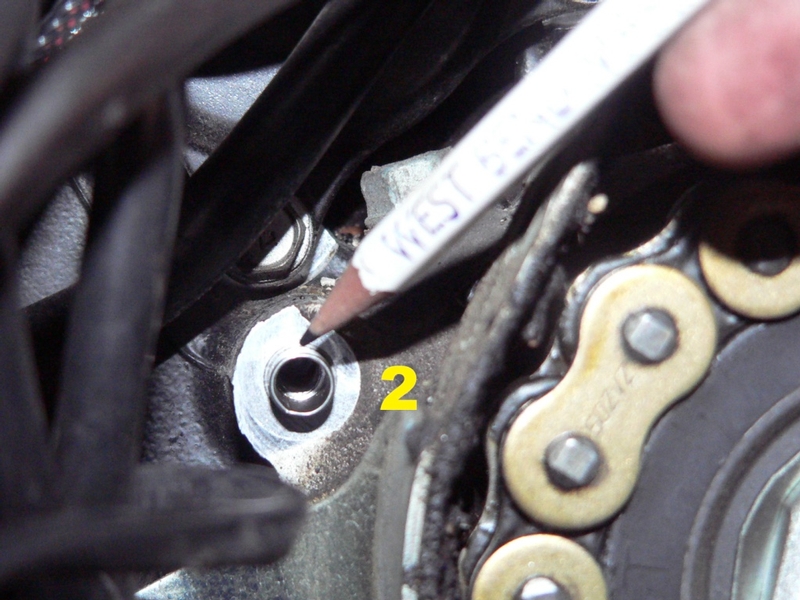
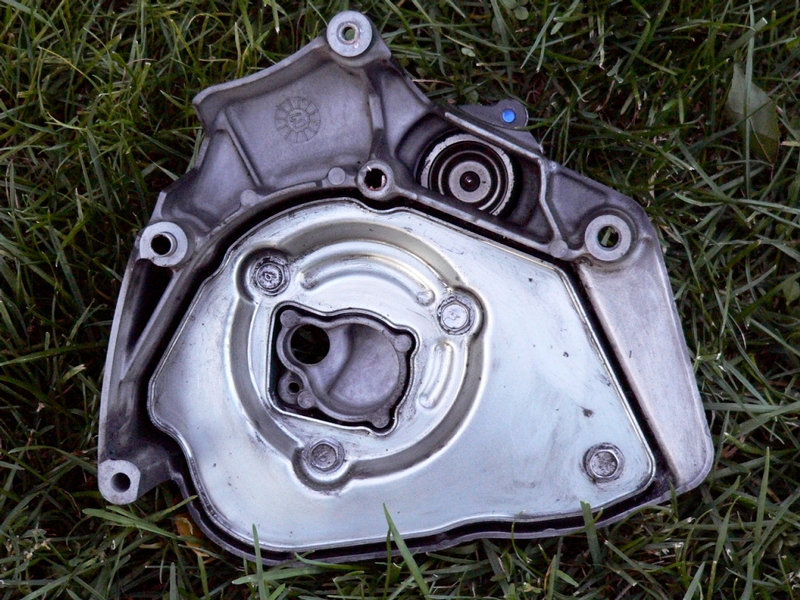
Chain Cover Damper and Plate Removal
These can protect your foot if the chain ever comes off of the sprockets. Remove them at your own risk. It’s a weight loss mod that results in a reduction of over 33% of the cover as installed/OEM. I have not noticed any difference in noise or vibration having these parts removed.
Use a 10 mm socket to remove the four screws (L) from the sprocket cover.
Remove the chain cover plate (M) and the foam rubber damper (N).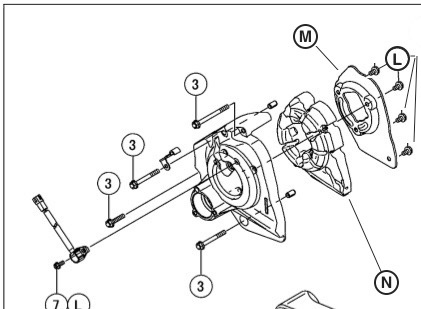
Installation of the cover and plate is the reverse procedure.
There is no torque spec but use non-permanent thread locking agent.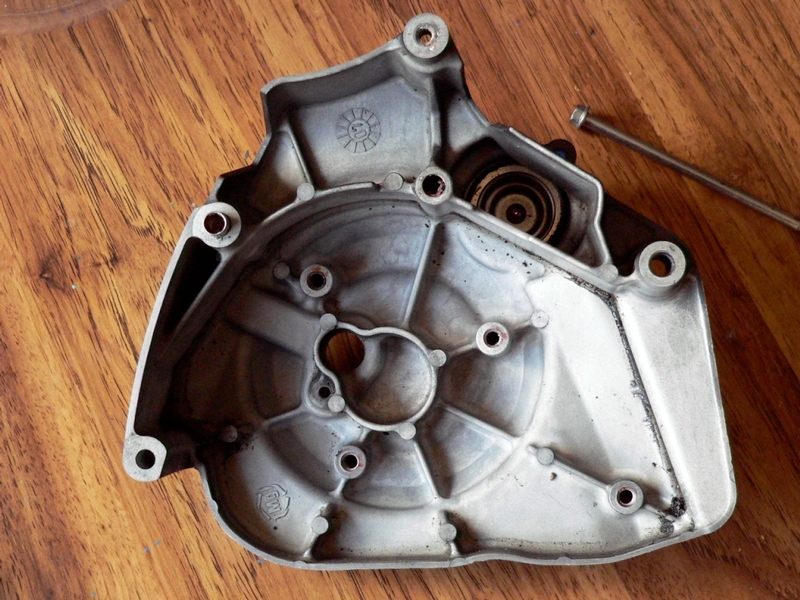
Installation
2. Reposition the sprocket cover carefully upon the dowel pins inserted in holes 2 and 4.
Loosely thread the longest of the four sprocket cover screws into hole 1.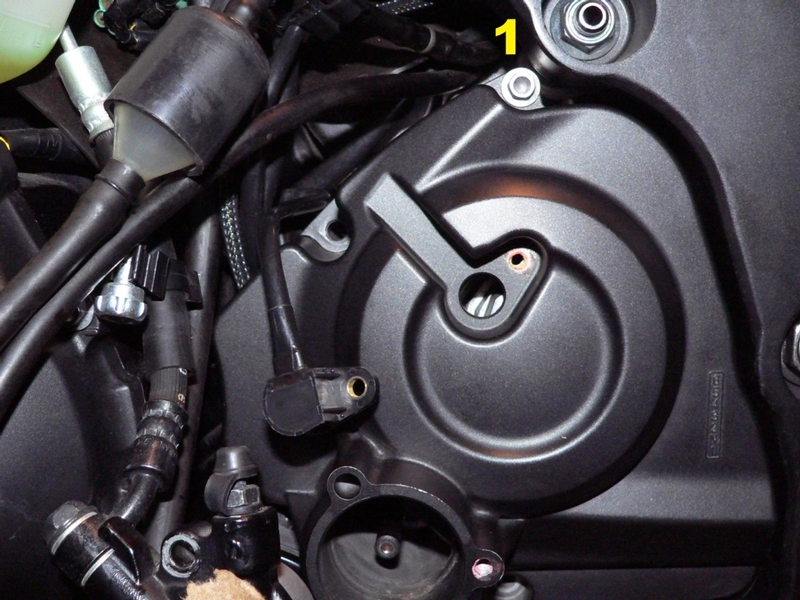
3. Position speed sensor back into the hole in the sprocket cover.
Loosely thread the screw with the speed sensor wire retainer bracket into hole 2.
4. I applied nonpermanent locking agent to the shortest sprocket cover screw because it had factory thread lock on it (pink) when it was removed. Loosely thread the shortest screw into hole 3.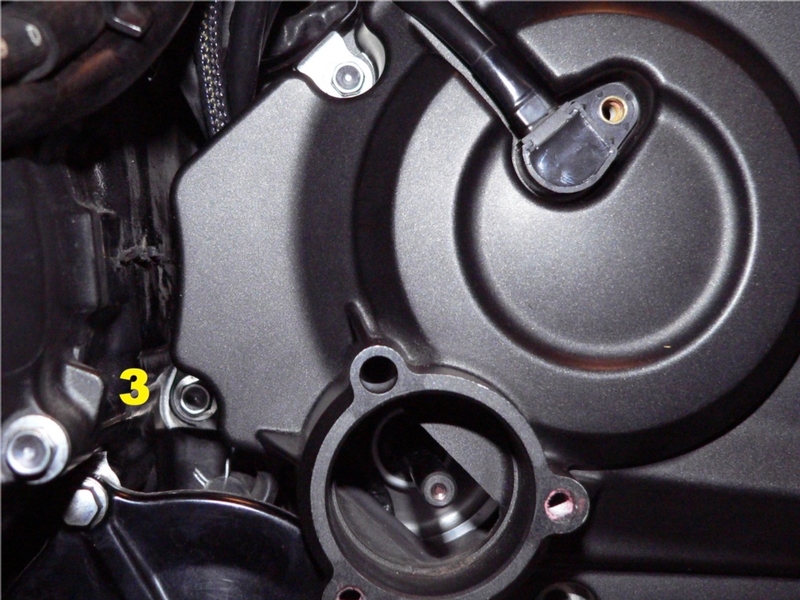
5. Loosely thread bolt 4. 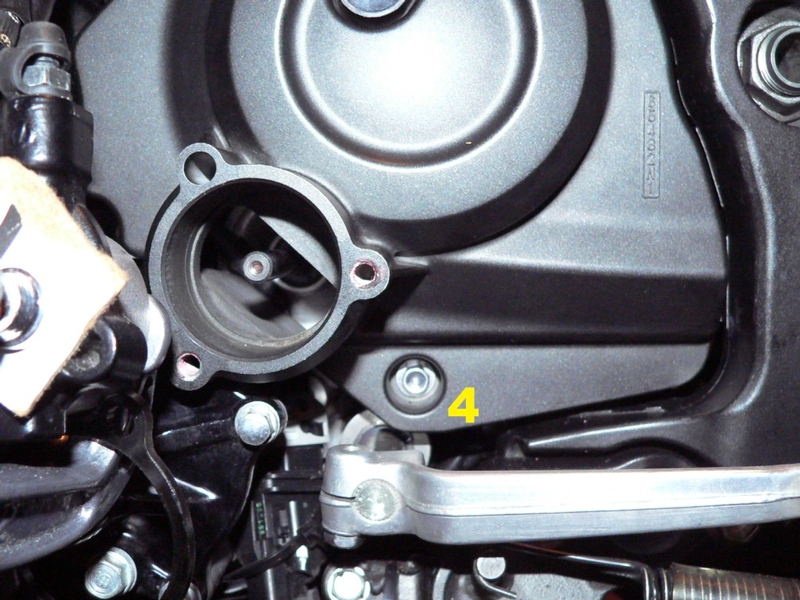
6. Use an 8mm socket and ratchet to draw all four screws up evenly and then tighten.
Torque - Sprocket Cover Bolts: 87 in lbs (~7) ft lbs.
Install the speed sensor (see Speed Sensor Removal, steps 6 and 7).
Install the clutch slave cylinder (see Clutch Slave Cylinder Removal, steps 4 through 7).
Install left lower fairing (see Fairings Removal, Lowers).
Weight
The OEM sprocket cover with clutch slave cylinder and without the damper and plate weighs 22.7 oz.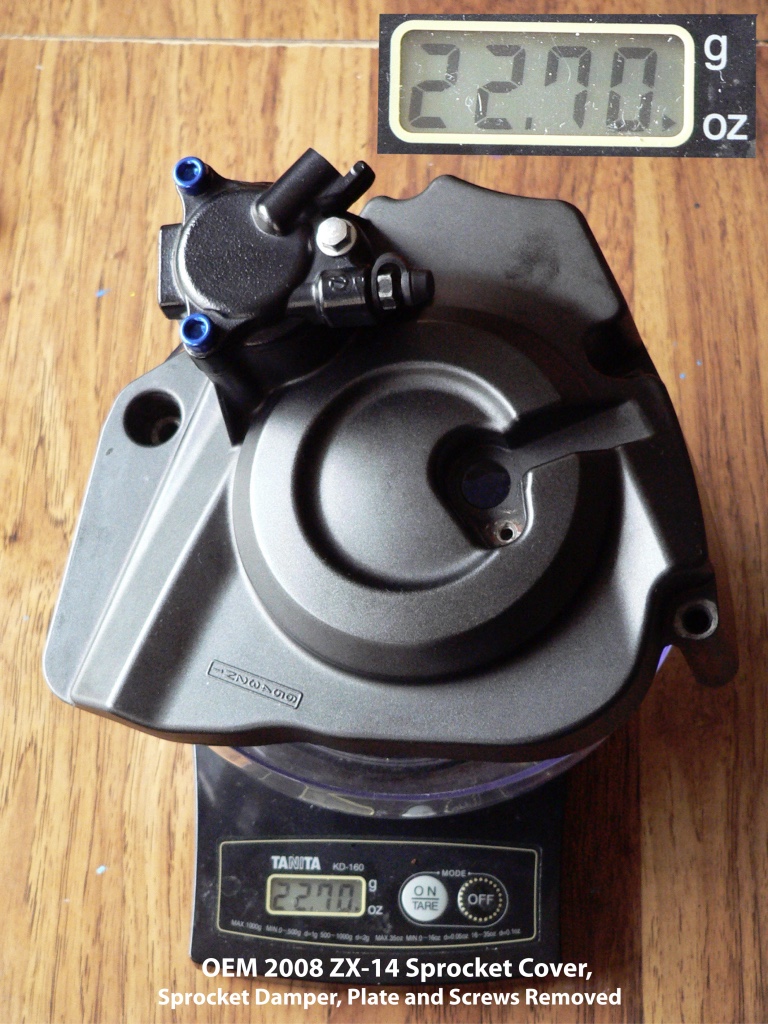
The damper, plate and screws weigh 12.10 oz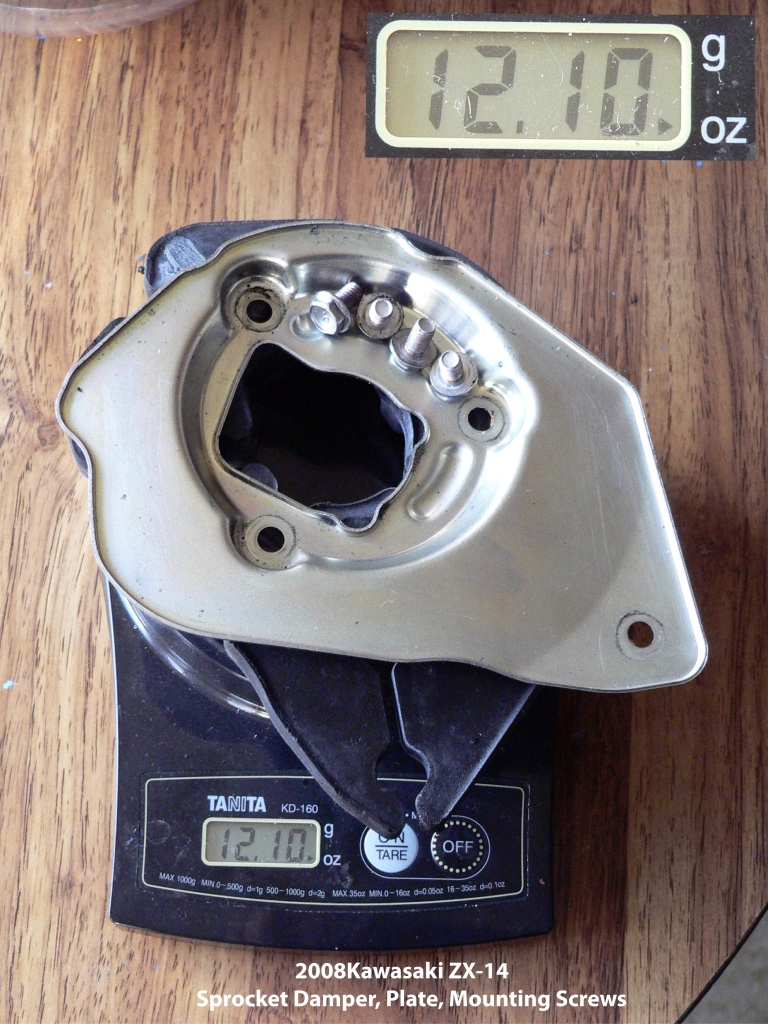
* Last updated by: Rook on 1/29/2020 @ 4:14 PM *