head cover gasket leak Fix
Oil leaking oil from the top left front corner of the engine is not an uncommon problem with the ZX-14. The oil seeps past the gasket between the head cover and the top of the head. This is probably caused by the gasket losing its resiliency over many heat cycles. Some of the oil that seeps out while the engine runs gets burned off of the head pipes. The oil that accumulates on the front and left side of the motor will not burn off but eventually flow to the tip of the oil drain plug protector on the oil pan. The oil loss is usually not drastic, requiring replenishment every 600-1500 miles. If the leak is slower than that, the oil is probably burning off before it is seen anywhere on the outside of the motor.
It has been suggested that the reason the leak comes from the left front corner is because that is where oil in the head flows after shutdown when the bike is put on its side stand. Some owners claim to have prevented such leaks by regularly putting the bike vertical on a rear stand after shutdown instead of tipped to the left on the side stand. This however has not been my experience. The photos below show the bike after being stored level and vertical for two months on front and rear stands.
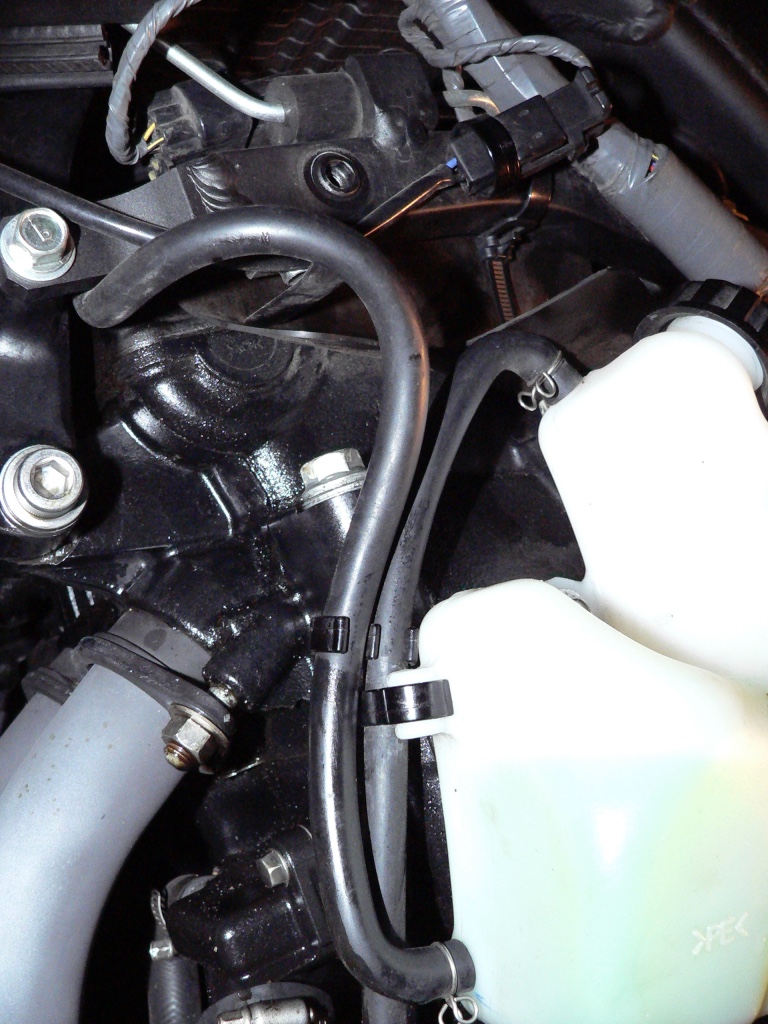
Oil leaks down the front left collecting at the tip of the left header bolt.
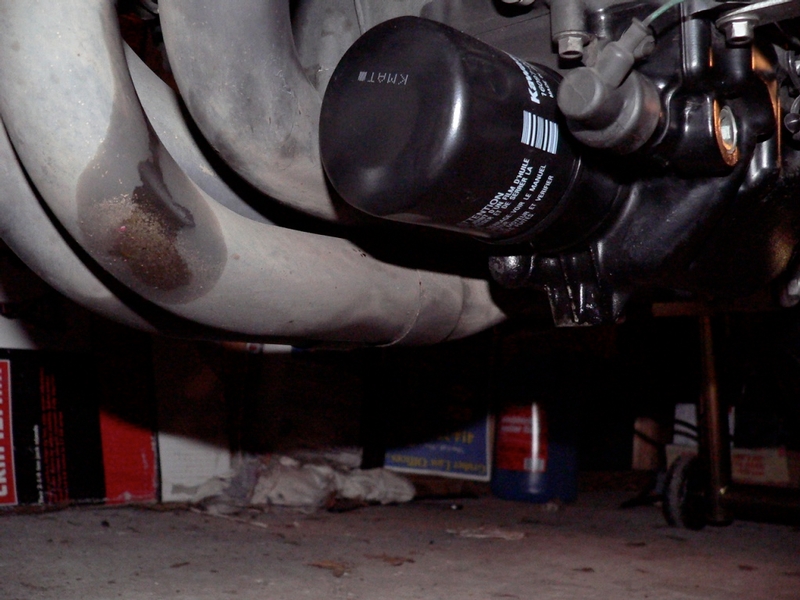
The leak flowed down the head pipe and accumulated at the oil drain plug shield.
The use of synthetic oil could be partially responsible for the leakage. Synthetic oil flows more readily and remains clean much longer. For these reasons, it may have a dissolving effect on the deposits left by conventional oil that accumulated at any loose spots in mating parts of the engine. The leaks that will inevitably happen in an engine may happen sooner after synthetic oil is used.
The head cover bolts have a shoulder which is designed to be tightened against seats in the camshaft caps inside of the head. This creates a definite point where the bolts should stop being tightened. The threads in the camshaft caps are aluminum and they will easily strip if the bolts are torqued too much.
If the head cover shoulder bolts are already drawn up to their seats, a shim under the bolt head will lift it away from their seat allowing for additional tightening. If the shim is .5 mm thick, the bolts will compress the gasket an additional .5mm before the shoulder makes contact with its seat.
The perfect shim for the head cover bolts is a 3/8 in or M10 washer. Any metal washer will do but they come in different thicknesses. Galvanized washers are the thickest. Zinc washers are thinner and Stainless steel are usually thinner yet. Stainless steel seem to be the washers that were most commonly recommended in the forum posts I read. Some used 2 washers per bolt while others used just one.
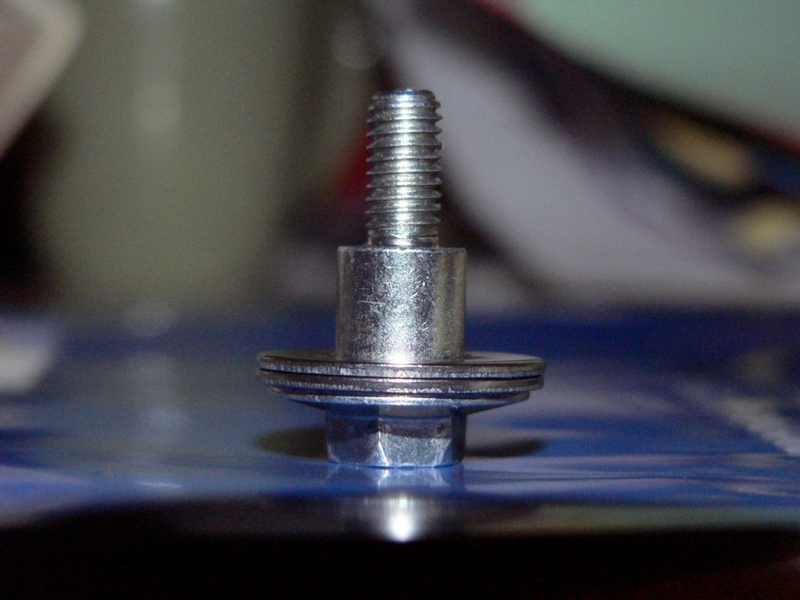
A head cover shoulder bolt shimmed with 2 stainless steel washers.
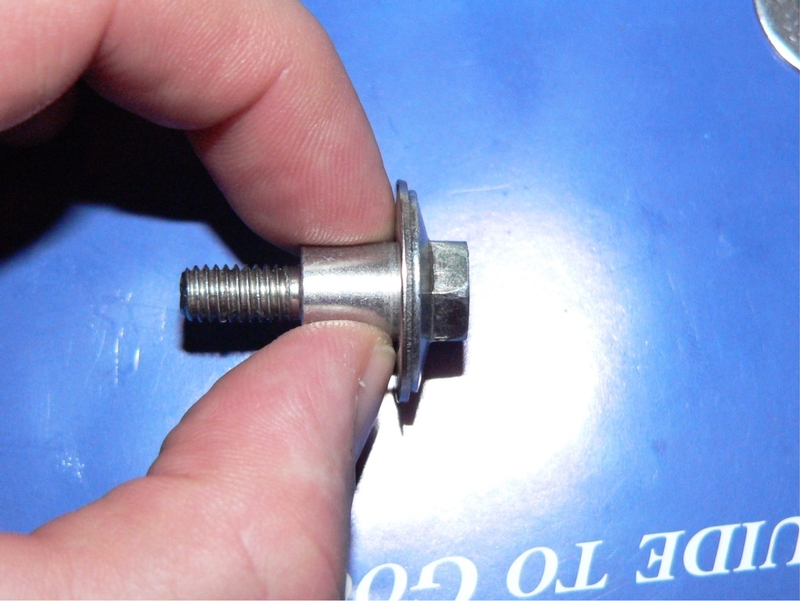
A head cover shoulder bolt shimmed with 1 stainless steel washer.
Some owners described their solution to the head cover gasket leak as simply placing washers under the two left head cover bolts and tightening them down again. The other head cover bolts were left alone in those cases. Other owners removed all of the bolts, placed washers under each and torqued the bolts to spec. Still another owner claims that an inexpensive liquid gasket applied between the rubber gasket and the head cover solved the problem altogether.
The following tutorial describes the more complete process of tightening the bolts evenly across the entire head cover. After doing this procedure, I am not 100% satisfied with the results. The leak has been reduced but not eliminated. I will update this tutorial as I take additional steps to fix the leak. At this point, my feeling is that the head gasket and head gasket washers with rubber pads (ring-os) should be replaced. The head gasket’s part number has been changed which indicates that the leakage problem may have been addressed by Kawasaki through a revision to OEM parts. I believe the OEM ring-o part number has also been changed.
Do First:
Remove Lowers, Foremans, ram air covers, Sides, tank fairing (Fairings Removal)
Remove Engine Heat insulator Plate (or open the top to get at head cover bolts).
Tools
1/4 inch drive ratchet
8mm socket
10mm socket
1” extension
3” extension
1” extension
universal adapter
1/4” drive 20-200 in lb torque wrench
3/8” or M10 stainless steel washers (6)
1. Using an 8mm socket, remove the LH fairing hanger or you can remove the main wiring harness from the plastic retainer (step 3, LH Side Subframe Removal).
Pull the main wiring harness aside to allow access to the top of the engine.
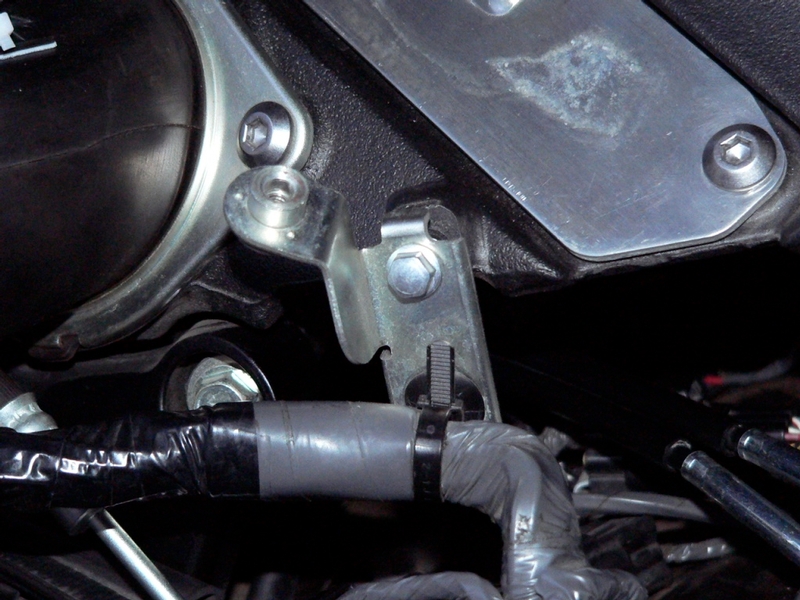
2. From the left side, locate the left head cover screws [3], [4]. These are the ones closest to where the gasket leaks. 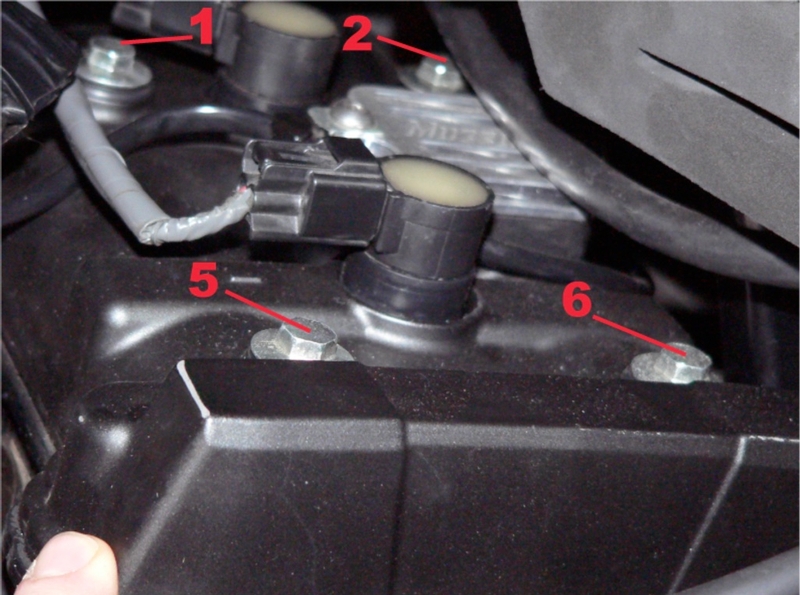
From the right side of the bike, locate the remaining head cover bolts, [1], [2], [5] and [6] 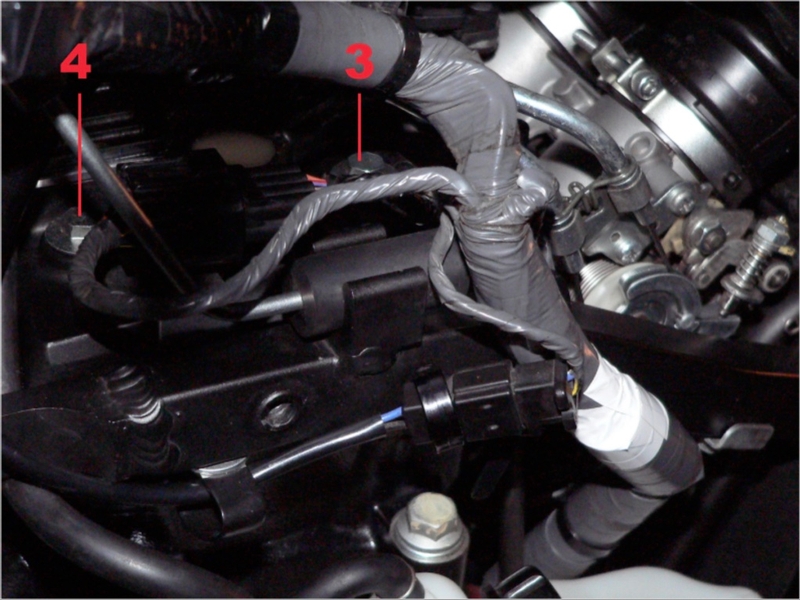
3. Clean the head cover off thoroughly to eliminate any debris that may fall into a bolt
hole.
The front left bolt is in a difficult position. Use a 10mm ratcheting closed end wrench or universal adapter and a 3” extension to reach it (see Head Cover Removal, steps 1 and 6).
The back left head cover bolt is also a bit obscured by the throttle cables. Use a 1” extension to reach the bolt head from between the throttle cables.
The two RH bolts are easily reached. The middle two bolts are also easily reached if the clean air switch valve has been removed. The photos of my bike show no switch valve and block off plates. If you are not able to reach the front middle screw, the switch valve may be removed or perhaps just the right reed valve cover (See PAIR Removal).
Remove all six head cover bolts using a 10mm wrench cover the holes with tape and bring a bolt to the hardware store to test fit washers.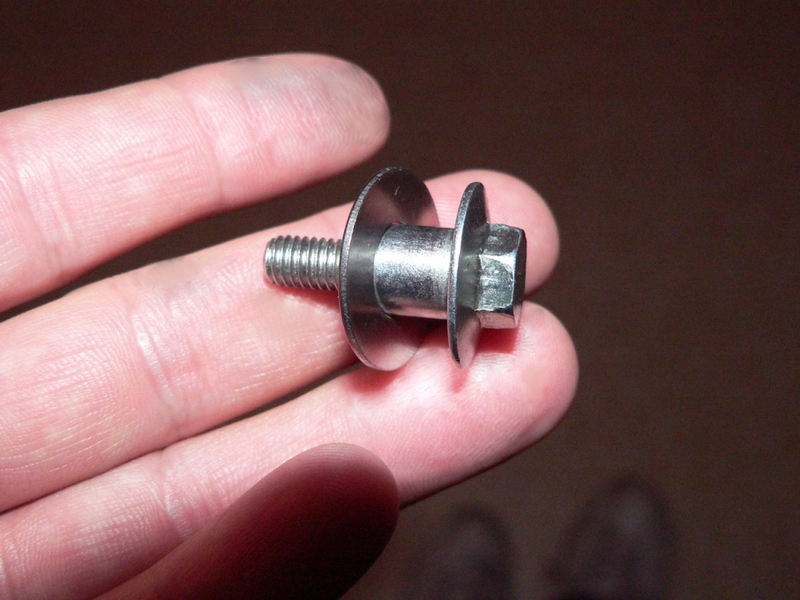
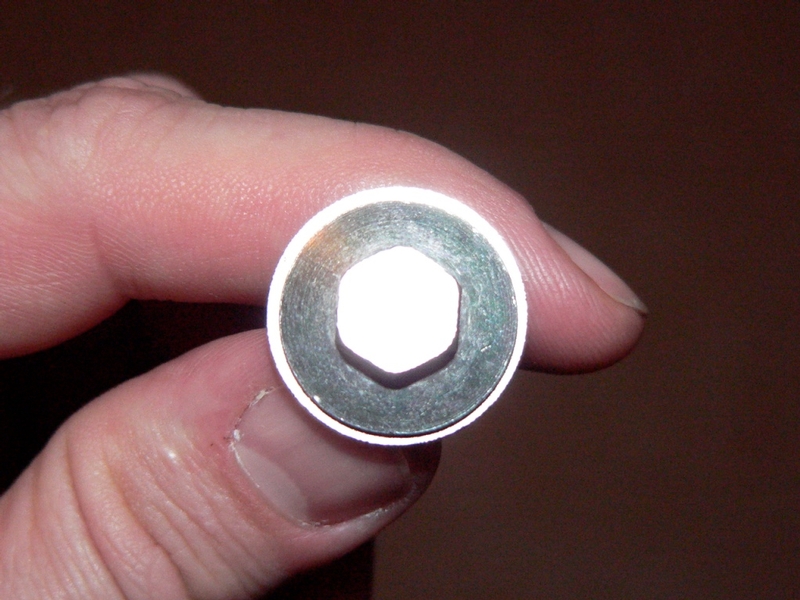
4. Place one washer on each bolt and thread each through the head cover hand tight.
5. Tighten the bolts evenly a little at a time according to the pattern shown in the illustration below.
Torque bolts in sequence using an accurate 20-200 in lb torque wrench. be very careful to seat the socket squarely on the front left bolt head. The extension and universal adapter make turning the bolt awkward (see Head Cover Removal, step 6).
Torque the bolts to 87 in lbs.
If at any time you feel the bolt meet sudden resistance, the shoulder has bottomed out against its seat. The bolts may receive a slight final torque but do not continue to thread them in deeper than this point. 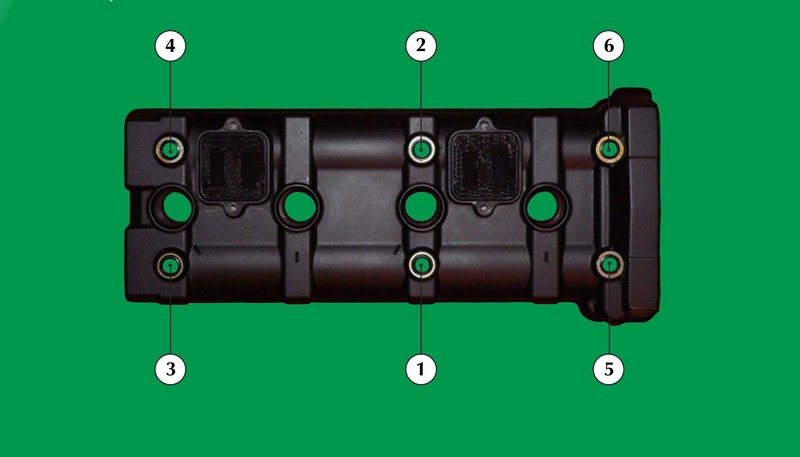
Install Fairings (Fairings Removal).
Install Engine Heat insulator Plate (or close the top flap).
* Last updated by: Rook on 1/12/2018 @ 9:42 AM *

