


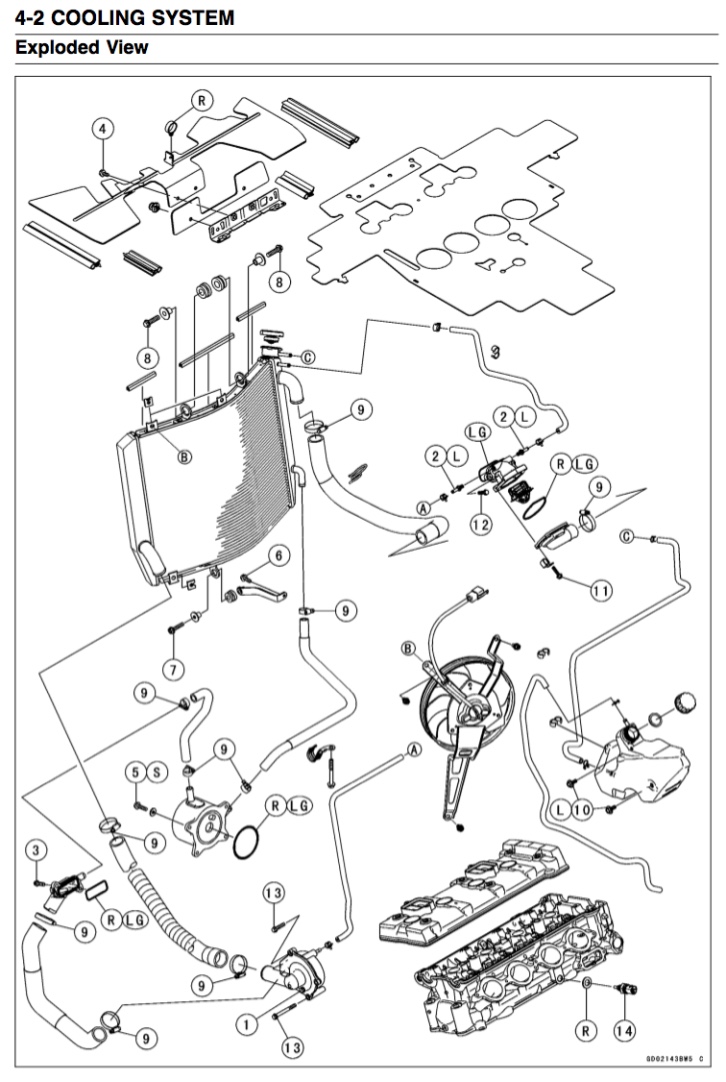
Water Hose Removal, Gen1
Do First:
Remove Ram Air covers, Tank Fairing, Formans, Side and lower fairings (See Fairings Removal).
Drain engine coolant (see Radiator Flush/Coolant Change, Steps 1 through 3).
If you need to remove hose QR, you may need to remove the water pump and you will definitely need to remove the Throttle Bodies Assembly (see Throttle Bodies Assy Removal, steps 1 through 18) to gain access to the hose clamps.
There are 3 kinds of hose clamps on the Gen1 ZX-14. The large and medium diameter hoses have hose clamps with a screw tightener. The small hoses have a spring clip made from steel straps or wire. Both types of spring clip are loosened by pinching the end tabs together to widen the diameter of the clamp.
The painted parts may have loose paint after the hoses are removed. Be sure to wipe away any chipped or loose paint from the fittings and hose ends.
Tools:
tape
Sharpie marker
drain pan
phillips screwdriver
circlip pliers
pliers
sheets of plastic
rubber bands
5mm socket
torque wrench
Removal
Always let the engine cool sufficiently before removing hoses. There may be pressure inside the cooling system when the coolant is hot.
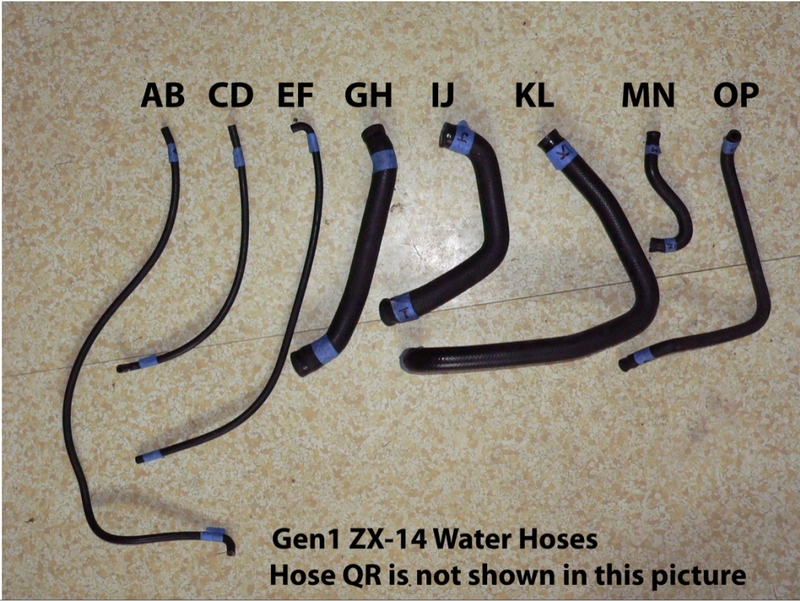
Before they are removed, use tape and a Sharpie marker to mark all of the hose ends and hose retainers for reinstallation. Be extra sure you have marked the hose ends of hose G-H properly because it is nearly the same on both ends and you would not want to mix them up. Note hose K-L is a long V shaped hose (shown in my pictures) on the 06-07 model where 08-11 models usually have an updated short hose. Don’t forget to mark all the junk on the hoses such as the large spring, retainer clips, heat shield mesh, etc. So you know where to reinstall them (I left most of that stuff off permanently).
Have a drain pan ready below each hose end as you remove it. Most of the hoses will contain some coolant after the system has been drained.
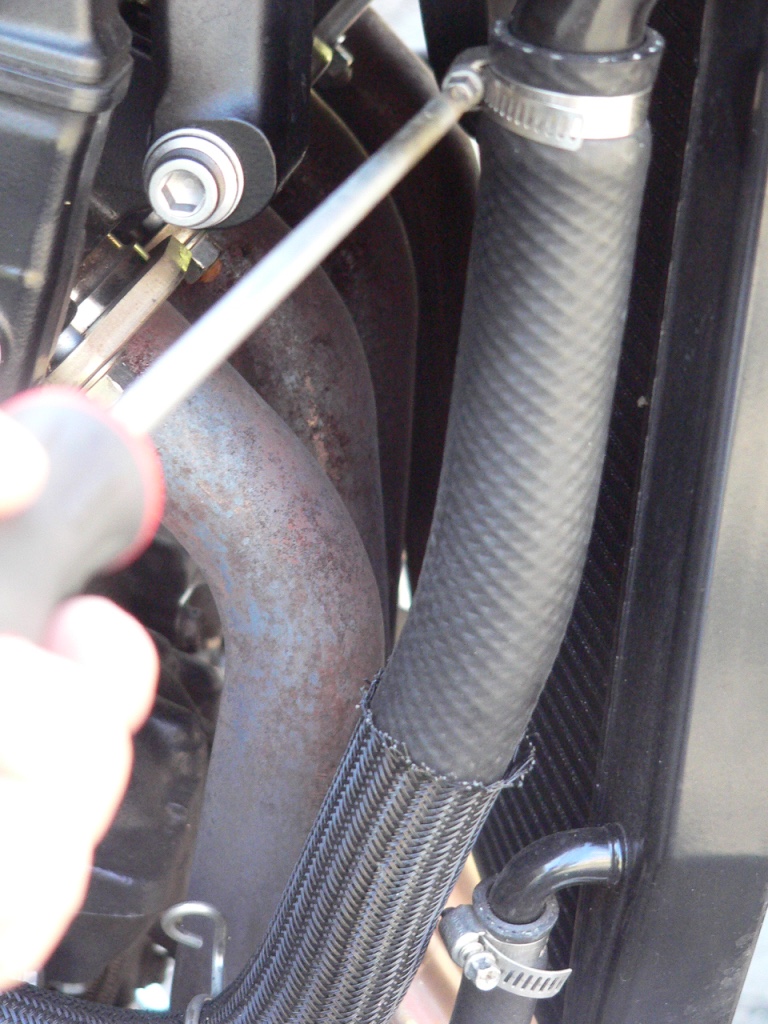
Large and Medium Hoses
Loosen the large or medium diameter hose clamp with a phillips screwdriver. The clamp will be stuck to the hose so break it free by gently pulling and twisting. Grasp the hose where it surrounds the fitting and twist to unstick it. If the hose cannot be broken free by twisting, grasp the hose a few inches away from the fitting and rotate your wrist like spinning a lasso. Pull on the hose simultaneously. Repeat this procedure to remove the opposite end of the hose.
The oil cooler hoses are hard to remove. Pull while doing the lasso motion and push from the end of the hose with your fingers. The oil cooler hoses require some persistence but they will slide off little at a time.
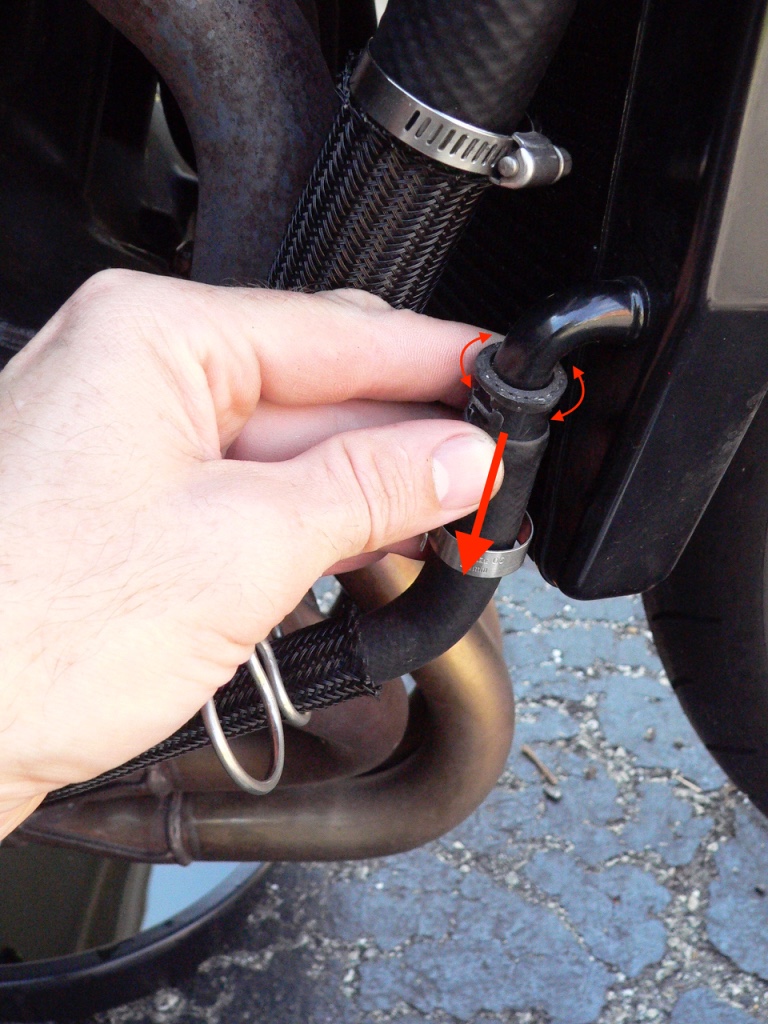
Small Hoses
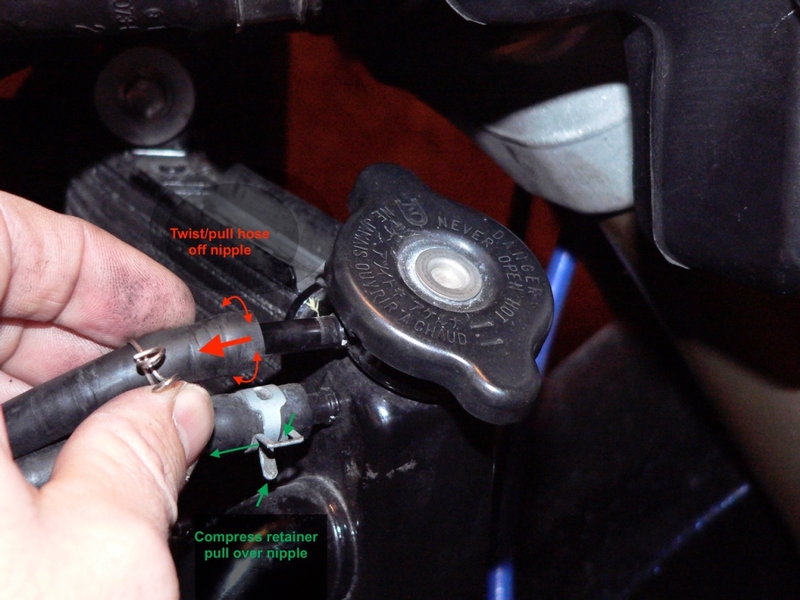
The small hoses may be removed by pinching the ends of the wire clip with your fingers (or a circlip pliers) and pulling the clip back or forward where it will not be compressing the hose over the fitting. The spring clips made of flat stock are removed in the same way. They will require a pliers to pinch the ends together while turning the clamp to unstick it from the hose. Then move the clamp forward or backward over the hose so it is off of the nipple. Grasp the small hoses over the nipple and twist with your fingers or push against the edge end of the hose with your finger tips to unstick it.
Cover all open fittings with a sheet of plastic bound with a rubber band.
The following pictures show the locations of both ends of each water hose.
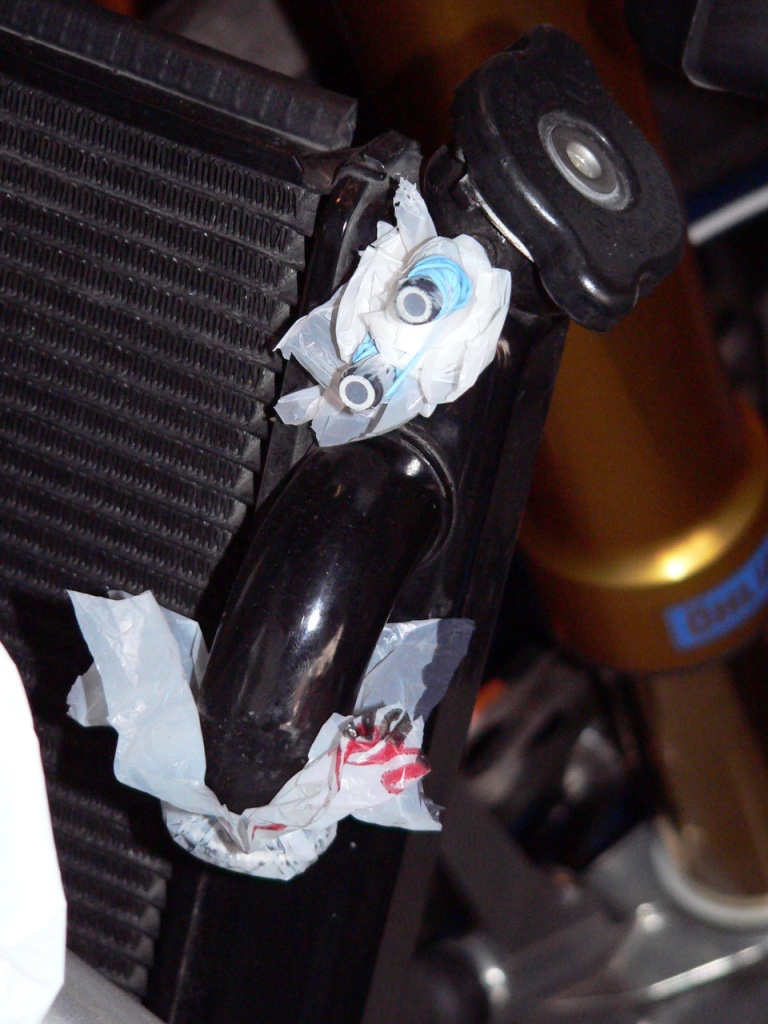
Hose AB, Radiator Filler Neck, RH side.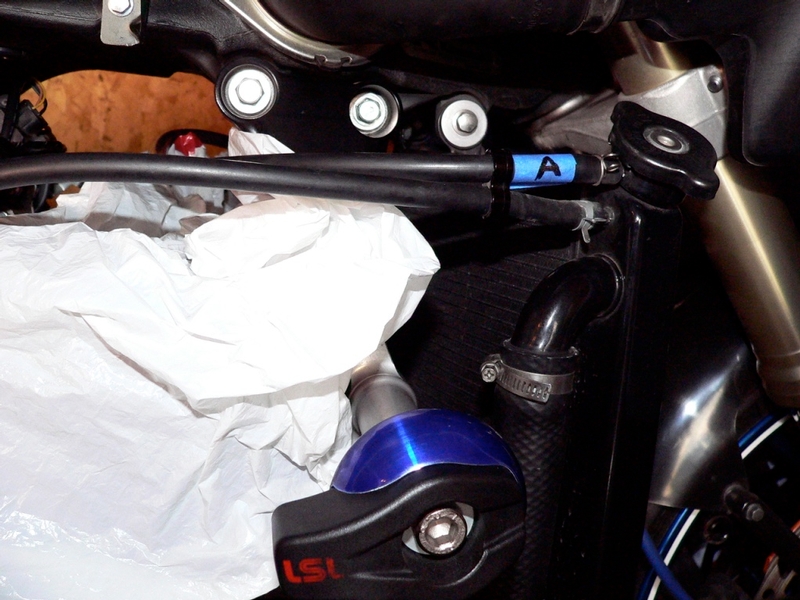
There is a plastic retainer holding the two hoses together.
Hose AB, Coolant Reservoir inlet, LH side.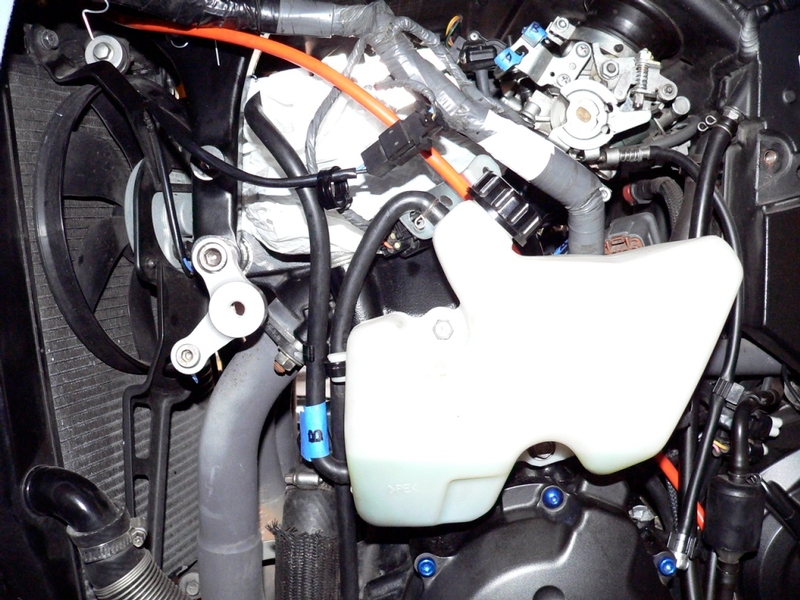
There is a plastic retainer holding this to the overflow hose.
Hose CD, Radiator to Thermostat, RH side.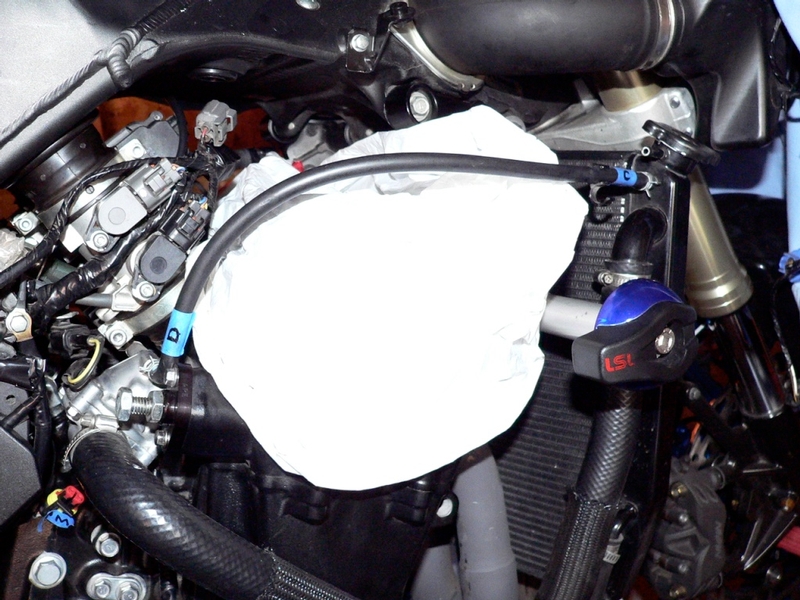
Hose EF, Coolant Reservoir Overflow, LH side.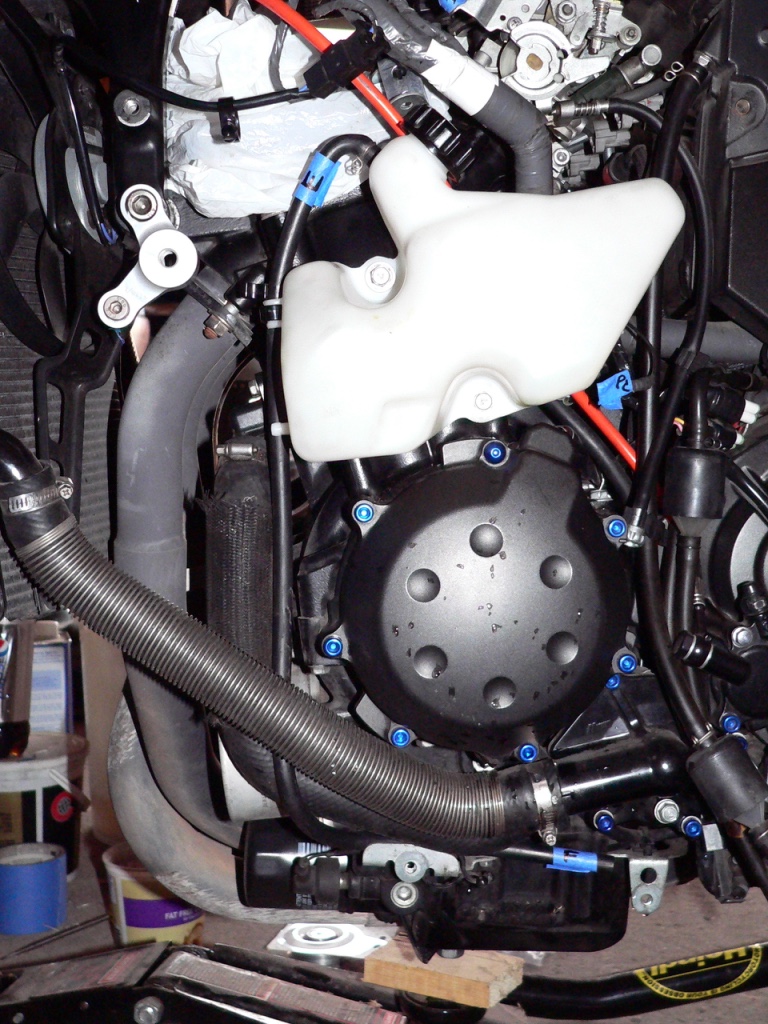
A plastic retainer holds this to the reserve tank and there is another retainer molded into the tank.
Hose GH, Radiator to Water Pump Return, LH side.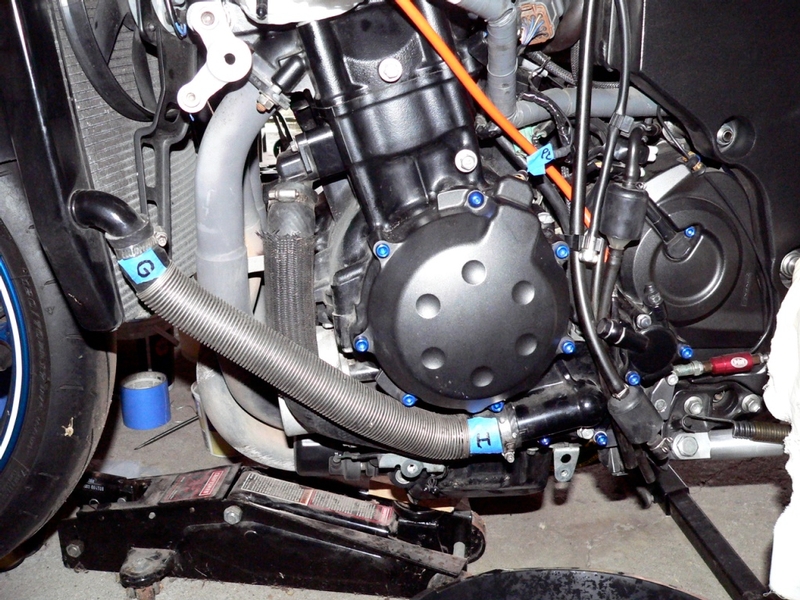
This pipe is encased in a spring.
Hose IJ, Engine to Water Pump Outlet, LH side.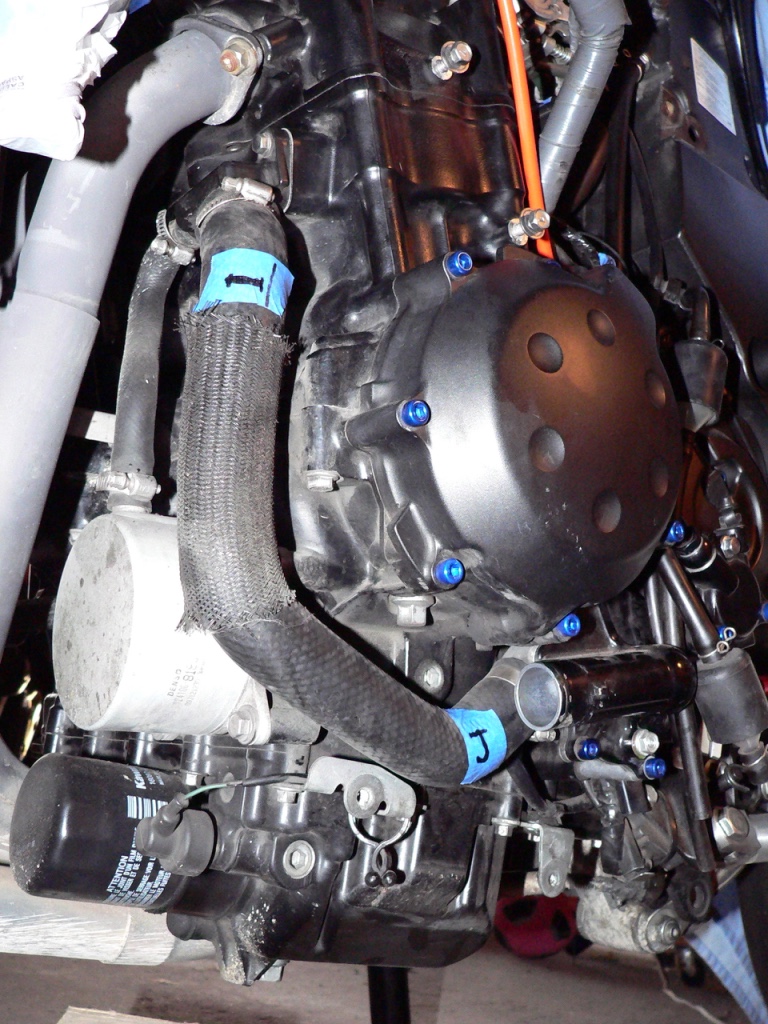
This hose has a woven sleeve.
Hose KL, Radiator to Thermostat Housing, RH side. 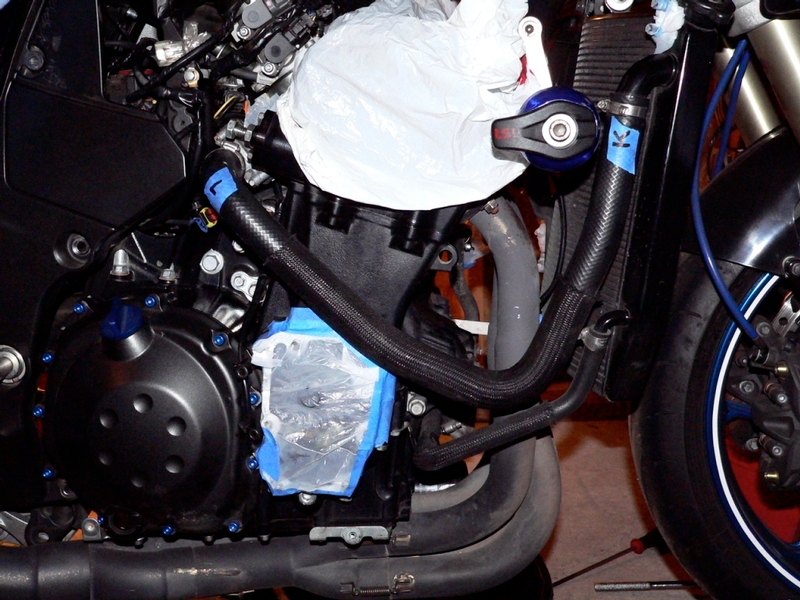
This hose has a woven sleeve. There is also a steel retainer holding it to the radiator/oil cooler hose.
Hose MN, Oil Cooler Inlet, LH side. 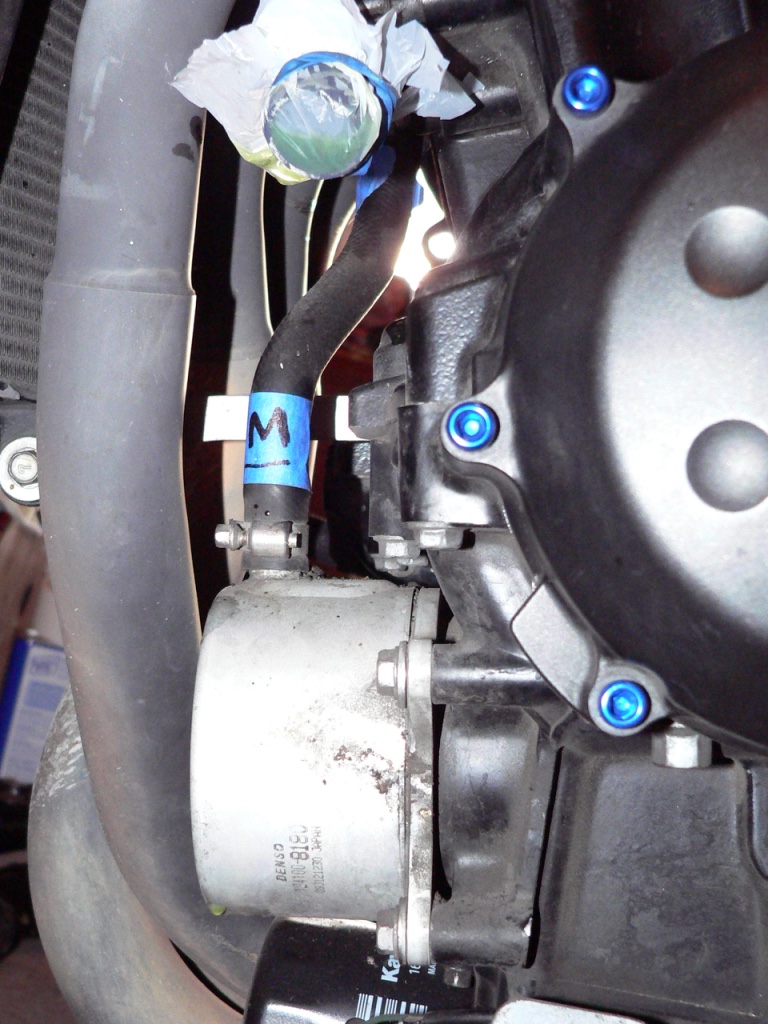
Hose MN, Engine, Viewed from RH side.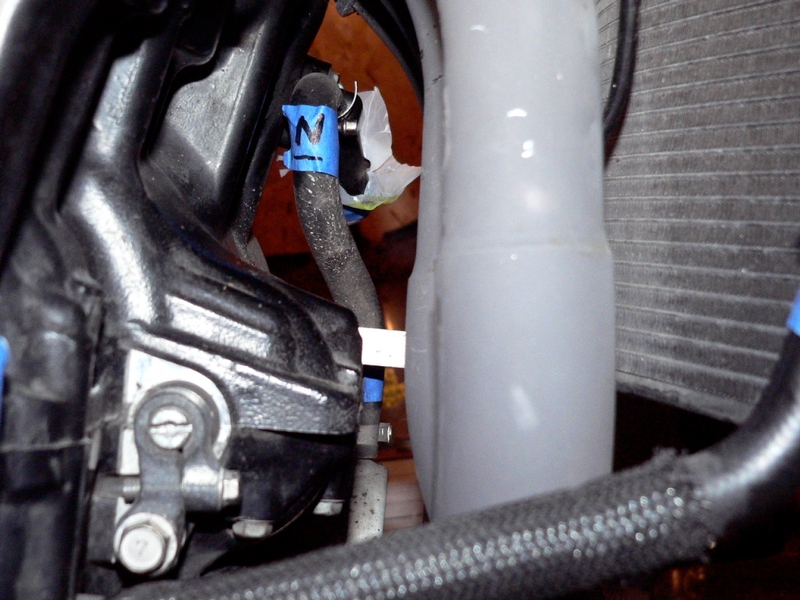
Hose OP, Radiator to Oil Cooler outlet, viewed from RH side.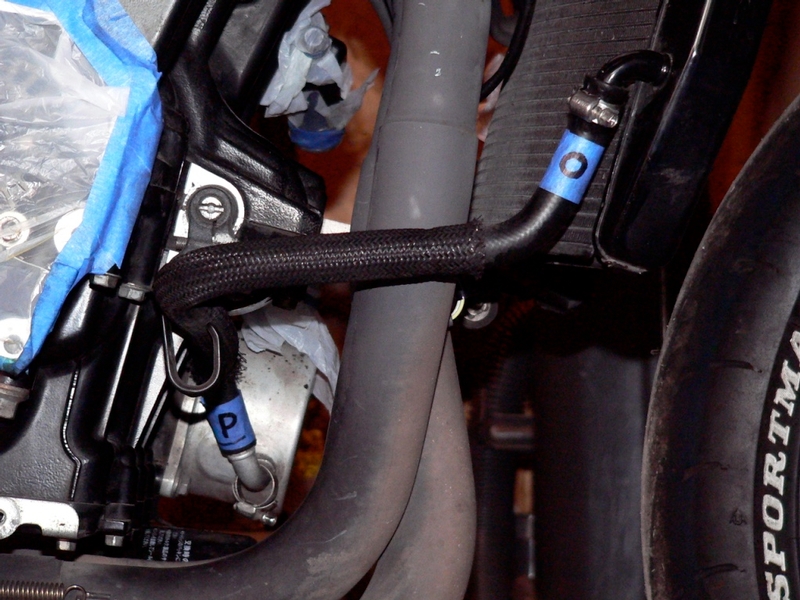
This hose has a woven sleeve.
Hose QR, Water Pump, LH side.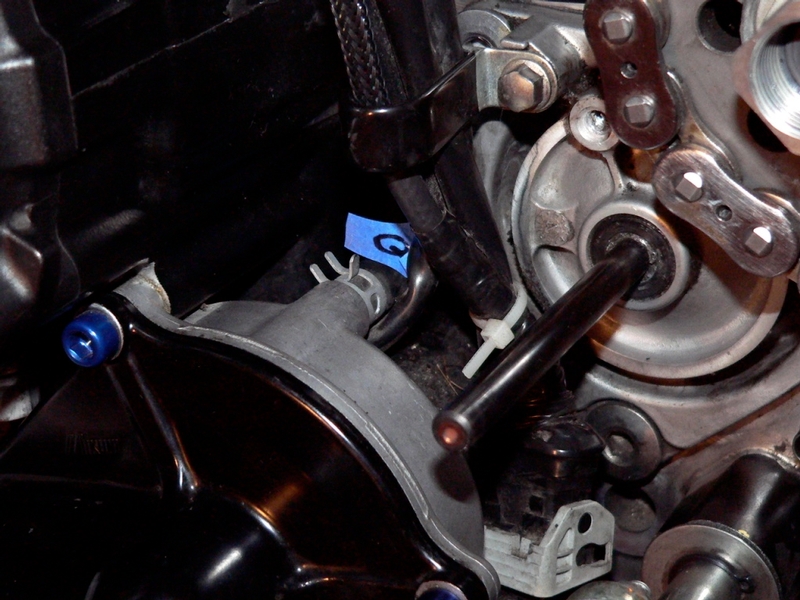
Hose QR, Thermostat Housing, RH side.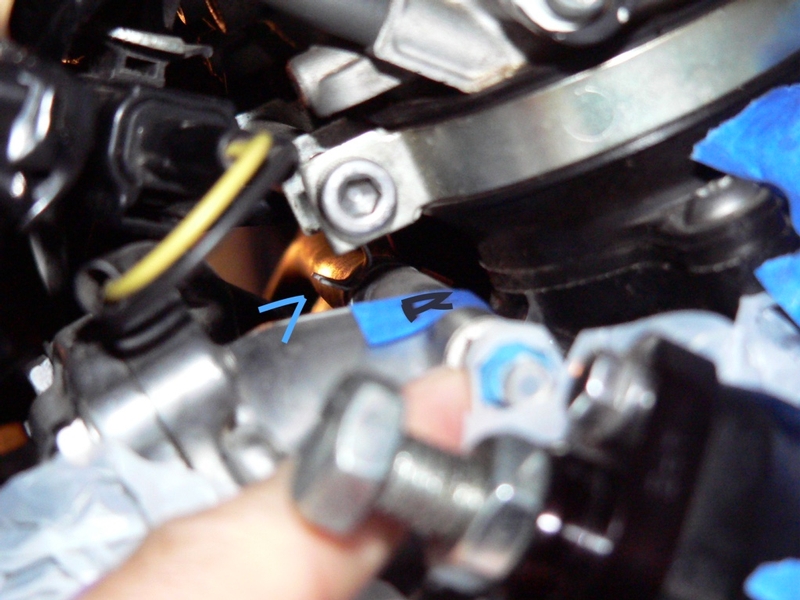
End R is located out of reach unless you remove the throttle bodies (Throttle Bodies Assembly Removal).
Installation
Install the proper retainers hardware as each hose is installed.
The hoses to the oil cooler (hose O-P and hose M-N) need to be slid onto the fittings until they touch the flange on the fitting. The other ends will slide on and snap into place over the expanded end of the fittings to the radiator and engine.
Hose G-H has a bump stop on the water pump return inlet. The hose should be touching that when it is installed.
Hose C-D has similar clamps for each end but they are not identical. The smaller clamp (D) goes to the engine and the larger clamp (C) goes to the radiator.
Slide the clamp on each end of the hose. Be sure the clamp is facing the same direction and is positioned the same way that it was when originally installed. Slide the hose ends onto the fittings one end at a time. Tighten the hose clamp.
Torque - Radiator (Water) Hose Clamp Screws: 2.0 N·m (0.20 kgf·m, 18 in·lb)
The hoses to and from the water pump will actually require the 18” lb torque spec. There is a lot of pressure in these hoses and they will leak if too loose.
Install the throttle bodies assembly if it was removed (Throttle Bodies Assembly Removal).
Fill the system with coolant and bleed air (see Radiator Flush/Coolant Change, steps 16-20).
Inspect all hoses for leaks. The hoses to the water pump need to be inspected closely because they seem to be the most likely to leak.
If leaks are detected, tighten the hose clamp a bit if it is verified that that is where the leak is originating. If a leak is detected that does not originate from a loose hose clamp, the hose has a hole and will need to be replaced.
Reinstall fairings (Fairings Removal).
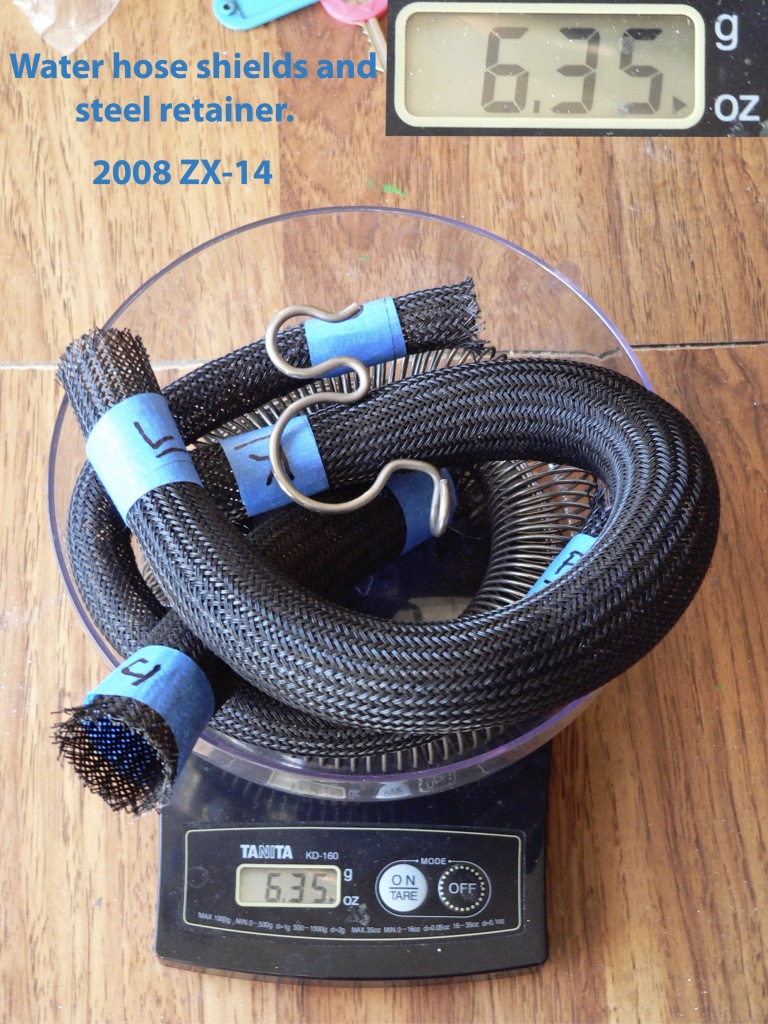
Weight
Here is all of the stock hardware on the coolant hoses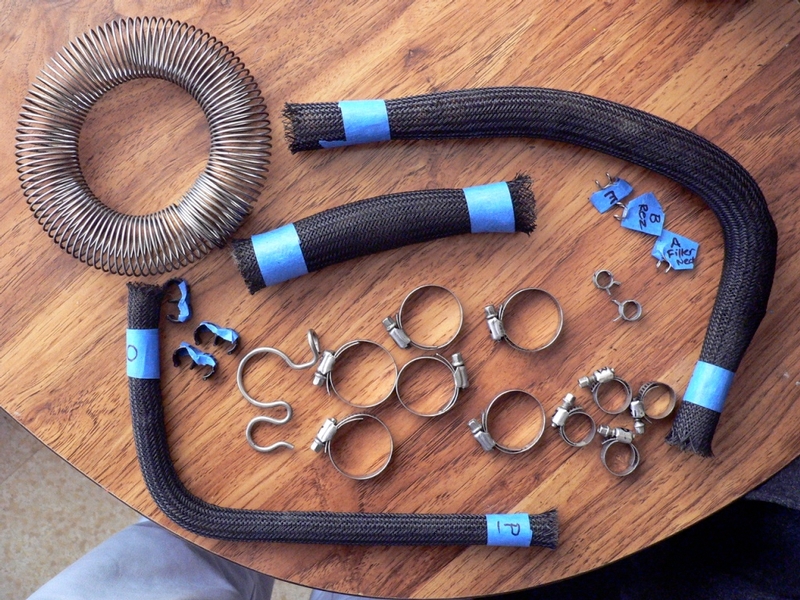
Here is what all the parts pictured above weigh. I considered using zip ties for hose clamps to save weight but it seemed much too risky.
ZIP TIES FOR WATER HOSE CLAMPS? 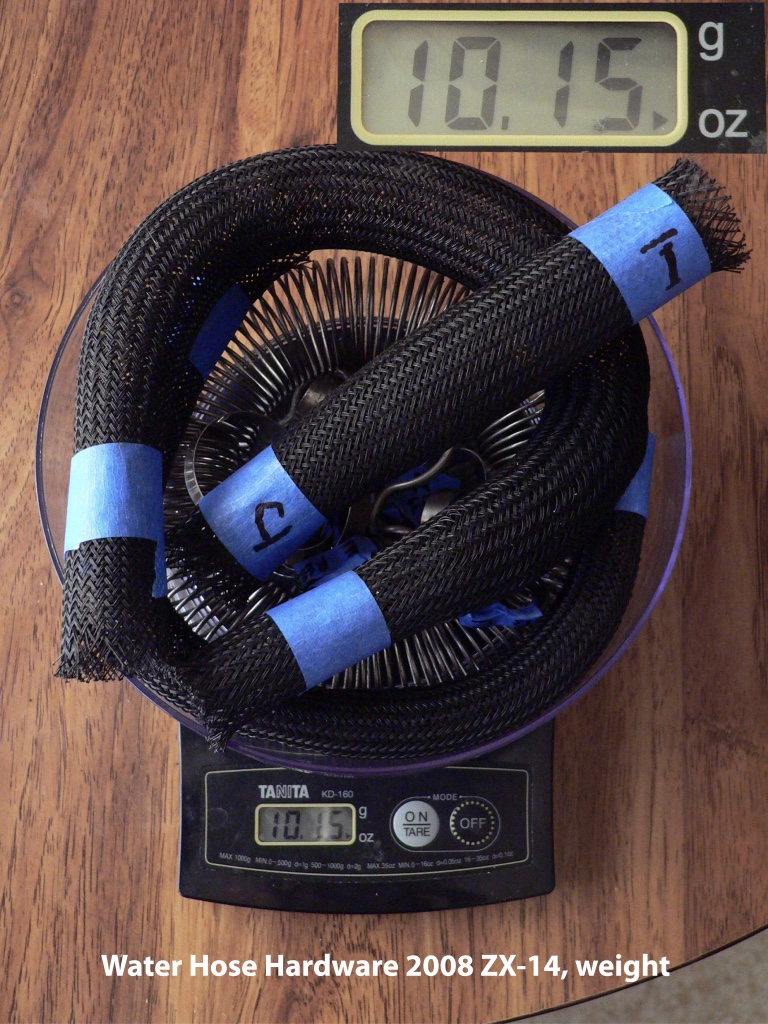
I reused all stock hose clamps and the three small plastic retainers on the overflow tube and the coolant reservoir. The three sleeves, spring and RH hose retainer were left off of the bike and here is what that stuff weighed.
The plastic retainers may be left off as well.

Even using the stock hose clamps, more than half the weight of the water hose hardware can be eliminated.
* Last updated by: Rook on 12/13/2017 @ 3:15 PM *