


Gen1 OEM Battery Removal
The OEM battery will need to be removed for maintenance or to connect battery maintainer pigtails. The OEM battery will also need to be replaced, usually after 3 years of service if well maintained. I recommend a Shorai battery for replacement. Refer to the second half of this tutorial for information on Shorai batteries.
Tools:
5mm hex tool.
8mm socket
phillips head screwdriver
dialectric grease
Removal
1. Remove the right Foreman (see FAIRINGS REMOVAL, Formans).
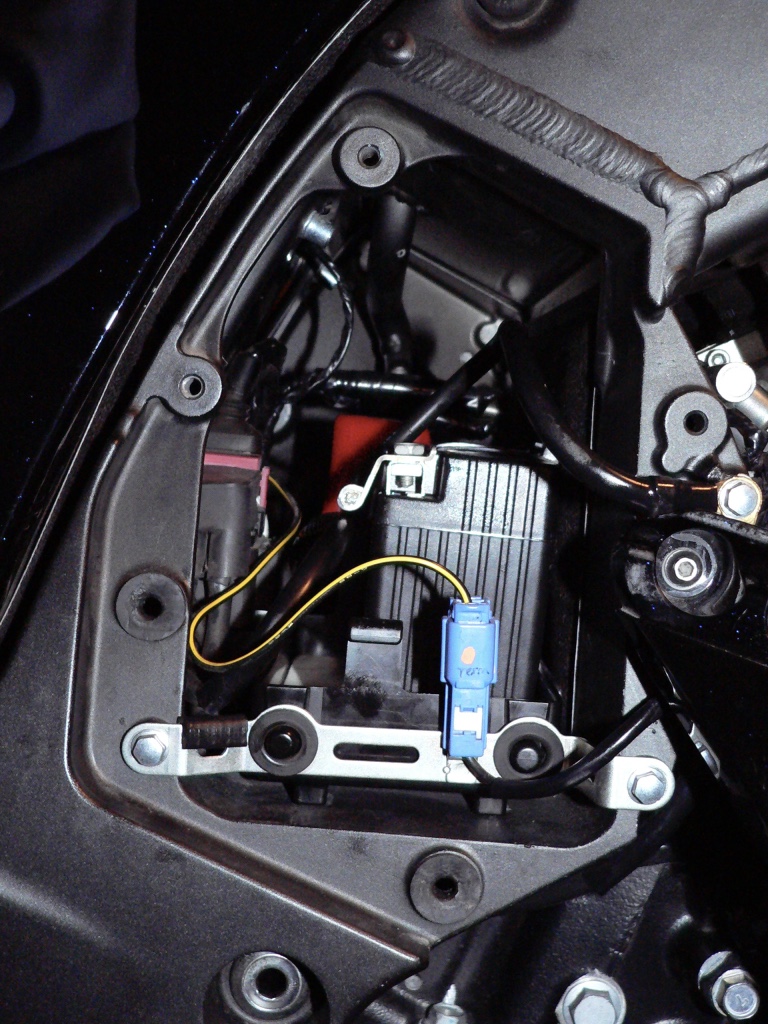
2. Remove battery door using a 5mm hex tool to remove the bolt (marked yellow in pic). Pull the projections from the grommets inside of the battery door.
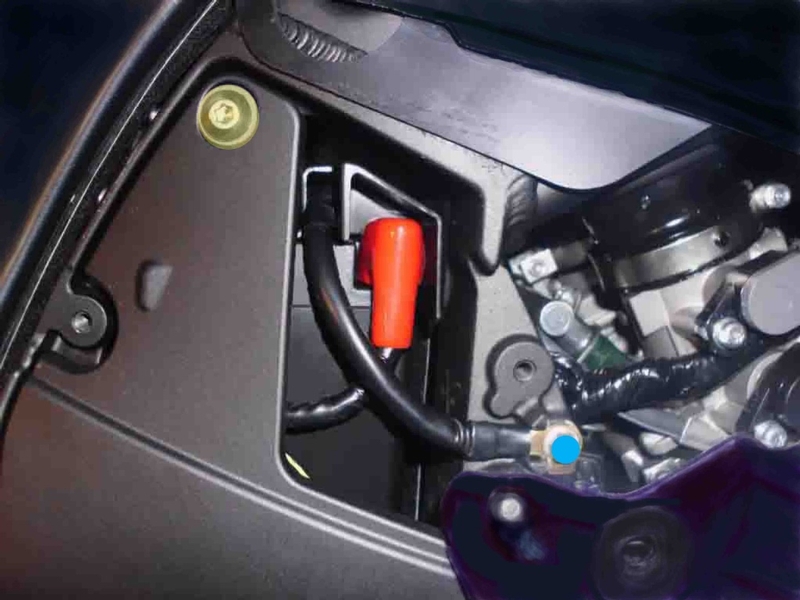
3. Disconnect battery negative terminal (marked with a blue dot in step 2 pic, above) from frame using an 8mm socket. To avoid sparks which may ignite gasoline vapors, make certain that the cable and connector cannot contact or arch to frame.
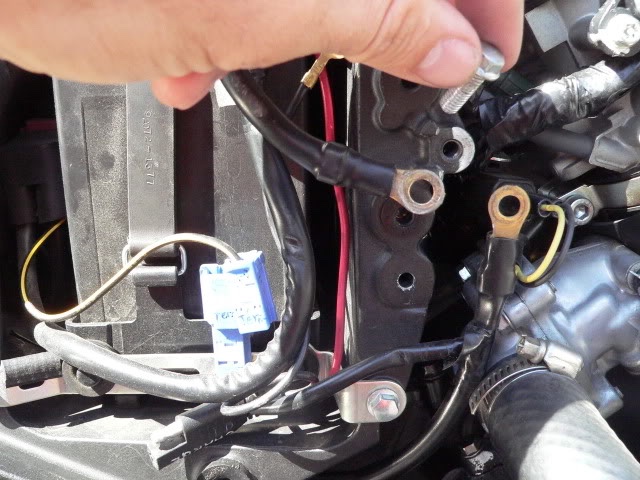
Temporarily wrapping the eyelets with electrical tape is a good precaution to prevent accidental sparking fro the battery negative cable while it is disconnected from the ground screw.
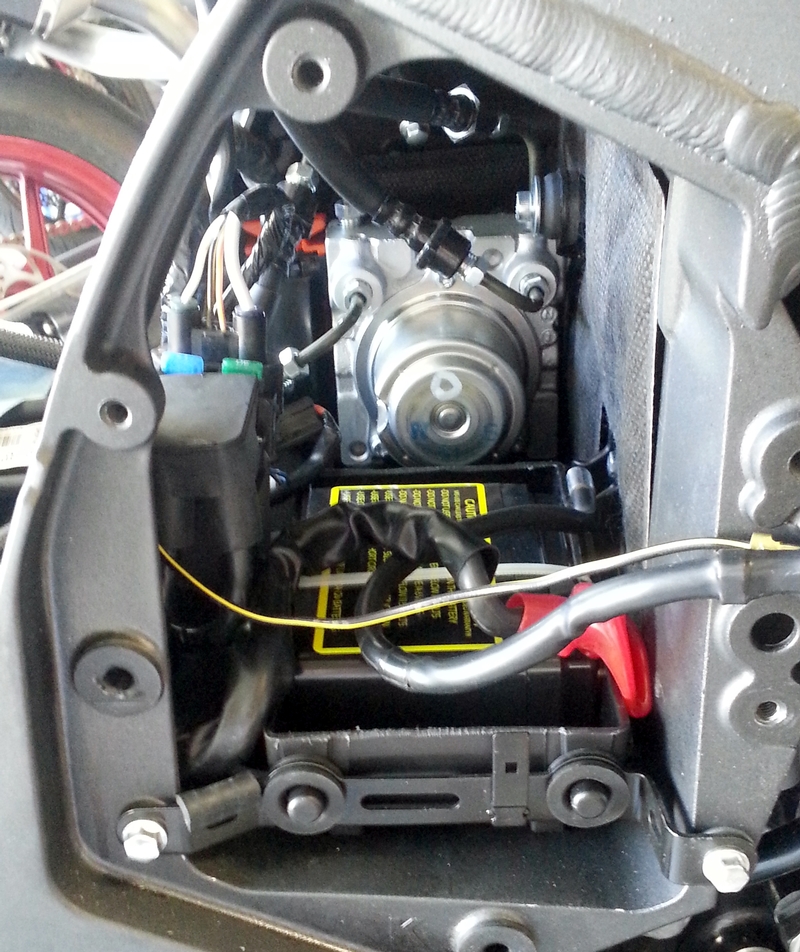
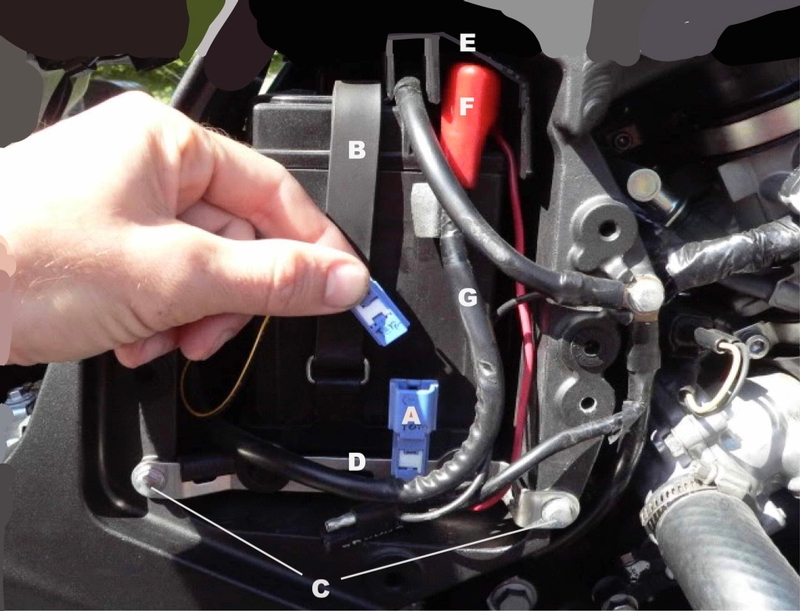
4. Disconnect the blue clip [A] at the outside base of battery tray. Pull the rubber band
battery retainer [B] down and unhook it from the battery tray. Use an 8mm socket to remove the two bolts [C] and remove the battery tray retainer [D]. Pull the battery tray out one inch and remove the battery cover [E]. Pull back the red rubber insulator [F] and use a phillips head screwdriver to remove the positive battery cable [G] from the positive battery terminal. Pull the battery tray out completely. Remove the rubber band hold down from the tray and remove the battery.
Installation
5. Installation of the OEM battery is the reverse procedure. It’s always a good
idea to use some dialectric grease on the battery poles and cable connectors so that corrosion is prevented.
Shorai Battery 14A-BS12 Install
The Shorai lithium iron batteries have been out for a few years now. Some owners had problems with batteries that were from a certain lot that came out early in production. The defective batteries were replaced promptly as Shorai was contacted by the owners. The battery I purchased has run flawlessly for the past year. It was stored off of a charger in an unheated garage for one winter and the bike started after 3 months. Also the battery sat indoors for two months before I installed it and it started without an issue then as well.
The most important reason to own a Shorai is not the performance (although the performance is at least as good as lead acid batteries of comparable power). The reduction in weight is dramatic. Even if a Shorai battery of greater power is used, the weight is still far less than OEM batteries.
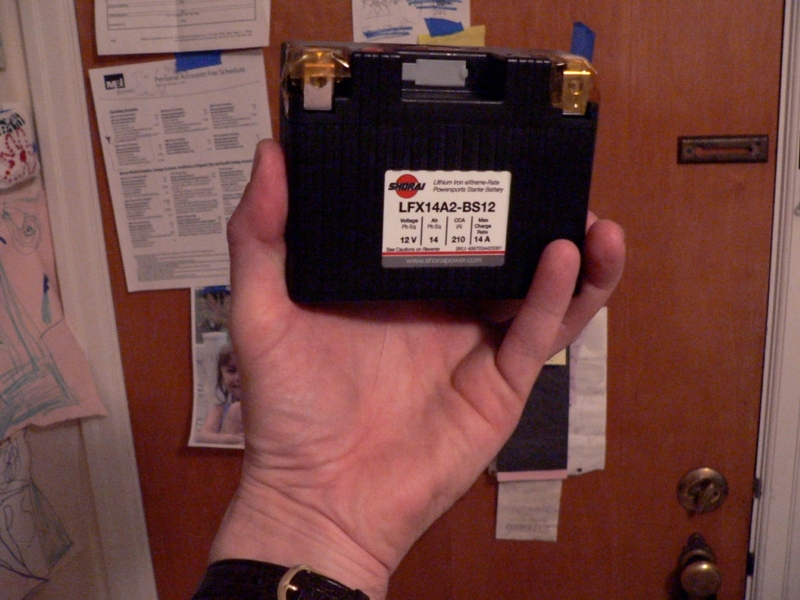
The Shorai LFX14A2-BS12 has identical specs to the OEM battery in the ZX-14. My experience so far has been that the Shorai 14Ah performs exactly as I remember the stock battery performing (before it finally died after 3.5 years). The Shorai 14 Ah is entirely adequate to start the bike in typical weather. It will do the job in the dead of winter after the bike sat for a couple months but it will crank more slowly just like the OEM battery did.
The Shorai 14A-BS12 has a much smaller battery case than the OEM battery and it will fall through the bottom of the OEM battery tray. Since a battery needs to be held stable inside the battery box, I decided to keep the light weight plastic OEM battery tray and mod it to hold the Shorai 14Ah. That procedure is detailed below.
As you will see, the Shorai 14A-BS12 needs to be installed with the positive pole inboard and the negative pole out. The only disadvantage with this is that the battery needs to be almost fully pulled out to remove the positive cable. However, the positive battery cable is designed for a much taller battery so having the extra distance to stretch actually works out fine.
This is a very good thread about Shorai batteries. It is long but it includes some great research, pics and video.
Tools:
5mm hex tool.
8mm socket
phillips head screwdriver
dialectric grease
1/4” plywood
pencil
Center punch
electric drill
1/8” drill bit
14” zip tie
silicone lubricant
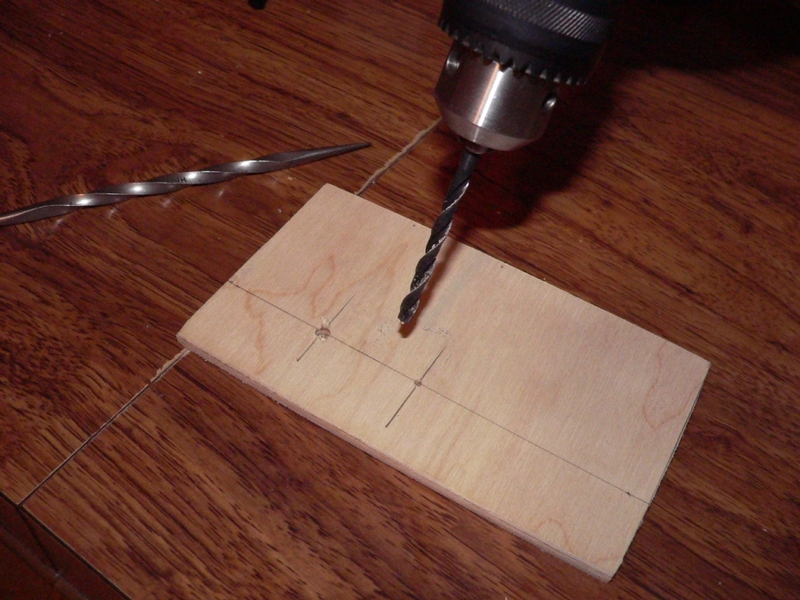
6. Cut a piece of 1/4” plywood 3 5/16 inches high and 5 7/8 inches wide to fit the bottom of the battery tray. Use a pencil to mark a line 1 inch from the bottom edge and then make a mark for a drill hole 1 1/2 inches from the left and another 2 7/8 inches from the left.
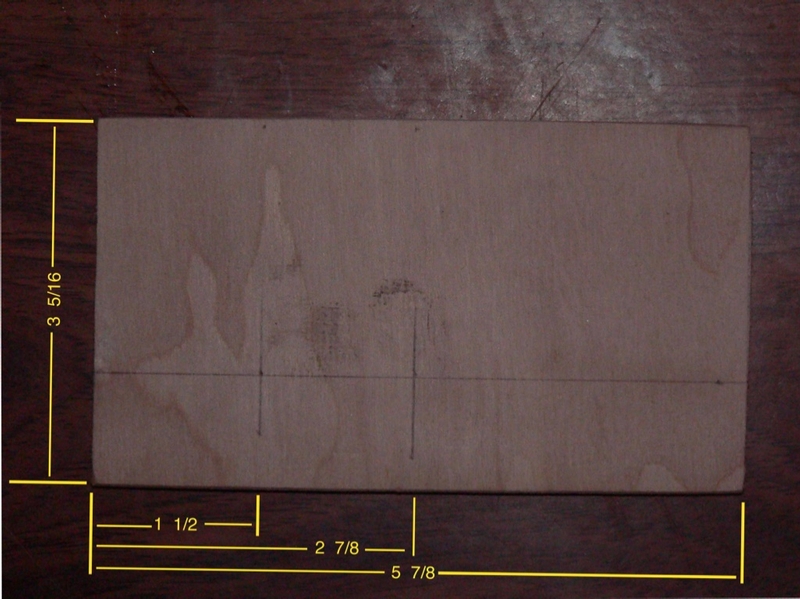
7. Center punch the hole marks. Use an electric drill with an 1/8” drill bit to make a hole at each drill hole mark.
8. Place the plywood in the bottom of the OEM battery tray. The drilled holes should be closest to the back left of the motorcycle when the tray is installed.

The holes are positioned as shown so that the battery will be held deeper into the battery compartment, away from the door. This seems to work best for allowing the positive cable enough room to loop around so that its entire length is taken up without having to bend the cable a lot.
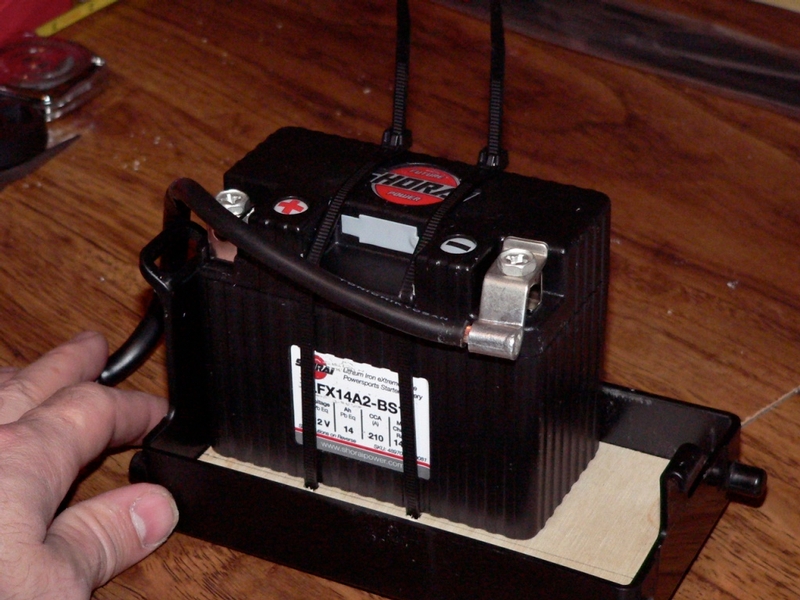
9. Place the Shorai 14A2-BS12 battery into the tray and thread a 14” zip tie through each hole. Wrap the zip ties under the battery tray and around the back of the battery. Slide the ends together and lock the zip ties so that they tightly hold the battery, tray and plywood together. The battery will be held in the front left corner of the battery tray.
10. Use a phillips screwdriver to connect the positive battery cable to the positive post which will be located toward the inside of the battery box, away from the door. Slide the red rubber insulator boot up and over the the connection at the battery pole. Leave the battery cover and rubber strap off. The cover is unnecessary as long as the red rubber cover remans on the positive pole of the battery. The battery is now held in the tray by the zip ties.
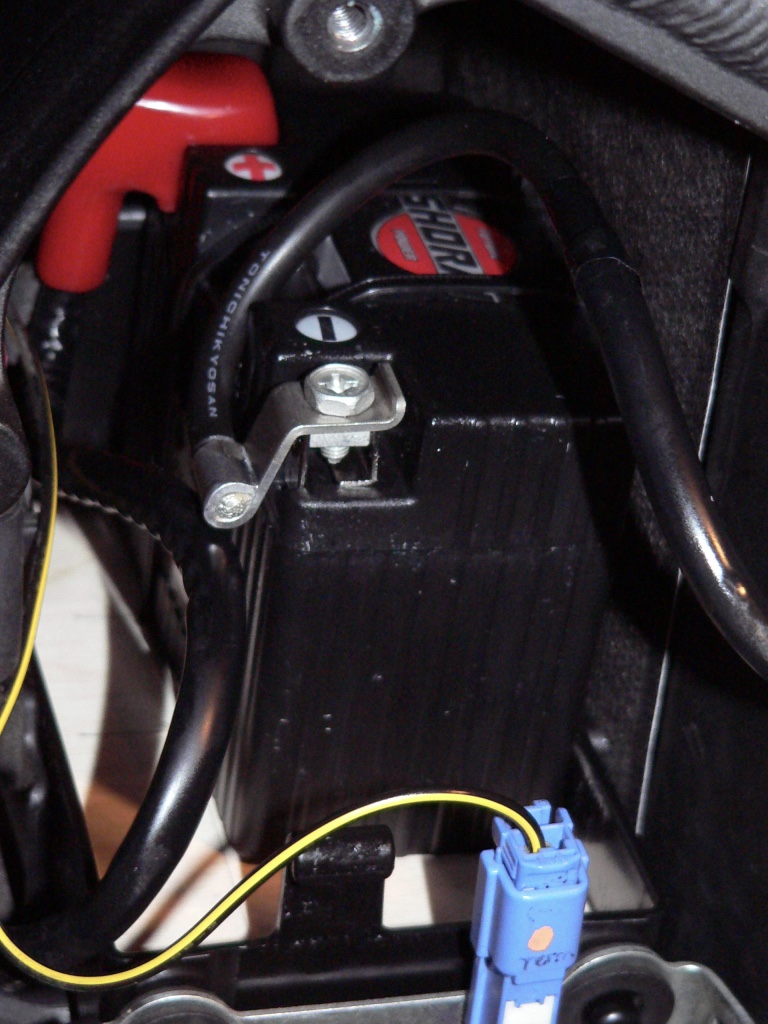
The Shorai 14Ah battery installed with cables shaped to accommodate the battery height and polarity. When installed, it will be necessary to bend the positive cable down somewhat but it will easily adjust for a taller battery again if necessary. The negative cable will also need to be bent so that it doubles back but it is not necessary to make any sharp bends or kinks in the cable. It will be easily readapted to an OEM battery.
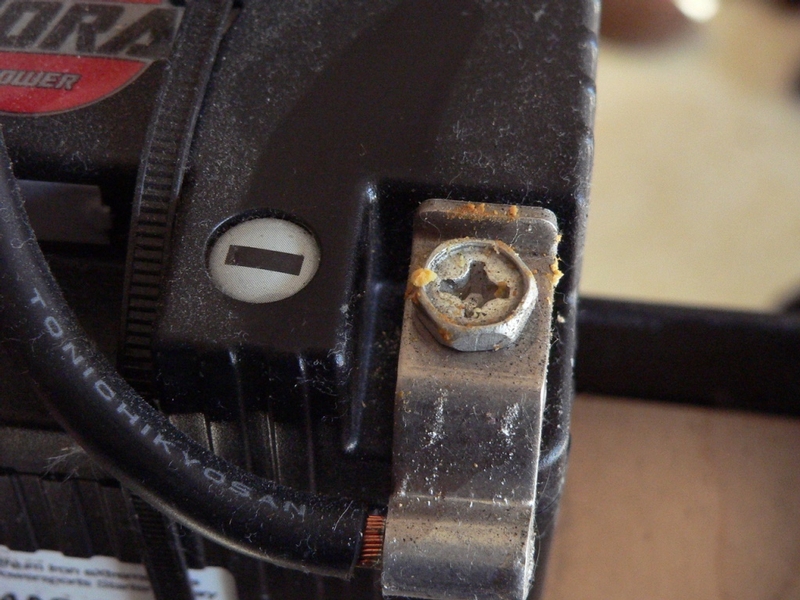
Lithium iron batteries are not supposed to corrode but I noticed a yellow crust on my poles after some time. I apply dialelectric grease to the connectors and battery poles and I have not seen the crust return in 7 years of service.
11. Refer to the photo below as well as the pics in steps 2, 3, 4. Slide the tray back into the battery compartment with the two short pegs pointed out. Place the battery tray retainer over the pegs on the tray and fasten the tray in position using an 8mm socket to tighten the two bolts. Connect the blue clip on the battery tray retainer. Apply dialelectric grease to the bolt and contacts of the negative battery cable. Use an 8mm socket to connect the negative cable to its ground on the frame outside of the battery compartment. Apply silicone lubricant to the projection on the back of the battery door. Replace the battery door and fasten the bolt with a 5mm hex tool. Replace right Forman (See FAIRINGS REMOVAL, Formans).
Weight Loss
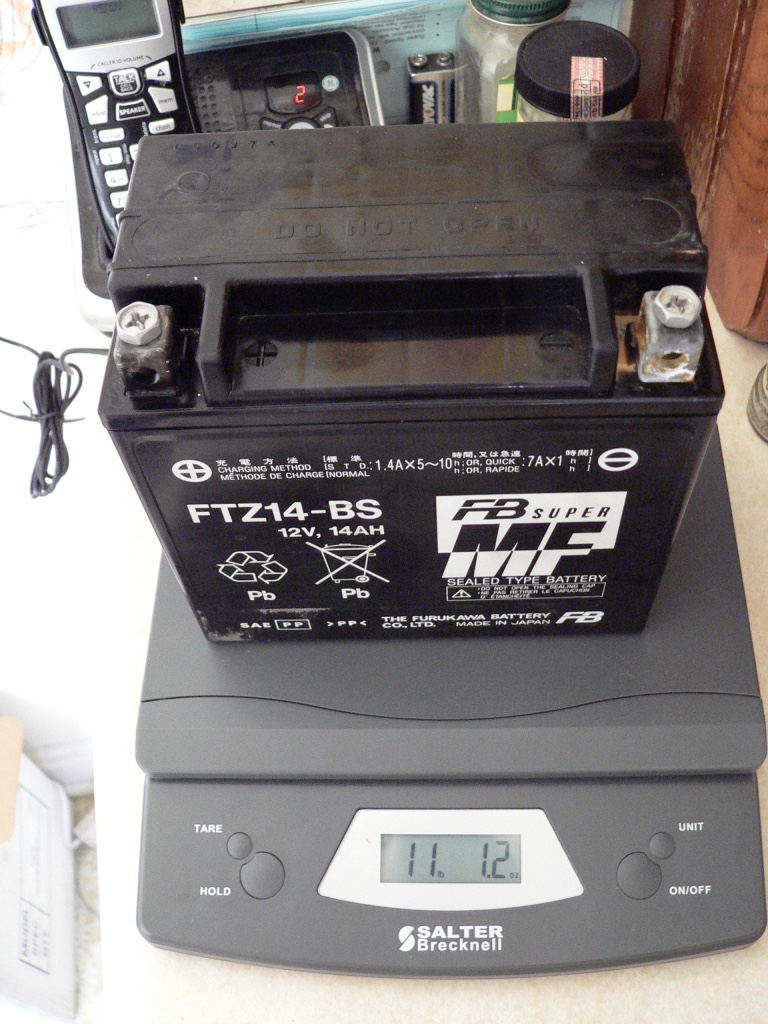
The OEM battery is 11 lbs, 12 oz
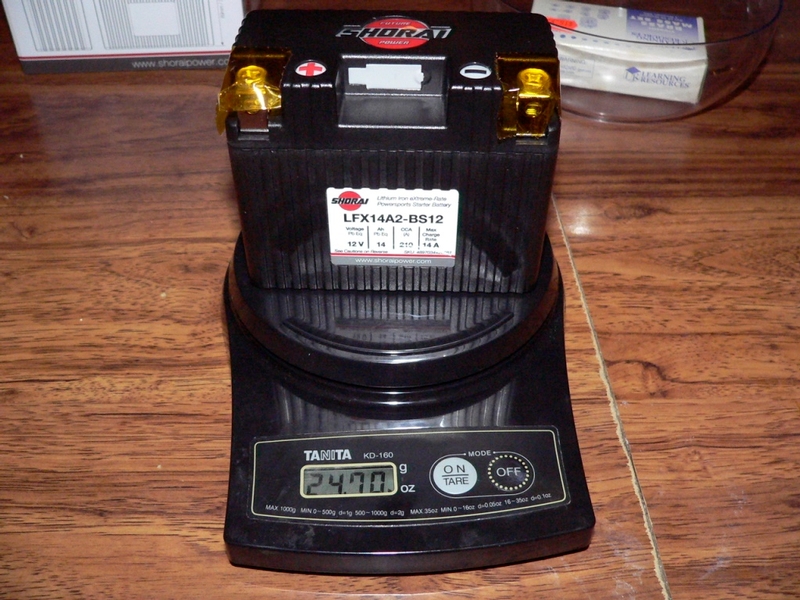
The Shorai battery is 24.70 ounces (1 lb, 8.7 oz)
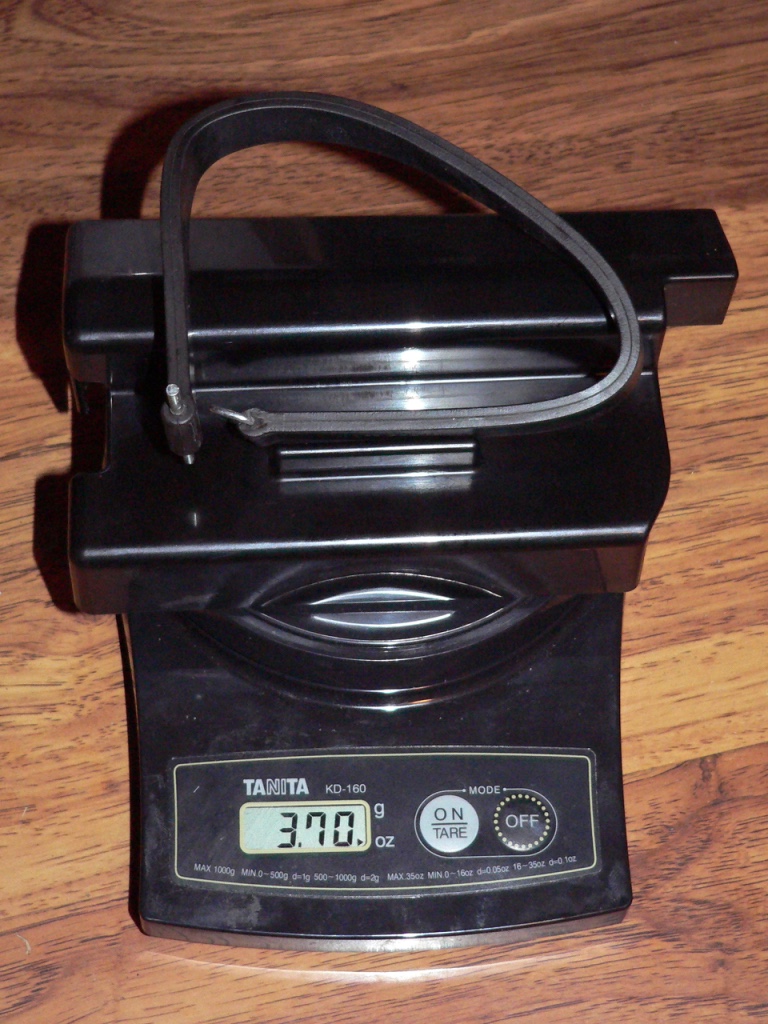
The battery cover and strap that have been eliminated are an additional 3.70
ounces.
Total weight savings of 10 lb, 7 oz.
* Last updated by: Rook on 9/3/2017 @ 6:17 PM *