


Has anyone got any specific details on the secondary openings or the low power map in general outside of it being apparently limited to 75% power?
Recently i started experimenting with the low power mode to see if i can still mess with my friends busa on a low power setting , though through my messing with said mode i've come to the conclusion that it still boogeys properly quick and is actually setup in a very clever fashion.
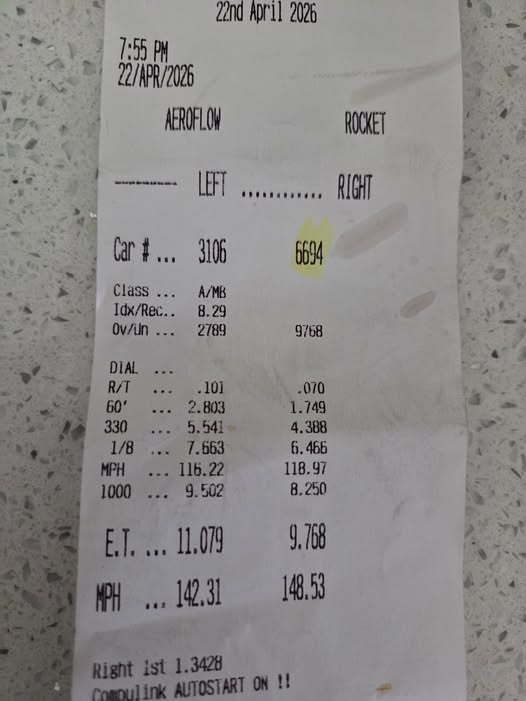
following this curiousity i did a single run on said mode and i severely doubt the 75% power number. but the friendlyness in first has spurred an interest in blending the maps together to keep the smoother power curve through most of first and ramp it in where i can use it.
ive heard of people doing this but never saw the value until i needed to actually be consistent lol.
* Last updated by: killernugget97 on 4/23/2026 @ 5:00 AM *