Move Close
Welcome to zx14ninjaform.com!

You are not logged in.
New Topic Reply
Next Page

Page: 1 2

Previous Page

Thread: Full Exhaust Install

Created on: 05/02/11 09:01 PM

Replies: 29

retsam


retsam's Gravatar

Location: McKinney, Texas

Joined: 04/09/11

Posts: 84

Full Exhaust Install
05/02/11 9:01 PM

Have any of you installed a full exhaust system on your ZX-14? If so, how difficult of a DIY would it be? Im getting a Brocks CT 4-2-1 Full system and I was just wondering how hard it would be to install it myself.


2010 ZX-14 SE, Ebay Fender Eliminator, Bolt License Plate LED, PCV, Brocks CT Single (4-2-1), 190/55 rear, Under seat USB port, Shogun frame sliders, Tech-Spec Tank Grip Pads, Knight Designs "1 Lower Pegs, on Engine Ice

Link | Top | Bottom

scottjkyl


scottjkyl's Gravatar

Location: east jordan,mi

Joined: 06/26/09

Posts: 1851

RE: Full Exhaust Install
05/02/11 9:38 PM

i installed the ct duals myself, not too bad hadd to strip all the fairings off except the nose lol. id read that some here installed without pulling the radiator but for the life of me i dont know how they did it plus i had engine ice i wanted to put in the cooling system so pulling the radiator just made sense and no worries of damaging it with the exhaust install. just make sure to use the copper sealant brocks gives you with the system. fairly easy job to do


08 zx14se Brocks CT Duals, Brocks street map, Driven 16/43 sprockets,EK ZZZ Chain,MRA Windscreen, Roaring Toyz Diamond Cut Grips Pingel Elec shifter, Hyper-Pro RSC Damper, BlackChrome Wheels, Sargent Seat,Factory Pro Velocity Stacks,PCIII USB,Bonneville Pro, TPX Radar/Laser Detector, TPX Laser Jammer, Goodridge Shadow series braided lines front and rear, Rifleman 1/5 turn throttle, Fusion LED Stage IV Kit, DDM HID's 10,000k

Link | Top | Bottom

darryle


darryle's Gravatar

Location: ontario

Joined: 02/15/09

Posts: 1185

RE: Full Exhaust Install
05/03/11 5:44 PM

You don't have to pull the rad,just the stabilizer bracket on the bottom,My bike was used to fit several different exhaust systems at Hindle exhaust,not once did they have to pull the rad


2012 14R,full hindle Evolution ,vortex rear sets,BST's with ceramic bearings,HID's,hyper pro damper and custom map 205.3 hp/120.2 torque

Link | Top | Bottom

Kolk1


Kolk1's Gravatar

Location: Alton IL

Joined: 02/08/11

Posts: 264

RE: Full Exhaust Install
05/03/11 6:28 PM

Yep, all the fairings come off, then just undo the bolts at the radiator so it can move forward about an inch or 2. Thats all I did. Not really hard, just time consuming. Probably took me 3 hours or so.


2007 Plasma Blue ZX-14.
New build, Fresh re-plated block, Velocity Racing Turbo kit, JE Turbo pistons, P&P Head, and a whole lot more. Current on 8.5psi.

2013 White ZX-14R, Full Hindle exhaust, Puig DB screen, HIDs, drop pegs, bar risers, and so on, setting it up for touring.

Link | Top | Bottom

DogoZX


DogoZX's Gravatar

Location:

Location: Location!

Joined: 02/26/09

Posts: 2889

RE: Full Exhaust Install
05/03/11 7:00 PM

Yep easy DIY, and a good chance to clean and inspect parts of the bike you can't always get to... If you haven't yet, order new gaskets.

My CT fit so well, it almost installed itself.

If you have any problems, you shouldn't, someone here or at Brock's will help...


"Life should not be a journey to the grave with the intention of arriving safely in a pretty and well preserved body, but rather to skid in broadside in a cloud of smoke, thoroughly used up, totally worn out, and loudly proclaiming "Wow! What a Ride!” HST

Link | Top | Bottom

privateer


privateer's Gravatar

Location: [random forest]

Joined: 02/16/09

Posts: 3605

RE: Full Exhaust Install
05/03/11 8:18 PM

The 4-2-1 (aka CT-Single) is easier to install than the -Dual.

The instructions that come with them are designed to tell you how to do it the easiest way. Follow the darn instructions. Read them at least 3 times before you start.

I needed my nephew to pull the springs on the #2 and #3 headers because I just couldn't get my big ham hock hands in between the radiator and header to get enough pull on the springs to stretch them enough.


Living the Gypsy Life

Link | Top | Bottom

Rook


Rook's Gravatar

Joined: 03/28/09

Posts: 20813

RE: Full Exhaust Install
05/04/11 9:52 AM

I never rush this stuff. It really is not that difficult if you are willing to spend the hours and you have a system that fits the bike well (get reccomendations---I only hear good about Brocks especially CT)

I would just take off the rad. It was my first haeder removal /aftermarket install and I didn't want to take any shortcuts. Go ahead and try tilting the rad if you want but put a piece of cardboard against so you do not bend any fins by accident. Don't get frusterated if you find you are better off removing the rad. It may be hard to get the old gaskets out if you cant stick your head up in there to see them. If you need to pry to get the original gaskets out, pry against the tongue that sticks up from the bottom of the port. Careful not to gash the machined surface the gasket seats on motor.

I'm very careful about wrenching and am just developing experience. I would give it a full weekend and maybe a few hours more. That's realistic if you have never done this before and you want to do a good job.


* Last updated by: Rook on 5/4/2011 @ 10:03 AM *


08 MIDNIGHT SAPPHIRE BLUE ZX-14 Now Deceased, will be resurected 2024 ZX-14R bran friggin NEW!

Link | Top | Bottom

retsam


retsam's Gravatar

Location: McKinney, Texas

Joined: 04/09/11

Posts: 84

RE: Full Exhaust Install
05/06/11 8:11 PM

Thanks for all the info and encouragement guys. Im still not sure I want to try it myself but I might get a wild hair and give it a go. We will see in a couple of weeks when my system arrives.


2010 ZX-14 SE, Ebay Fender Eliminator, Bolt License Plate LED, PCV, Brocks CT Single (4-2-1), 190/55 rear, Under seat USB port, Shogun frame sliders, Tech-Spec Tank Grip Pads, Knight Designs "1 Lower Pegs, on Engine Ice

Link | Top | Bottom

retsam


retsam's Gravatar

Location: McKinney, Texas

Joined: 04/09/11

Posts: 84

RE: Full Exhaust Install
05/07/11 6:18 AM

So does anyone have a link to a good DIY for removing and installing the radiator? I would imagine it involves some bleeding and what not. Thats the one issue I think I would have with this whole process. Well, that and potential leaks.


2010 ZX-14 SE, Ebay Fender Eliminator, Bolt License Plate LED, PCV, Brocks CT Single (4-2-1), 190/55 rear, Under seat USB port, Shogun frame sliders, Tech-Spec Tank Grip Pads, Knight Designs "1 Lower Pegs, on Engine Ice

Link | Top | Bottom

scottjkyl


scottjkyl's Gravatar

Location: east jordan,mi

Joined: 06/26/09

Posts: 1851

RE: Full Exhaust Install
05/07/11 6:55 AM

retsam, its a pretty staight forward job if i remember right theres 2 bolts on the top 1 each side and 1 on the bottom(on a bracket that bolts to the motor) and of course the hoses that r connected to the radiator. takes longer to disconnect the hoses than to get the radiator off lol. be sure to drain radiator first i disconnected bottom hose to do this tip: remove radiator cap first (relieves the vacuum) so fluid will drain. Being in Texas it would benefit you to replace coolant with engine ice will run 1-2 bars cooler for ya good luck


08 zx14se Brocks CT Duals, Brocks street map, Driven 16/43 sprockets,EK ZZZ Chain,MRA Windscreen, Roaring Toyz Diamond Cut Grips Pingel Elec shifter, Hyper-Pro RSC Damper, BlackChrome Wheels, Sargent Seat,Factory Pro Velocity Stacks,PCIII USB,Bonneville Pro, TPX Radar/Laser Detector, TPX Laser Jammer, Goodridge Shadow series braided lines front and rear, Rifleman 1/5 turn throttle, Fusion LED Stage IV Kit, DDM HID's 10,000k

Link | Top | Bottom

retsam


retsam's Gravatar

Location: McKinney, Texas

Joined: 04/09/11

Posts: 84

RE: Full Exhaust Install
05/07/11 4:58 PM

Thanks for the info Scott. What about refilling it? Im not totally retarded when it comes to mechanics, but I am when it comes to radiators. Just want to make sure I dont screw something up.


2010 ZX-14 SE, Ebay Fender Eliminator, Bolt License Plate LED, PCV, Brocks CT Single (4-2-1), 190/55 rear, Under seat USB port, Shogun frame sliders, Tech-Spec Tank Grip Pads, Knight Designs "1 Lower Pegs, on Engine Ice

Link | Top | Bottom

scottjkyl


scottjkyl's Gravatar

Location: east jordan,mi

Joined: 06/26/09

Posts: 1851

RE: Full Exhaust Install
05/07/11 5:47 PM

when i refilled it i filled the radiator and overflow bottle then just like a car i started it with the rad cap off and let it run until no more air bubbles and keep filling as needed at the radiator


08 zx14se Brocks CT Duals, Brocks street map, Driven 16/43 sprockets,EK ZZZ Chain,MRA Windscreen, Roaring Toyz Diamond Cut Grips Pingel Elec shifter, Hyper-Pro RSC Damper, BlackChrome Wheels, Sargent Seat,Factory Pro Velocity Stacks,PCIII USB,Bonneville Pro, TPX Radar/Laser Detector, TPX Laser Jammer, Goodridge Shadow series braided lines front and rear, Rifleman 1/5 turn throttle, Fusion LED Stage IV Kit, DDM HID's 10,000k

Link | Top | Bottom

Rook


Rook's Gravatar

Joined: 03/28/09

Posts: 20813

RE: Full Exhaust Install
05/08/11 9:52 PM

That may be of some help for draining and refilling.

Once alll the hoses are off the there is just 3 screws like scotty said. Easy to reach.


08 MIDNIGHT SAPPHIRE BLUE ZX-14 Now Deceased, will be resurected 2024 ZX-14R bran friggin NEW!

Link | Top | Bottom

retsam


retsam's Gravatar

Location: McKinney, Texas

Joined: 04/09/11

Posts: 84

RE: Full Exhaust Install
05/15/11 10:22 PM

Update: Got the power commander installed this past Thursday. Uploaded the stock map from the power commander website. May birthday was Saturday so I rode all day Friday and did absolutely nothing on Saturday. This morning I got up at 7 with the determination that I would have my Brocks exhaust installed and done! Well, I did it! Took me 10 hours because Im retarded and I have to take my time but I got it done. I didnt remove the radiator but I should have. I ended up bending a few spots on the radiator but it wasn't too bad. The first time I fired it up I noticed a lot of smoke and freaked out a bit. But then I realized that its probably the WD-40 I used to put the pipes together. I uploaded the brocks maps and replaced the fairings and went for a ride. Maaaaannn this thing is LOUD! I actually put the noise reduction plug in and it helped a little but but the pipes are still really loud. I love the way my bike sounds now! The freeking stock pipes are HEAVY AS HELL! I seriously didnt realize how much weight I'd be dropping. I also forgot to do the anti pop plug. I will get to that later. Im also going to post some pix and video later this week. This was a really good exercise for me as Im not a seasoned mechanic. Hopefully I didnt screw up my bike!


2010 ZX-14 SE, Ebay Fender Eliminator, Bolt License Plate LED, PCV, Brocks CT Single (4-2-1), 190/55 rear, Under seat USB port, Shogun frame sliders, Tech-Spec Tank Grip Pads, Knight Designs "1 Lower Pegs, on Engine Ice

Link | Top | Bottom

privateer


privateer's Gravatar

Location: [random forest]

Joined: 02/16/09

Posts: 3605

RE: Full Exhaust Install
05/15/11 10:29 PM

Sorry to hear it is loud... :(


Living the Gypsy Life

Link | Top | Bottom

Rook


Rook's Gravatar

Joined: 03/28/09

Posts: 20813

RE: Full Exhaust Install
05/15/11 11:18 PM

Took me 10 hours because Im retarded and I have to take my time but I got it done.
Nope, that is about what it should take--at least unless you are a pro.

I didnt remove the radiator but I should have.
I always recommend but then add 4-5 hours drain and refill.

The first time I fired it up I noticed a lot of smoke and freaked out a bit. But then I realized that its probably the WD-40 I used to put the pipes together.
Same happened to me. Ceramic paint on headpipes cured under exhaust heat and caused smoke.

The first time I fired it up I noticed a lot of smoke and freaked out a bit. But then I realized that its probably the WD-40 I used to put the pipes together.

Loud is so, so nice after humming along on the stockers. Pull that plug and let her scream, baby!

I also forgot to do the anti pop plug.

If you are talking about blocking the clean air hose, I have a tutorial in How Tos. It is very elementary but a few pics and some instructions never hurt.

Enjoy the bike. I'm sure you did not damage a thing and if you are picky, you can carefully straighten those fins out with an exacto knife or some thin plastic instrument next winter when you drain the system to flush and replace coolant (have a tutorial on that one too, if you enjoy this kind of thing).


08 MIDNIGHT SAPPHIRE BLUE ZX-14 Now Deceased, will be resurected 2024 ZX-14R bran friggin NEW!

Link | Top | Bottom

Rook


Rook's Gravatar

Joined: 03/28/09

Posts: 20813

RE: Full Exhaust Install
05/15/11 11:21 PM

So what did you get? A short meg? Street meg, A-head? All nice pipes but loud as F&#CK which is great fun. There are those times I wish I were quieter though.


08 MIDNIGHT SAPPHIRE BLUE ZX-14 Now Deceased, will be resurected 2024 ZX-14R bran friggin NEW!

Link | Top | Bottom

DogoZX


DogoZX's Gravatar

Location:

Location: Location!

Joined: 02/26/09

Posts: 2889

RE: Full Exhaust Install
05/16/11 12:35 AM

You got the CT single correct, retsam? That's what I have and think it's quiet, as far as aftermarket systems go...lol.


Good job on the DIY.


BTW, I wipe my system down with WD40 when I wash my bike. Love the smoke when I start the bike... gives me a buzz!


* Last updated by: DogoZX on 5/16/2011 @ 12:41 AM *


"Life should not be a journey to the grave with the intention of arriving safely in a pretty and well preserved body, but rather to skid in broadside in a cloud of smoke, thoroughly used up, totally worn out, and loudly proclaiming "Wow! What a Ride!” HST

Link | Top | Bottom

Rook


Rook's Gravatar

Joined: 03/28/09

Posts: 20813

RE: Full Exhaust Install
05/16/11 9:30 PM

I also forgot to do the anti pop plug.

HOLD ON!--

If you mean you forgot to plug the clean air outlet in bottom of air box, and the hose is no longer installed, better stuff something in there ASAP. The air box should be forcing air out and it is not likely much debris floats under there but no sense in taking chances on something getting in the hole. At least stick a big piece o duct tape over it for a temporary patch.


08 MIDNIGHT SAPPHIRE BLUE ZX-14 Now Deceased, will be resurected 2024 ZX-14R bran friggin NEW!

Link | Top | Bottom

retsam


retsam's Gravatar

Location: McKinney, Texas

Joined: 04/09/11

Posts: 84

RE: Full Exhaust Install
05/16/11 9:59 PM

DogoZx - Yes I have the CT Single. I think it is loud but not too loud.

Rook - I didnt remove anything from the air box yet. So as far as that goes, everything is as it was stock. The Brocks instructions say to cut the hose tapered end, install a plug in the hole and insert the hose into the plug. They say its to cut deceleration pop. I hope thats what you were talking about. The pop wasnt too bad when I took my first ride though.


2010 ZX-14 SE, Ebay Fender Eliminator, Bolt License Plate LED, PCV, Brocks CT Single (4-2-1), 190/55 rear, Under seat USB port, Shogun frame sliders, Tech-Spec Tank Grip Pads, Knight Designs "1 Lower Pegs, on Engine Ice

Link | Top | Bottom

retsam


retsam's Gravatar

Location: McKinney, Texas

Joined: 04/09/11

Posts: 84

RE: Full Exhaust Install
05/22/11 7:27 AM

Here are all the pix I took during install. It was too painful to upload them here so I had to put them on flickr. Hopefully these pix will help some other poor soul, as clueless as I was, get the job done. Not that I did a good job taking pix or documenting anything.


IMG_0713 by retsam@prodigy.net, on Flickr


This is the spigot that goes into the header. I took a picture of this because the dox dont really explain which way to put them in. I read in the dox for another bike that the flared edge should go toward the engine so thats what I did. If I did that wrong, someone let me know so I can take another 10 hours and fix it LOL.


Spigot and flange installed.


The Dox said to install this spring before attaching the headers as it would be hard to install after. The dox also said that they others are "easily" reached after install. I wished I had installed them all before attaching the headers.


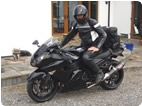
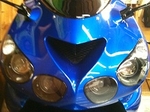
Just wanted to take this pic because I thought it looked cool... LOL


The heavy stock header pipes.
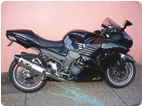
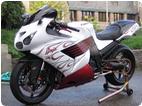
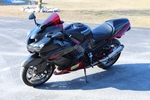
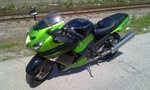

Installed!


Done!


2010 ZX-14 SE, Ebay Fender Eliminator, Bolt License Plate LED, PCV, Brocks CT Single (4-2-1), 190/55 rear, Under seat USB port, Shogun frame sliders, Tech-Spec Tank Grip Pads, Knight Designs "1 Lower Pegs, on Engine Ice

Link | Top | Bottom

russty


Location: O'straya

Joined: 02/15/09

Posts: 230

RE: Full Exhaust Install
05/22/11 12:14 PM

Great pics. Thanks


08 sapphire

Link | Top | Bottom

LGR2010KAWI


LGR2010KAWI's Gravatar

Location: Plano, Tx

Joined: 05/21/11

Posts: 47

RE: Full Exhaust Install
06/08/11 7:59 PM

great job neighbor ...


2009 Connie - sold!

2010 ZX14 Candy Persimmon Red / Brocks CT Dual / PCV w/Brocks Maps / speed tactics fender eliminator / zero gravity double bubble / heli bar risers / Joe Florida 162-Multi-Color LED SportsBike Accent Light Kit w/Remote Control / custom LED Brake light w/integrated turn signals

2013 ZX10R ABS / Fender Eliminator / ivans wire mod / custom LED Brake Light w/Integrated turn signals

Link | Top | Bottom

Rook


Rook's Gravatar

Joined: 03/28/09

Posts: 20813

RE: Full Exhaust Install
06/09/11 9:45 PM

Thos epics are great . Good job.


08 MIDNIGHT SAPPHIRE BLUE ZX-14 Now Deceased, will be resurected 2024 ZX-14R bran friggin NEW!

Link | Top | Bottom

jpzx14


jpzx14's Gravatar

Location: chicago, il

Joined: 06/15/11

Posts: 46

RE: Full Exhaust Install
10/20/11 5:53 PM

in geting a brooks short ahead, but does anyone know how much is the torque for the nuts on the header?

Link | Top | Bottom


Welcome to zx14ninjaform.com!
 
New Topic Reply
Next Page

Page: 1 2

Previous Page

New Post

Please login to post a response.