


Tail Light Removal
Necessary for rear fender removal or to replace the OEM tail light with and aftermarket tail light.
Do First:
Remove the back tail piece (see FAIRINGS REMOVAL, Tail Piece, steps 1 and 2).
Remove each tail fairing (see FAIRINGS REMOVAL, Tail Fairings.
Tools:
phillips screwdriver
1. Pull the foam block that holds immobilizer/diagnostic connector from its location at the back of the seat compartment on the rear brake side of bike.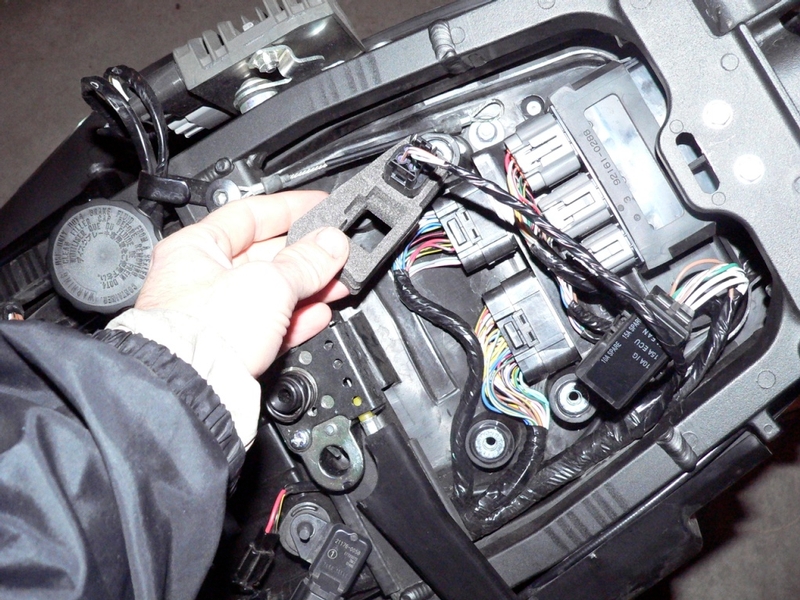
2. Remove the three screws and washers from tail light using a phillips screwdriver. They will be threaded quite tightly into the plastic so place a hand on the tail light lens and press forward to support the force required to turn the screws without stripping the slots.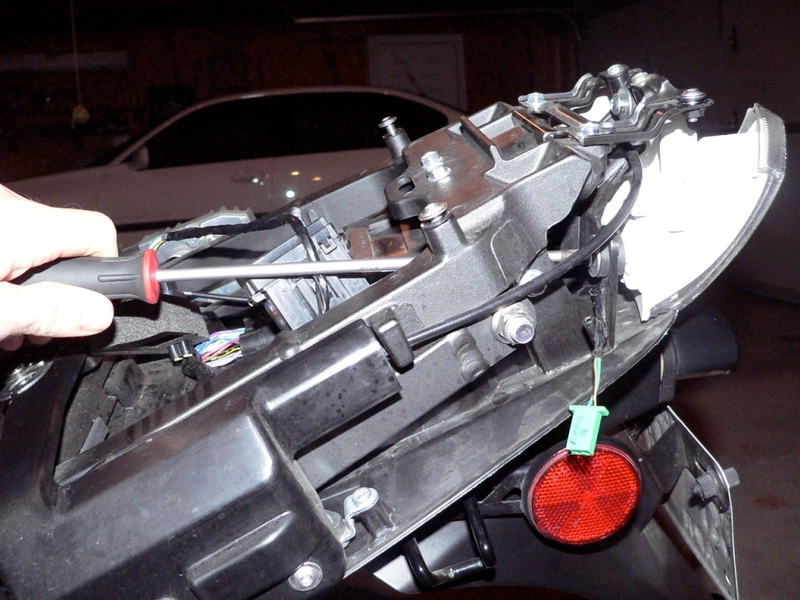
3. Pull tail light straight back to remove it. You may disconnect the tail light wire by pressing tab on bottom of connector and pulling light free. It may be possible to complete this job by just pushing the light aside without disconnecting it.
Installation is the reverse procedure.
Reinstall fairings.
(FAIRINGS REMOVAL, Tail Fairings and Tail Piece).
* Last updated by: Rook on 11/21/2017 @ 1:14 AM *