


ZX-14R Battery Removal
The OEM battery will need to be removed for maintenance or to connect battery maintainer pigtails. The OEM battery will also need to be replaced, usually after 3 years of service if well maintained. You can drop several pounds of weight by going with one of the lightweight lithium batteries available. I had a Shorai in my Gen1 ZX-14 and it was still in service after 11 years.
Tools:
5mm hex tool
1/4” drive ratchet
10mm socket
electrical tape
8mm socket
phillips head screwdriver
dialectric grease
DO FIRST:
Make sure the ignition is switched to OFF
Remove the RH fairing cover (grill). I’ll do a fairings removal tutorial soon but for now, I suggest you use the Brock’s video. https://www.youtube.com/watch?v=40oTkAb2zCE&t=185s Also, ask questions before removing a fairing cover the first time because I broke mine.
Removal
1. Remove battery compartment cover screw along with the plastic washer using a 5mm hex tool. Pull the projections at the inside of the cover from the grommets in the frame (locations marked with yellow dots).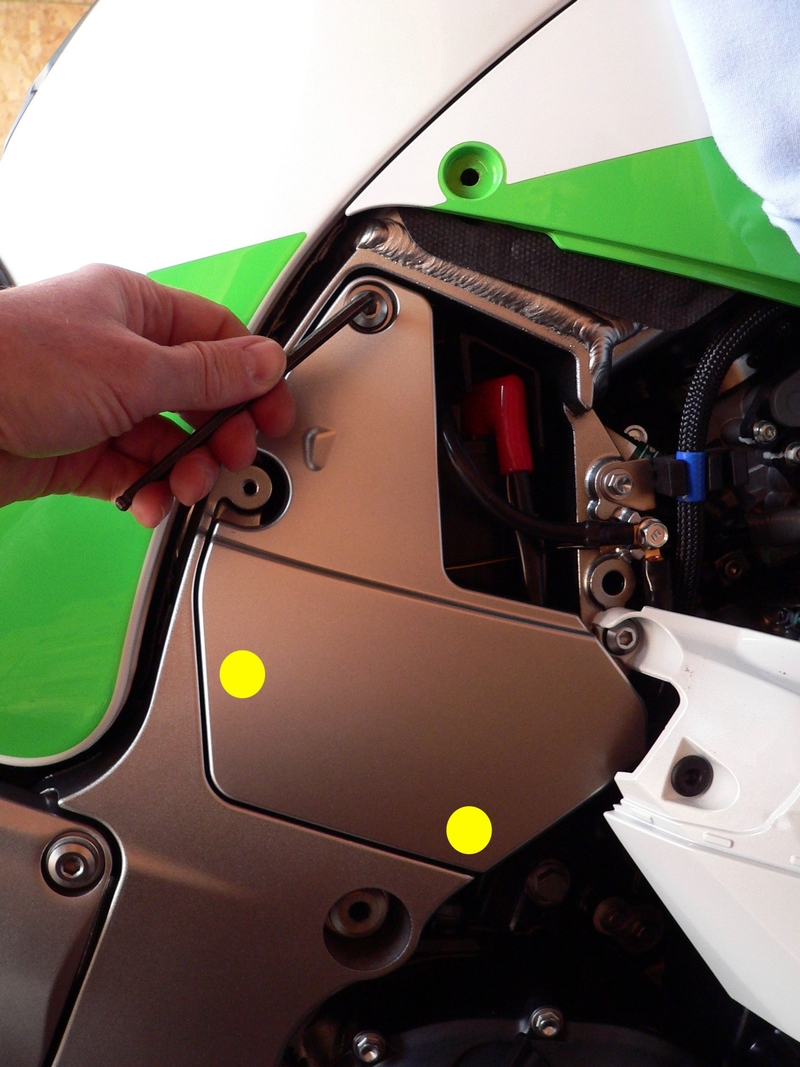
2. Remove the frame ground bolt [A] using a 10 mm socket and 1/4” drive ratchet. Separate the negative cables from the frame ground bolt. To avoid sparks which may ignite gasoline vapors, make certain that the battery negative cable and ring lug cannot contact or arch to the frame.
Remove the battery tray bracket bolts [B] using an 8mm socket. Remove the battery tray bracket.
Temporarily wrapping the battery negative ring lug with electrical tape is a good precaution to prevent accidental sparking while it is disconnected from the ground screw.
3. Unhook the rubber band [A] and clear the small black/yellow battery ground lead from the battery. Pull the battery tray out of the compartment about one inch and slide the battery cover back to expose the positive battery terminal. Slide the red cap [B] down. Use a 10mm socket to remove the positive battery terminal screw and disconnect the positive battery cable from the battery. 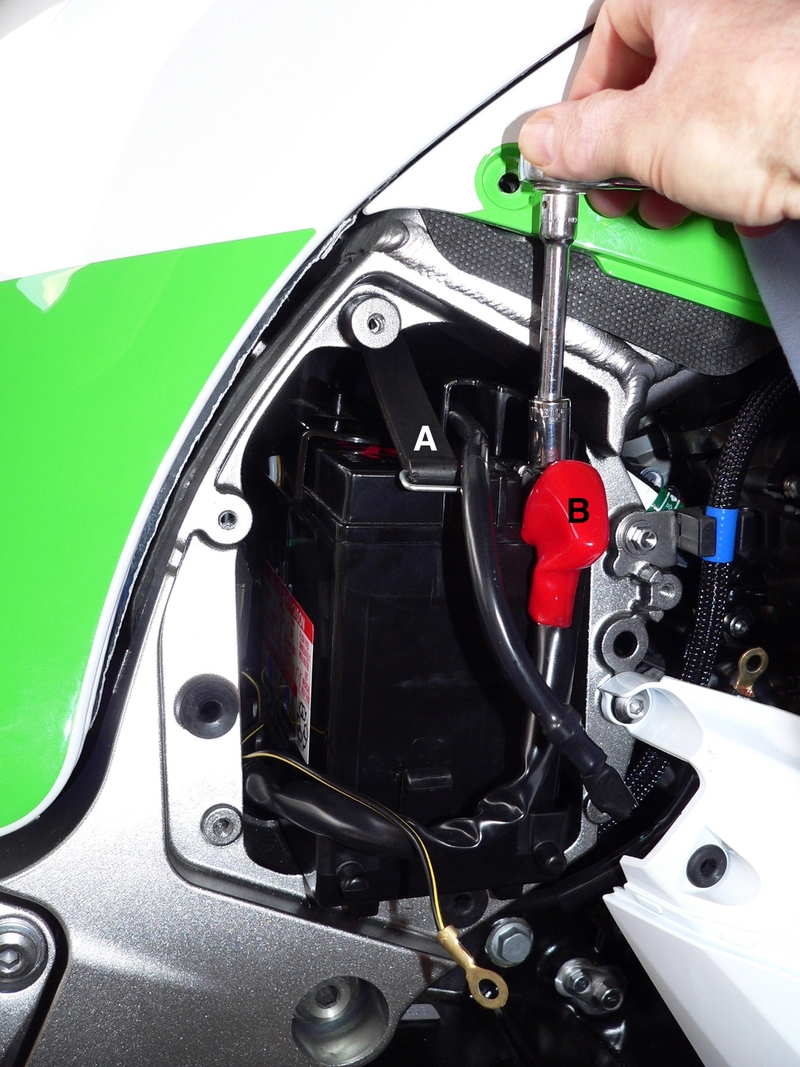
It’s a good idea to thread the positive battery terminal screw in immediately after removing the cable so the screw and the battery terminal nut are not lost.
4. Remove the battery tray, battery and battery cover from the battery compartment. 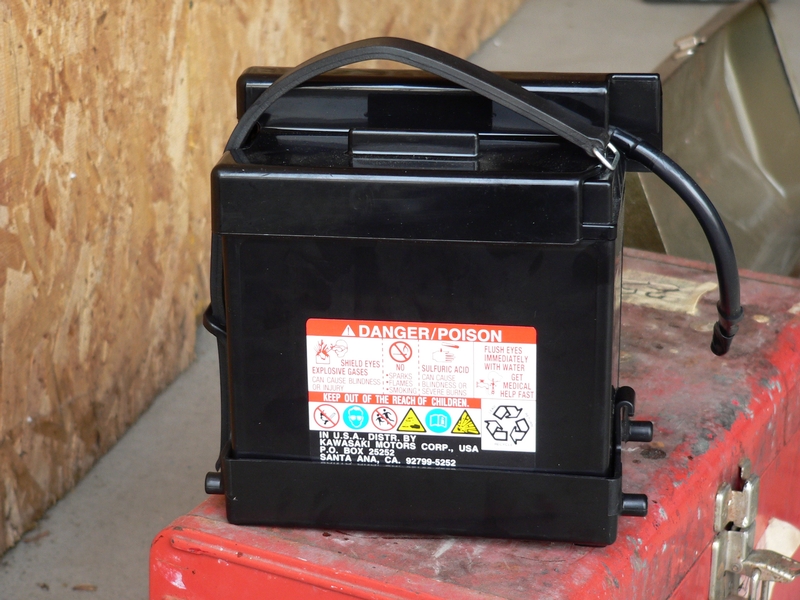
Installation
5. Installation of the OEM battery is the reverse procedure. Here’s a few more tips:
The back of the battery tray has two protrusions that fit into holes in the battery case marked by the yellow arrows in the photo below. 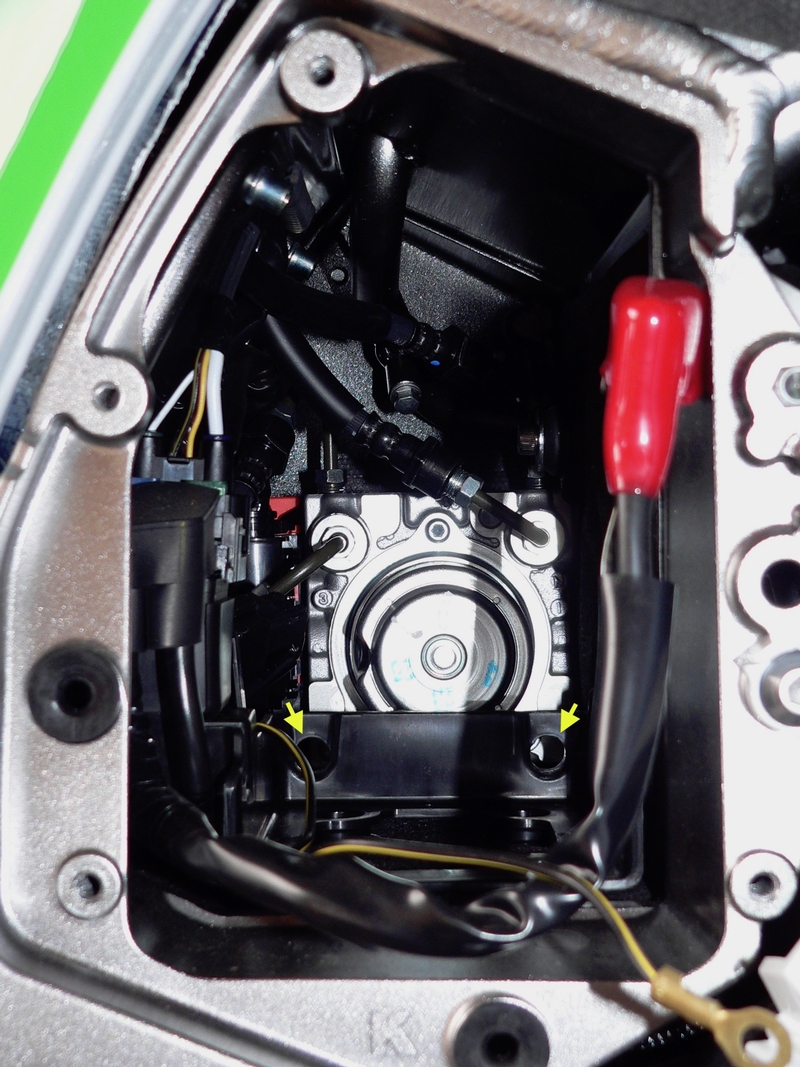
A phillips screwdriver works best to get the battery terminal screws started in the little rectangular nut within the battery post. Once drawn up with the screwdriver, snug the screws up with a wrench. The battery terminal nuts are just set in place, be careful that the nuts don’t fall out when the battery terminal screws are not threaded in.
It’s not a bad idea to use some medium strength thread locking agent on the battery tray bracket bolts and then tighten them snug.
It’s always a good idea to use some dialectric grease on the battery terminals and cable lugs so that corrosion is prevented.
The photo below is from the 2012 service manual and as you can see, the battery positive cable routs under the rubber band along with the battery ground lead. The battery positive cable on my bike came from the factory as shown in my photos. I could bend it to fit under the band but I’m leaving it as it was from the factory for now.
Also, the illustration from the service manual seems to indicate that the battery ground lead ring lug is position on top of the battery negative cable lug with the third cable (engine ground) at the bottom of the bunch. From the dealership, the battery negative ring lug on my bike was on top of the battery ground lead with the engine ground against the frame at the bottom of the bunch.
Whatever order you put the ring lugs on, they should butt up against the stopper protrusions molded into the frame ground.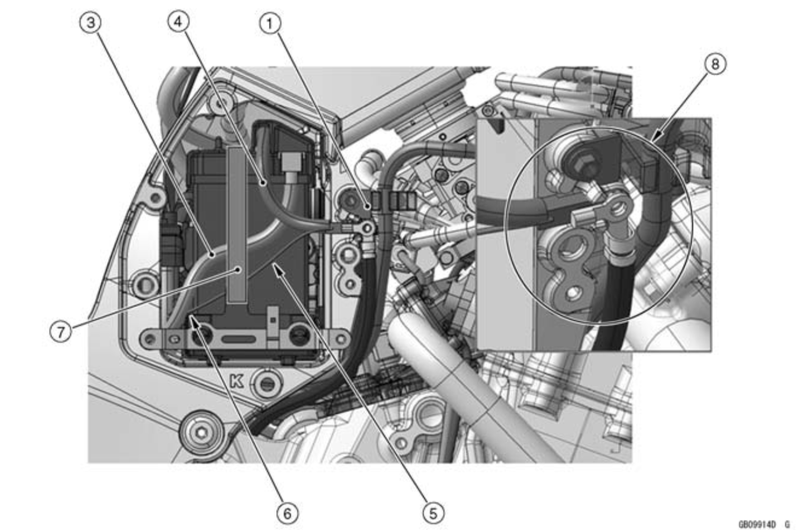
I would put a little dielectric grease on the projections at the inside of the battery compartment cover. The projections will slide in and out of the grommets easier the next time the cover is removed.
The battery compartment cover bolt should not be tightened beyond just snug or the cover might crack. I always use medium strength thread locking agent on that fastener and tighten it just snug. If the cover is drawn tight up to the frame, that’s too tight.
* Last updated by: Rookpics on 1/17/2026 @ 6:42 PM *