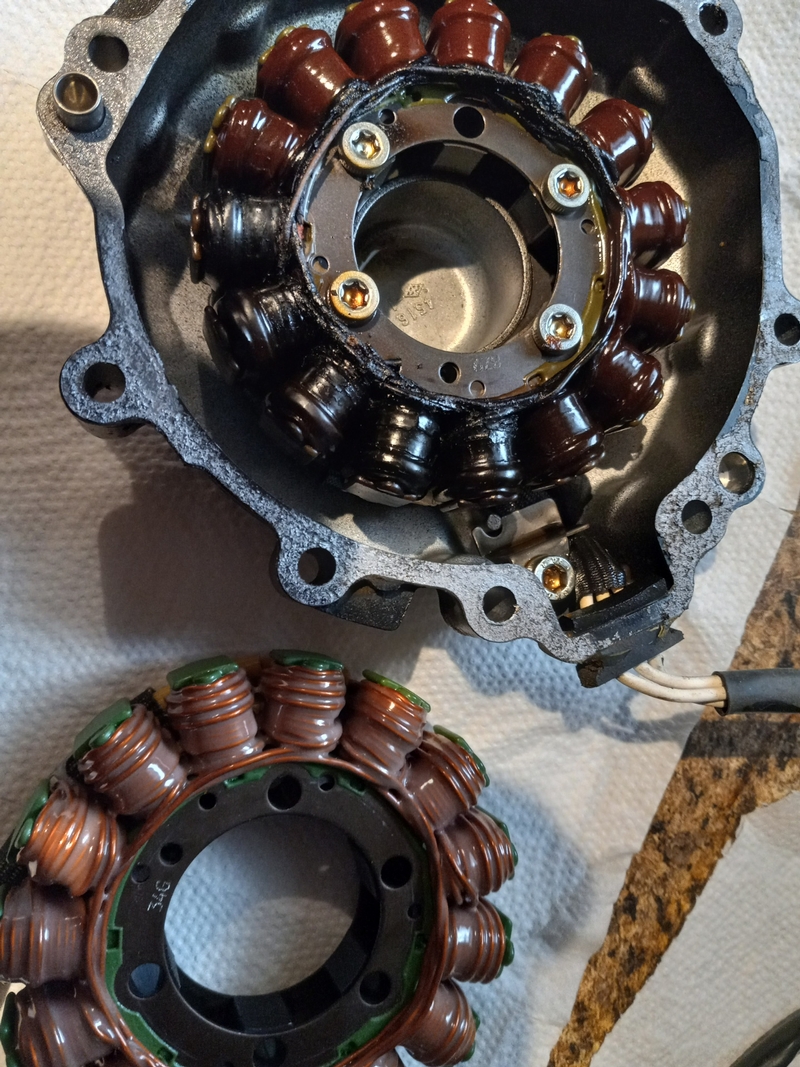
Looks like a block of 5 coil windings took the heat. So say 15 blocks all together equals 15v. The output is 10v say. Each block is either N and the next one is S then alternates to make AC.
For next time:
12.8v or higher off the charger.
12.8v with key on only. No drop in volts shows it has reserve.
11.1v with starter motor turning. Shows battery load drop around that voltage reading.
12.8v shows the recovery volts in an instant once engine starts.
14.4v is the immediate volts change with engine starting to idle.
Above shows perfect scenario showing battery being good. Battery recovery shows a well charged battery with plenty of reserve back to recovery. Shows the stator output is at normal range, but can show as high as 14.7v. And shows VR can bleed off stator output being normal and can be reused, is within spec, etc., not needing new with a new stator.
Now will show the 3 components of the charging loop and can pinpoint who in the loop has failed.
Battery: After the current draw via starter motor draw shows 12.1v or lower, relates to a bad battery in poor recovery mode.
Stator: Will remain at 12.8v when idling or revving engine. This points to stator loops burned out and can no longer produce AC at its peak output.
VR: Will show full current output of say 15v of stator output, but cannot regulate the range of 14.4v.
So all you need is a voltmeter on the battery and watch for said numbers above to determine who in the loop shows bad numbered output readings.
I use GM's Mr. Goodwrench intake manifold sealer. Maybe 12-14 dollars a tube vs. OEM brand. Did a lot of intake manifold leaks working for a Chevy dealer. Paper gaskets for the head's coolant, then a bead of sealer across the engine block's horizontal ends. Never had a comeback sold me on the stuff.
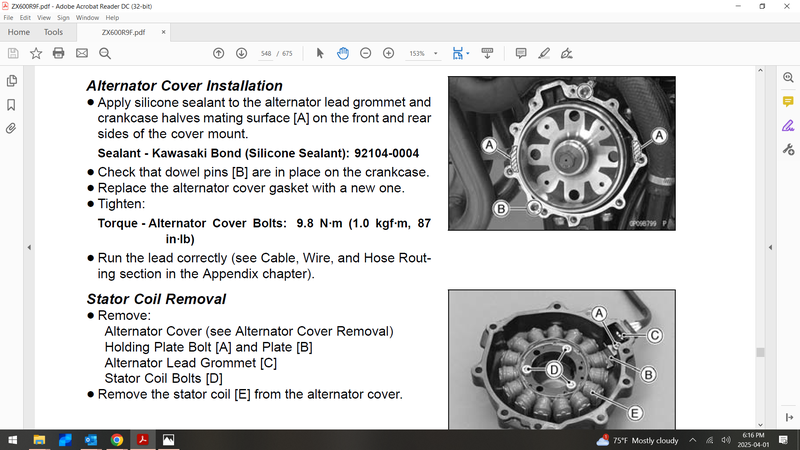
The hash marks are used for the case splits, having an oil path at the case halves splits. Another little path is the rubber boot (lead grommet) with the 3 wires going thru it. That lays in a U kind of trough, where the rubber shrinks and/or loses memory down the road. That abstract reads the one hash side is the lead grommet side, and case half the other hash side. I'm saying use sealer laying down the grommet into the stator cover horseshoe area for the grommet.
Where sealer is on the hash areas metal side, place gasket into the dowel's side, being you have one dowel in the cover, the other in the engine case. Which ever is easier to pull out, lay the gasket on the dowel side which steady's the gasket.
Use a new single edge razor and do not dig into the machined sided case halves and cover. Has to be gasket free down to showing metal only. Any remaining gasket material is a hydraulic path out from those rises leftover.
Scraping gaskets off is like an art. Scrape with old stator in but do not install the new windings and possible nick it. A 45° angle for the bulk of the scrape, and 90° straight up for the stubborn areas. Gouging is too deep and creates a path. Slow and steady eliminates the nicks. The Abstract says to use a new gasket and says nothing about sealing the gasket somewhere. So gasket goes on dry.
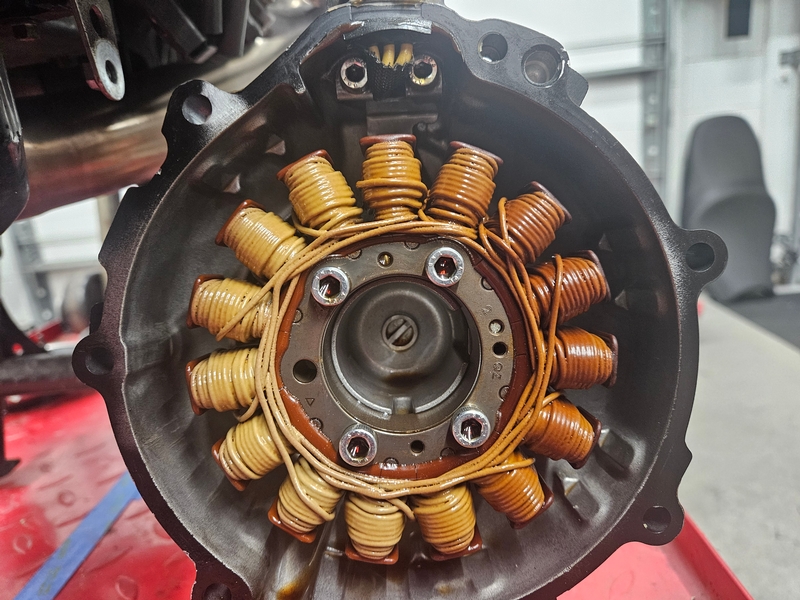
Looks like a 5mm hex and a 40 torx. Torque for sure.
* Last updated by: Hub on 4/2/2025 @ 12:21 AM *
Tormenting the motorcycling community one post at a time