Move Close
Welcome to zx14ninjaform.com!

You are not logged in.
New Topic Reply
Next Page

Page: 1

Previous Page

Thread: How best to remove OEM license plate bracket & license light?

Created on: 01/26/19 03:33 PM

Replies: 15

JimGnitecki


Location:

Vancouver Island, Canada

Joined: 01/14/19

Posts: 326

How best to remove OEM license plate bracket & license light?
01/26/19 3:33 PM

I have an inexpensive Chinese license plate bracket with license plate light coming via Amazon, so I cna get rid of the OEM plastic fender. The ad said no instructions are provided since the install is "easy".

That may be true for the install. BUT:

1. What's the easy & smart way to remove the OEM bracket and light without disassembling more of the ZX-14R tail than I need to?

2. I want an OEM-like install with "factory" connector for the licesne plate light. I don't know if the new light comes with the right connector, or just 2 non-terminated wires. The service manual wiring diagram says the license plate light connector is the one with the Black/Yellow and Red wires. Would I be able to get that connector at the Kawasaki dealer, or will I need to order one from somewhere? If I need to order one, where from?

My Zx-14R is a 2017 model. I have the pdf service manual, but it does not seem to cover removal / reaasembly of the tail section.

Jim G


* Last updated by: JimGnitecki on 1/26/2019 @ 3:34 PM *

Link | Top | Bottom

Hub


Hub's Gravatar

Joined: 02/05/09

Posts: 13801

RE: How best to remove OEM license plate bracket & license light?
01/26/19 5:02 PM

1. I just looked at my '017 and it shows just 4 bolts, 2 for each part. The fender is injected molded so it's a one piece fender. Both plate and light are injection molded and removing those will let both of the molds stick out, meaning, don't expect a smooth rear fender.
a. Does the aftmrk light fit the 14's hole?
b. Does the plate use the same holes as the OEM?
c. If so, then it's just R&R using the same bolts over again.

2. Connector wise, I just got off the phone with Mr. Meguyveer and he said to use an aluminum soda can and bend a female end that looks like the OEM, solder the aftmrk wire on the outside of the can, slip it into the OEM male end. Then take either amazing goop glue (E6000), yamabond, 3M weather strip, some kind of glue to hold the wire in the connector. Wire connector wise, it's wire in and wire out of the bulb, so it does not matter if you swap the light, it still works both way.

Razor wise, you can slice the wire connector end and cut a square piece out. Razor the paint off the can. With the razor, fold the square so you build an open end tiny box so it winds up like the female end with 4 sides. At the open fold, lay the wire strands over that outside flap and weld it closed as you have the wire soldered to the tiny female end made.


* Last updated by: Hub on 1/26/2019 @ 5:10 PM *


Tormenting the motorcycling community one post at a time

Link | Top | Bottom

JimGnitecki


Location:

Vancouver Island, Canada

Joined: 01/14/19

Posts: 326

RE: How best to remove OEM license plate bracket & license light?
01/26/19 6:19 PM

Hub, I don't have the aftermarket kit in hand ye, so don't know yet if the aftmrk light fits the 14's hole, and if the plate use the same holes as the OEM (But I'm pretty sure it does a sit is specific to the ZX-14R).

As for the connector, I really want everything to look "factory", as the bike is a brand new "leftover" 2017 that my dealer finally decided to fire sale a week ago. So, IF the aftermarket kit does not have a proper "factory" connector, I want to get one that will plug in exactly like the factory one. My whole approach when modding a bike is to create a machine where a viewer realizes that it looks different, but cannot see anything that is obviously "not factory". I even took the "Graves" stickers off the Graves exhausts on my Yamaha R3 and my Kawasaki 125 Pro (competitor to the Honda Grom). I once did a 2010 Mustang where it took a keen observer about 10 minutes of circling the car and looking underneath to figure out that I had installed all the key power and suspension features of a Roush 427. To a casual observer, the car was as subtle as Bullit's Mustang.

I realize no one sees that power connector for the license plate light, but I couldn't forgive myself for taking any shortcut. :)

Jim G

Link | Top | Bottom

piken


piken's Gravatar

Location: Phoenix, AZ

Joined: 08/27/15

Posts: 674

RE: How best to remove OEM license plate bracket & license light?
01/26/19 7:34 PM

I guess you could reuse the oem connector and pins.

Using pin removal tool or something else, remove oem wires/pins
from oem connector.

Remove solder from pin, un-crimp pin from wire. Getting
the pins off in re-usable shape might be difficult.

re-crimp and solder new wires to pins and snap pins back
into connector.

Sounds tedious, but should be possible. Having the proper new pins
would be easier.

snip, solder and heat shrink tubing more my style.

Or dig around here....

Cycle Terminal Connectors


* Last updated by: piken on 1/26/2019 @ 7:44 PM *

Link | Top | Bottom

JimGnitecki


Location:

Vancouver Island, Canada

Joined: 01/14/19

Posts: 326

RE: How best to remove OEM license plate bracket & license light?
01/26/19 8:49 PM

Thank-you, Piken! That URL is exactly what I was hoping for. I will chekc out their offerings and compare to the OEM license plate connector.

Jim G

Link | Top | Bottom

suzy1052


suzy1052's Gravatar

Joined: 03/19/15

Posts: 140

RE: How best to remove OEM license plate bracket & license light?
01/27/19 7:40 AM

I'm like you Jim I wanted to keep my connectors OEM on my tidy tail and I figured Kawasaki uses the same connector across many models. I can't remember what bike but I'm thinking 250 Ninja OEM rear fender on ebay for less than 20 bucks shipped and snipped the male end off and spliced into the new tail wiring. That way I kept my OEM tail intact and swapped it back on when I traded.

Link | Top | Bottom

JimGnitecki


Location:

Vancouver Island, Canada

Joined: 01/14/19

Posts: 326

RE: How best to remove OEM license plate bracket & license light?
01/27/19 8:31 AM

Good idea, Suzy1052!

Jim G

Link | Top | Bottom

Rook


Rook's Gravatar

Joined: 03/28/09

Posts: 20856

RE: How best to remove OEM license plate bracket & license light?
01/27/19 5:55 PM

Everything you need to know is right here. It's not too hard.

There is a link near the end of that that will take you to the LED tag light tutorial. You probably just hook up to the connector the stock tag light goes to and that is what I did.


08 MIDNIGHT SAPPHIRE BLUE ZX-14 Now Deceased, will be resurected 2024 ZX-14R bran friggin NEW!

Link | Top | Bottom

JimGnitecki


Location:

Vancouver Island, Canada

Joined: 01/14/19

Posts: 326

RE: How best to remove OEM license plate bracket & license light?
01/27/19 6:16 PM

Rook, after reading all the "do it simpler" suggestions on that thread, I am wondering if all I need to actually do is:

- Take off the seat
- Disconnect the OEM license plate connector
- Remove the toolbox
- Move (but don't disconnect) the ECU and relay pack
- Remove the 2 forward fender bolts
- Remove the 3rd (rear) bolt from under the fender. MIGHT have to get a 10mm shorty wrench onto the nut from the area normally occupied by the tool box, ECU ands relay pack, but might not even need to do that.
- Thread the OEM license plate light wiring cable down and out along with the OEM fender
- Install aftermarket license plate mount to the 2 forward bolt hole locations
- Connect the LED license light on the aftermarket license plate mount to the OEM license plate connector, provided that the aftermarket kit comes with the right connector. Otherwise BUY a make OEM connector.

Have I got this right?

Is it potentially possible to reach both of the forward bolts without even moving the toolbox, ECU, and relay pack, if I am not concerned about recovering the nut and washer from the 3rd (rear) bolt?

Jim G


* Last updated by: JimGnitecki on 1/27/2019 @ 6:18 PM *

Link | Top | Bottom

Rook


Rook's Gravatar

Joined: 03/28/09

Posts: 20856

RE: How best to remove OEM license plate bracket & license light?
01/28/19 2:14 PM

You have the general routine outlined up there pretty much how I did it in my tutorial.

Is it potentially possible to reach both of the forward bolts without even moving the toolbox, ECU, and relay pack, if I am not concerned about recovering the nut and washer from the 3rd (rear) bolt?

The toolbox must come out, I'm pretty sure.

If the bolt turns and the nut sticks, I guess you don't need to retrieve the nut.

You will need to at least lift up on the ECU to pull the OEM tag light connector under it and through the hole in the mudflap. This is pretty rough treatment, I'd rather pull the ECU and relay box out of the boot. It is not hard to do that. No need to pull the plugs. Otherwise, cut the OEM tag light wire and pull it out. There you have a wire with a connector to solder up to for your LED. I hate to destroy the OEM equipment.


08 MIDNIGHT SAPPHIRE BLUE ZX-14 Now Deceased, will be resurected 2024 ZX-14R bran friggin NEW!

Link | Top | Bottom

JimGnitecki


Location:

Vancouver Island, Canada

Joined: 01/14/19

Posts: 326

RE: How best to remove OEM license plate bracket & license light?
01/28/19 3:44 PM

Ok, makes sense. I too hate to destroy OEM stuff.

Jim G

Link | Top | Bottom

JimGnitecki


Location:

Vancouver Island, Canada

Joined: 01/14/19

Posts: 326

RE: How best to remove OEM license plate bracket & license light?
02/04/19 3:24 PM

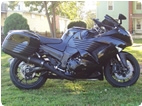
I did the install this morning. It turned out to be pretty easy except for the wiring connector:

First, I disconnected the tail light wiring at its connector under the seat.

I unbolted the toolbox, which exposed the 3 bolts that hold the "outer" rear fender (There is a much longer "rear fender" mounted above that on the Gen 2 ZX-14R that goes down to near the swingarm pivot - you leave that alone!).

All 3 bolts can out pretty easy (using a 10mm open end wrench on the nut for the 3rd bolt as Rook suggested) and this left the fender held in place by only the license plate light wire. I was able to pull that wire rearward from its connection to the OEM harness, and get it under the metal "crosspiece" that is routes under. But, it got stuck under that crosspiece, because the distance between the crosspiece and the "longer' rear fender was too shallow for it to pull through! However, by manipulating the wire towards the LH side of the bike, I was able to reach a spot where the clearance was better, and the connector successfully pulled through.

Then I was able to pull the wiring with its connector easily through the hole in the longer fender through which the wire is threaded to reach the license plate light.

I assembled my new fender eliminator kit which is in reality simply a license plate mount with an LED license plate light, and was able to bolt that into the 3 same holes as the OEM outer rear fender bolted into. I used the new bolts, washers, and nylon lockring nuts that came with the kit, so no need for Blue Loctite.

The only setback was that while the kit includes enough wire liength to reach the OEM license plate connection point, the kit did NOT include a conenctor that would plug into the OEM conenctor. Instead it included a pair of "suitcase" connectors, which would have required destroying the OEM license plate harness a few inches rearward of the OEM connector. I did not want to do that.

So, I left the new license plate light wire pair unterminated with some tape sealing it. In the next day or two, I'll take the OEM license plate harness to my local dealer, and see if I can buy the correct connector in the parts department. If so, there is one sales rep at the dealership who knows how to properly insert wires into OEM connectors, and I'll pay him to do that for me. If the dealer does not have the connector for sale, I'll need to go to an automotive electrical supplier to seeif I can find one.

Not havong the license plate LED light working is not an issue for me in the short-term, as I normally do not ride at night, especially in the winter. Hopefully, I can find and install the right connector given a bit of time. It's a simple 2-wire, weather resistant connector with a springy plastic lock/release lever that engages a square hole on its OEM harness mate - nothing complicated.

By the way, the entire factory colelction of aprts removed totals to just 1.62 lb on my Gen 2 ZX-14R, which is apparently less weight than thr 1st generation assembly.

MY replacement license plate bracket with LED light is "built rather robustly", and still comes in at just 0.95 lb, so I save 0.67 lb. :)

Jim G


* Last updated by: JimGnitecki on 2/4/2019 @ 3:26 PM *
Link | Top | Bottom

Rook


Rook's Gravatar

Joined: 03/28/09

Posts: 20856

RE: How best to remove OEM license plate bracket & license light?
02/05/19 8:13 AM

In the next day or two, I'll take the OEM license plate harness to my local dealer, and see if I can buy the correct connector in the parts department.

You might try Ebay. I'm sure there are a million rear fenders for sale cheap. Cut the plug off and solder it to your aftermarket light wire.

If you find a new male plug that will fit the OEM female, it is very easy to assemble wires to it. crimp on some contacts and insert to back of plug. The contacts lock in behind a plastic detent is all it is.

Just make sure you get + male to + female and - male to - female. Use a test light to be sure.


08 MIDNIGHT SAPPHIRE BLUE ZX-14 Now Deceased, will be resurected 2024 ZX-14R bran friggin NEW!

Link | Top | Bottom

JimGnitecki


Location:

Vancouver Island, Canada

Joined: 01/14/19

Posts: 326

RE: How best to remove OEM license plate bracket & license light?
02/05/19 8:48 AM

I live in Canada, where the population is 1/10th the size of The U.S. but the geographic size of the country is larger than The U.S.! Also, in every province except here in British Columbia, motorcycle are only usable about 6 months each year because of climate. Finally, insurance is VERY expensive. This creates the following problems for an eBay solution:

- the domestic "source of used parts" is much less than 1/10th the size of The U.S.
- Shipping costs are ridiculous for everyone except Amazon who has negotiated volume deals with shipping companies and The Post Office (It seems like tiny, lightweight parcels shipped in Canada cost $10 and up)
- We pay national and provincial sales taxes totaling 12% on all imports, plus an import fee, and we do it all using a Canadian dollar that is worth $0.76 US right now

This all makes the dealer's parts department a more likely source.

But I will give eBay.ca and eBay.com a try . . .

IF I knew how to properly identify the connector in "applicable standard electrical connector industry terminology", I could order online from an electrical supply house as another potential channel, but I lack that knowledge and don't want to acquire it for a one-time purchase!

This is one of those situations where you hope the local dealer has one of these lying around. :)

Jim G

Link | Top | Bottom

JimGnitecki


Location:

Vancouver Island, Canada

Joined: 01/14/19

Posts: 326

RE: How best to remove OEM license plate bracket & license light?
02/05/19 1:53 PM

Well,local dealer says that while kTM sells replacement connectors for its bikes, Kawasaki and Yamaha do not. I would have to buy the whole license plate light assembly!

Online searches came up with a few available pre-used license plate lights, but their cost, plus shipping, was way too high.

So, the best solution turned out to be:
- Cut the OEM connector with a few inches of OEM wire still attached
- Use heat-shrink waterproof connectors to join the above connector and wires to the wires from the new license plate light.

Unfortunately, this makes the OEM license plate light worthless, but it's better than trying to butcher the OEM bike harness to splice in the new light's wires.

I've ordered the high tech heat shrink conenctors, whose maker promises that when they are heated, they:
- bond the 2 conductor wires being joined to each with a conductive adhesive
- seal the connection with a waterproof polymer at each end
- tightly bond the insulating layers of the 2 wires so they cannot separate
- contract when heated to take out unfilled air space.

Sounds good to me, as it leaves the new license plate light connected to the oEM harness in exactly the same way as the OEM light was connected.

Jim G

Link | Top | Bottom

Rook


Rook's Gravatar

Joined: 03/28/09

Posts: 20856

RE: How best to remove OEM license plate bracket & license light?
02/06/19 6:54 AM

Also, in every province except here in British Columbia, motorcycle are only usable about 6 months each year because of climate.

I have heard about the ridiculous cost of importing stuff to Canada. Also, the extremely strict speeding laws!! To bad Romans wasn't still around the forum. He would set you up with a connector I'm sure. I believe he lived near Toronto.

IF I knew how to properly identify the connector in "applicable standard electrical connector industry terminology", I could order online from an electrical supply house as another potential channel, but I lack that knowledge and don't want to acquire it for a one-time purchase!

I came across this site a while back but I don't see anything that looks like the tag light connector.

- Cut the OEM connector with a few inches of OEM wire still attached
- Use heat-shrink waterproof connectors to join the above connector and wires to the wires from the new license plate light.
Unfortunately, this makes the OEM license plate light worthless, but it's better than trying to butcher the OEM bike harness to splice in the new light's wires.

I would simply hook it up the way I did. Crimp a very small contact onto each of the ends of the tag light wires and slide the contacts in. You will need to file the contacts narrower and sandpaper them a bit thinner but they can be made to fit like the prongs in the OEM plug. Then tape it up. Nothing cut-all easily restored to OEM.

OR

Get some positaps and screw them down on the OEM wires. I would steer clear of the Skotchlok kind that slice into the wire like a guillotine. Positaps pierce a pin hole and that is plenty for a low draw like an LED. I've used both and had no problems but the Skotcklok type undoubtedly are more invasive and likely to cause problems down the road.


* Last updated by: Rook on 2/6/2019 @ 6:57 AM *


08 MIDNIGHT SAPPHIRE BLUE ZX-14 Now Deceased, will be resurected 2024 ZX-14R bran friggin NEW!

Link | Top | Bottom


Welcome to zx14ninjaform.com!
 
New Topic Reply
Next Page

Page: 1

Previous Page

New Post

Please login to post a response.