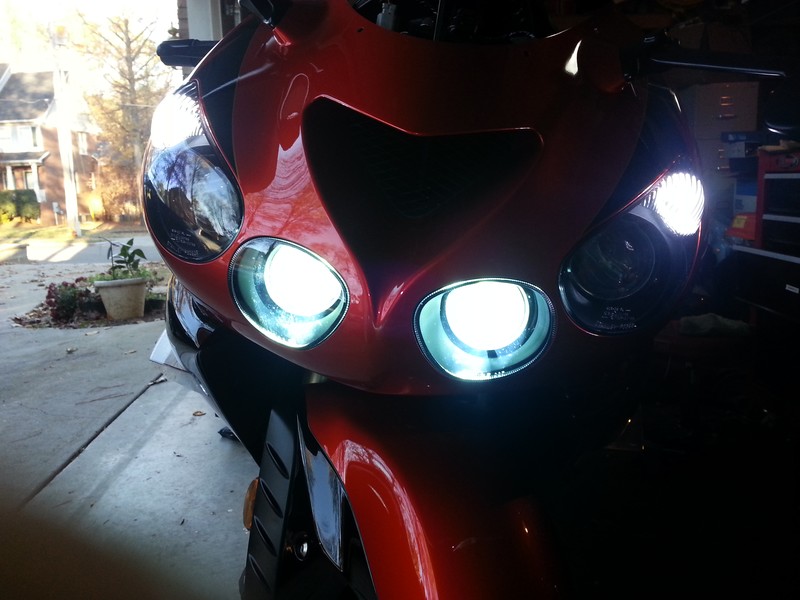
Nasty recently installed a set of HIDs on his motorcycle he wanted to share with y'all.....

For the latest installment of "Nasty's Ballin' on a Budget" I replaced all four headlights with 6000k HIDs. I bought the quad HID kit from coremoto.com for $130 plus they threw in some LED lamps for the marker lamps for free. I chose to go with the 6000k for a much brighter, whiter light for night time driving since I live in the middle of nowhere filled with tons of wildlife that likes to run out into the middle of the road at night. So far I have no idea if it's better or not. Lol! It's still the middle of winter and tons of ice on the roads. My main reasoning for sharing this quick little "how-to" is because my HID kit came with no instructions so I had to figure it out through trial and error. Hopefully this thread can help some of you down the road. I will also show where I mounted the ballasts. For this install I highly recommend removing all the fairings including the plate under the headlights, it will make access to the headlights much easier and it will be easier to find places to hide your ballasts.
The 6000k quad kit for zx14.
Two H11 bulbs for dims(center lights)
Two H9 bulbs for brights(outer lights)

The free LED lamps. I chose pink for something different. These were the easiest to install

The bulbs came with a white washer around the bottom, but as I quickly found out, they will not fit into the socket with the current arrangement. Once I removed the white washer and moved the rubber gasket down into its place it fitted right into the socket with out any trouble.


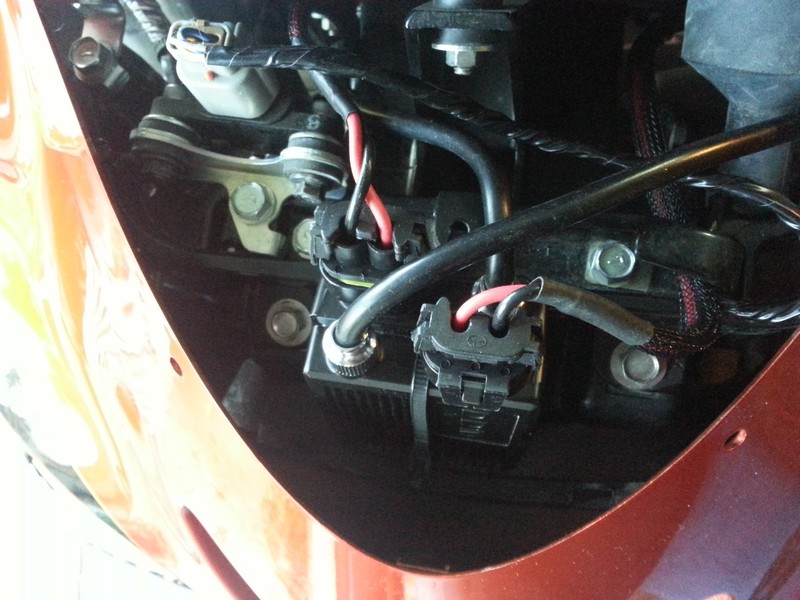
Hopefully this image is self-explanatory. You can't get the ballast side wrong, there is only one way they will plug in.


The black and yellow wire on the original plug from the bike is your ground wire, plug your black terminal here, the red goes in the remaining side.


I placed one ballast behind the windscreen. I used double sided tape to hold it in place. I was hoping to get two in there but that wasn't happening.

I placed one ballast on each of the ram air tubes. I used the clip for the turn signal wire for added security along with the double sided tape.


For the remaining ballast I taped to the inside of the fairing. I really tried to keep from installing the ballast in the fairings just to keep disassembly simple and not have to unplug 30 wires every time I remove the plastics but there is very little room for good places to mount the ballasts.

Install was pretty straightforward. Just make sure you secure everything and you have the right wires going to the right places. The original wiring harness is simple. The blue plug(short wire) goes to you highs, black(long wire)to your lows.
If you have any questions let me know, I'd be more than happy to help in anyway I can.

* Last updated by: Cornelius on 2/7/2014 @ 3:06 PM *
