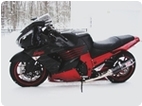


Step 1: Carefully remove two exhaust covers per side and the heel guards.
Step 2: I sprayed with lighter fluid to degrease and allowed to sit.
Step 3: Wash all parts thoroughly with warm soapy water and dry with paper towlels until completely dry. At this time I cleaned all of the screw threads thoroughly with a soft wire brush and a little wd-40.
Step 4: I fashioned simple hangers out of coat hangers so as not to disturb the paint between coats.
Step 5: I did 5 coats lightly, each coat holding the can about 8-9 inches away from the part and using even strokes.
Step 6: Hang using the coat hangers for ten to twelve minutes between each coat. The lighter the coat the better, just be sure to lightly cover the object each time and by the fourth or fifth coat you will notice a nice even sheen.
Step 7: When you notice that nice even sheen, Stop re coating. You can add another coat later if necessary.
Step 8: Allow to dry overnight and re assemble being careful not to ding anything or scratch any paint. Slow deliberate movements when assembling my baby! :))
Note: on torque - if doing little jobs like this is unfamiliar and you don't want to strip a bolt, just when you feel it start to tighten, apply a firm amount of pressure till you feel it firm in, then stop. Practice how it feels with an aluminum nut and bolt in a vise, then a steel nut and bolt, then mix em up. The different materials will feel and seat differently. I still do this now and then to re-familiarize myself with not over torquing things. When in doubt always use a torque wrench and follow book spec on torque. This is just how I do it when working on something like my exhaust cover. Valve cover is a different story! :)))
* Last updated by: Cblast on 4/21/2013 @ 12:24 AM *
Disciple of the 14R
Vincit Qui Patitur
Predator Race Team #23 - Priscilla ~ 118.85 ft.lbs. of TORQUE
Call to get CBLASTED • 360-649-8047
PredatorRaceTeam@gmail.com


