


Front and Rear Brake Line Replacement
The idea behind routing your new brake lines is to avoid situations that will cause abrasion. Rout the new lines so there will be as close to 0 contact against any moving or vibrating parts as possible.
Aftermarket brake lines may have banjo bolts that are light weight but far inferior in strength to the OEM banjo bolts. Care should be taken to not over-tighten the aftermarket banjo bolts. They should be checked for leaks and tightened if necessary.
Brake fluid can be harmful to painted or unfinished metal and plastic. Take precautions to avoid contact with anything outside of the brake system. Always wipe up drips and wash thoroughly with water soon afterward.
Rear Brake Line Removal
DO FIRST:
Purge all the old fluid before removing the line. Follow steps 1 through 3. Do not replenish fluid. Purge until no fluid comes out.
BRAKE FLUID BLEED AND PURGE
Tools
drip pan
bucket of water and wet rag
12mm socket
rag
5mm hex tool socket
6mm hex tool socket
10mm socket
P-clip
Rear Brake Line
1. Using a 5mm hex tool, remove screw from swing arm bracket and forward part of brake line retainer.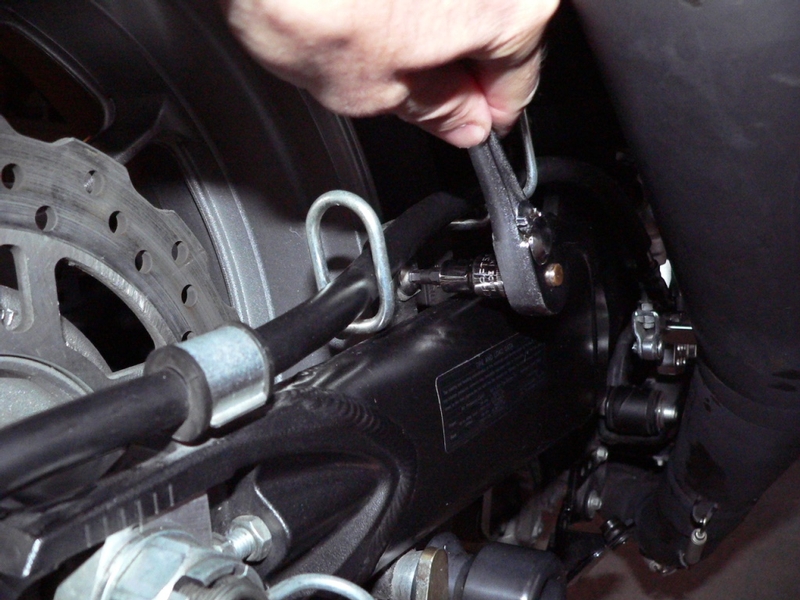
2. Use a 10mm socket to remove the bolt that attaches the rear portion of the brake line retainer. 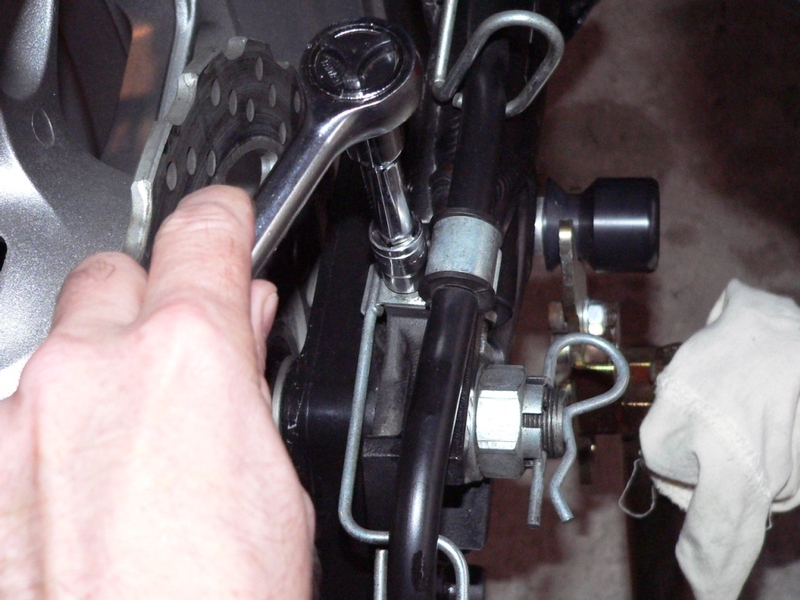
3. Place drip pan under the rear master cylinder brake line coupling. Have a water bucket prepared in case any brake fluid splashes or drips on painted surfaces.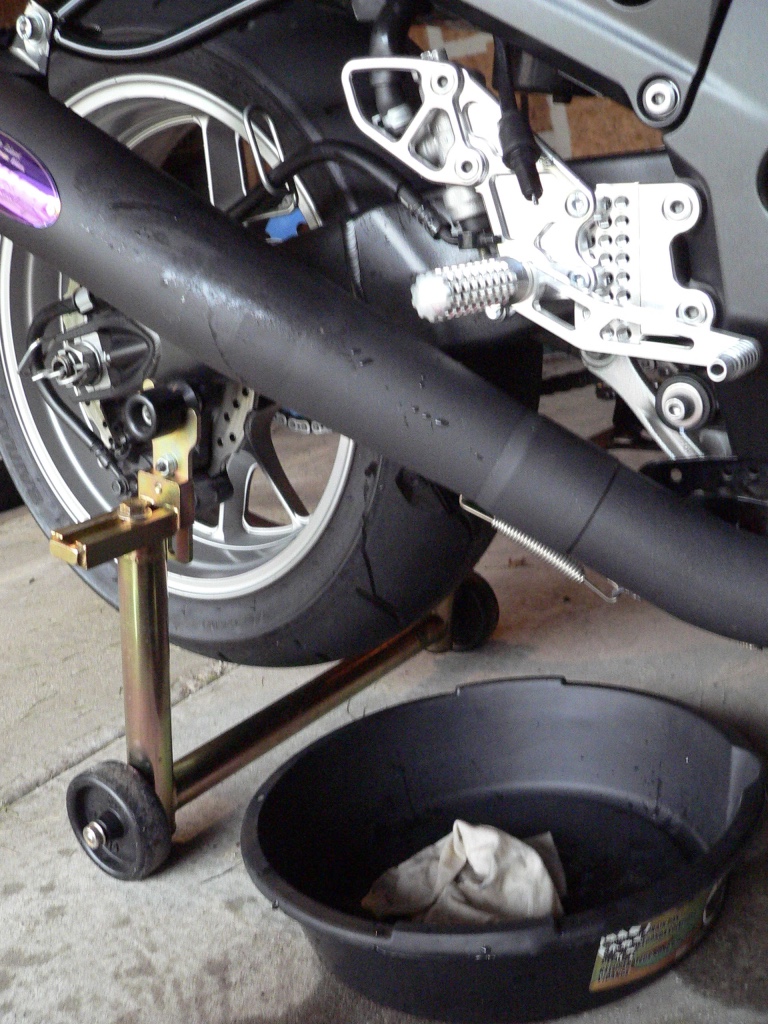
4. Remove the banjo bolt, gaskets and ring coupling from rear brake master cylinder using a 12mm socket.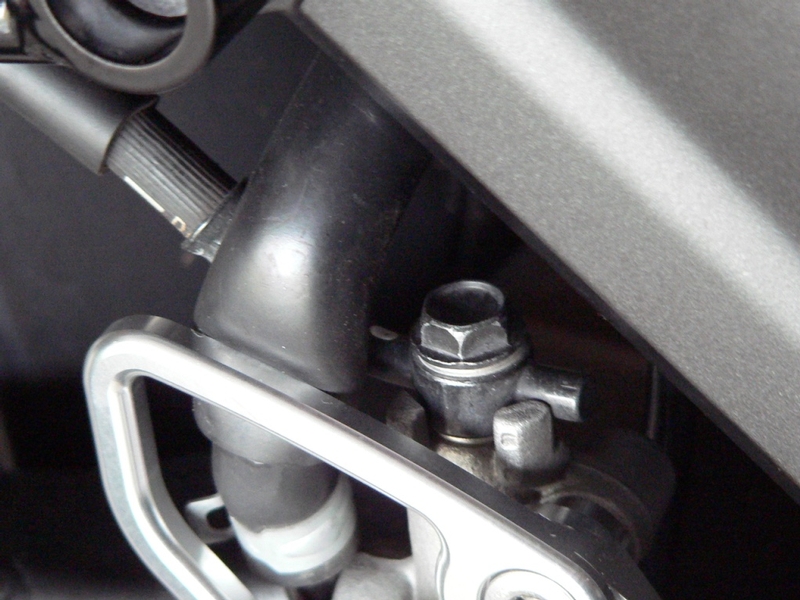
5. Place the drip pan under the rear brake caliper. Use a 12mm socket to remove the banjo bolt, brake line ring coupling and gaskets from the rear brake caliper.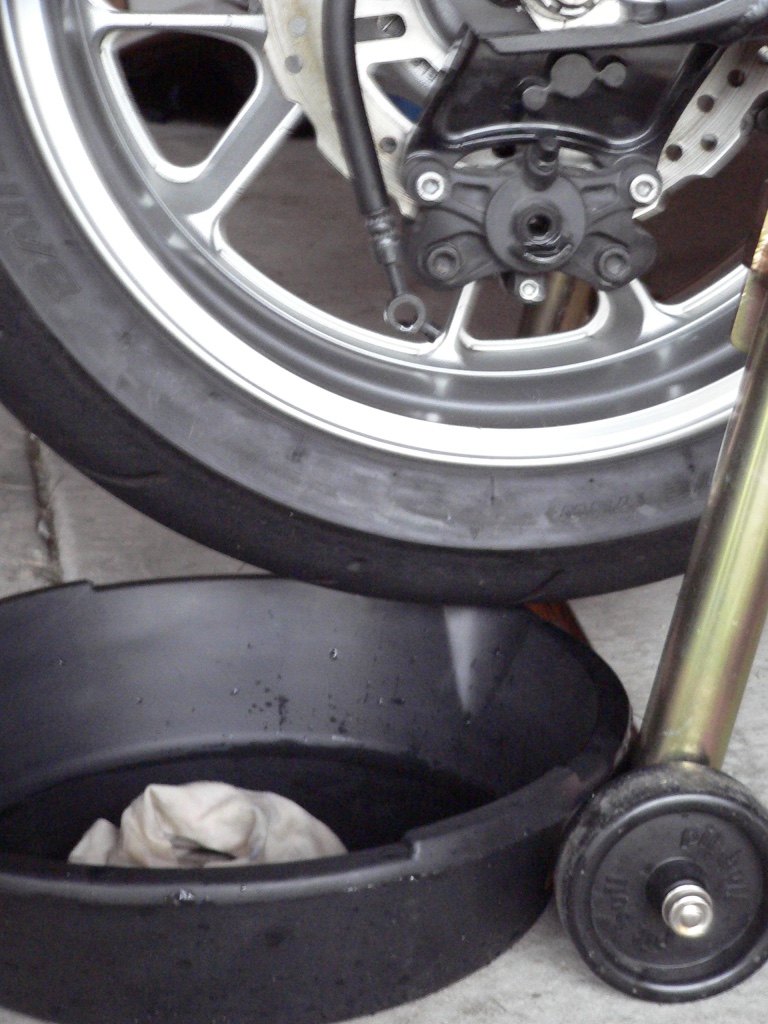
Rear Brake Line Installation
Other than routing and banjo bolt specifics, follow the same procedures described below for installing an OEM rear brake line.
6. Loosen bolts on master cylinder using a 6mm hex tool socket. This will allow for more space while connecting brake line ring coupling to master cylinder. 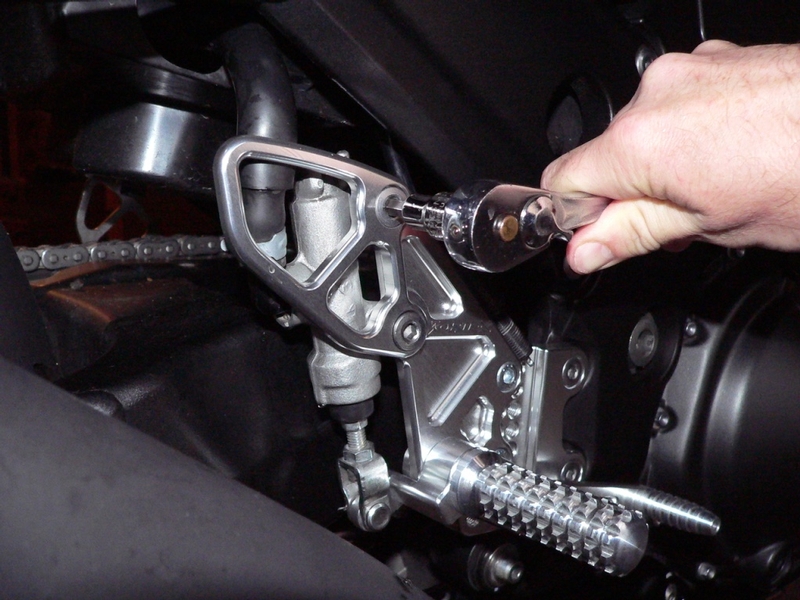
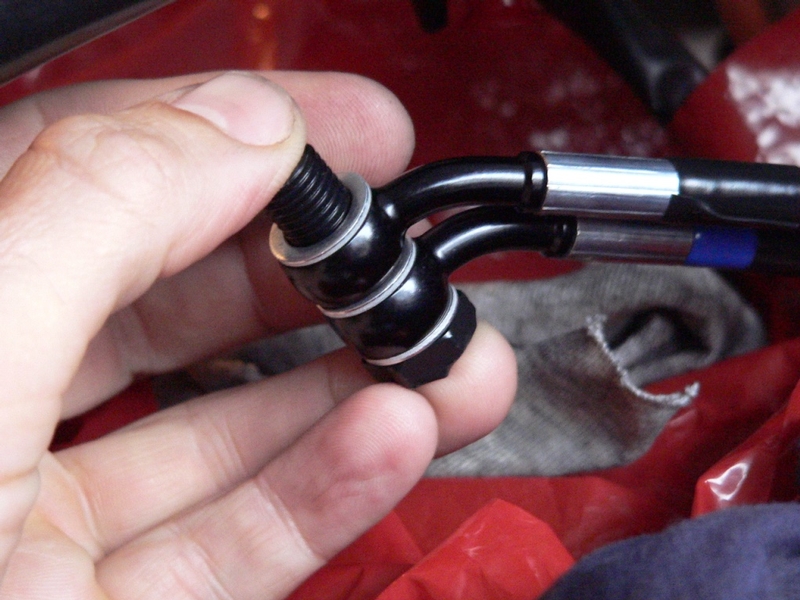
7. Locate new brake line ring coupling with the curved stem. Properly arrange new
gaskets and new banjo bolt. 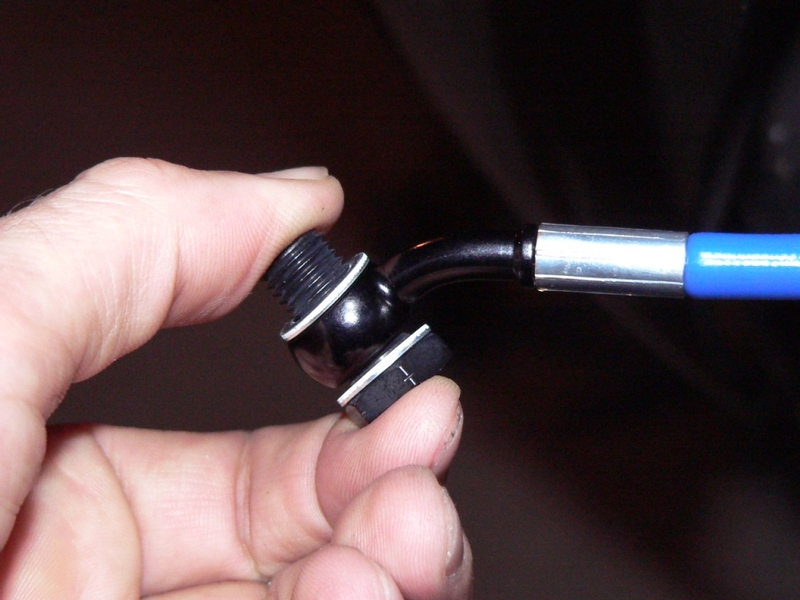
Thread banjo bolt finger tight into hole in top of rear brake master cylinder.
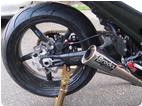
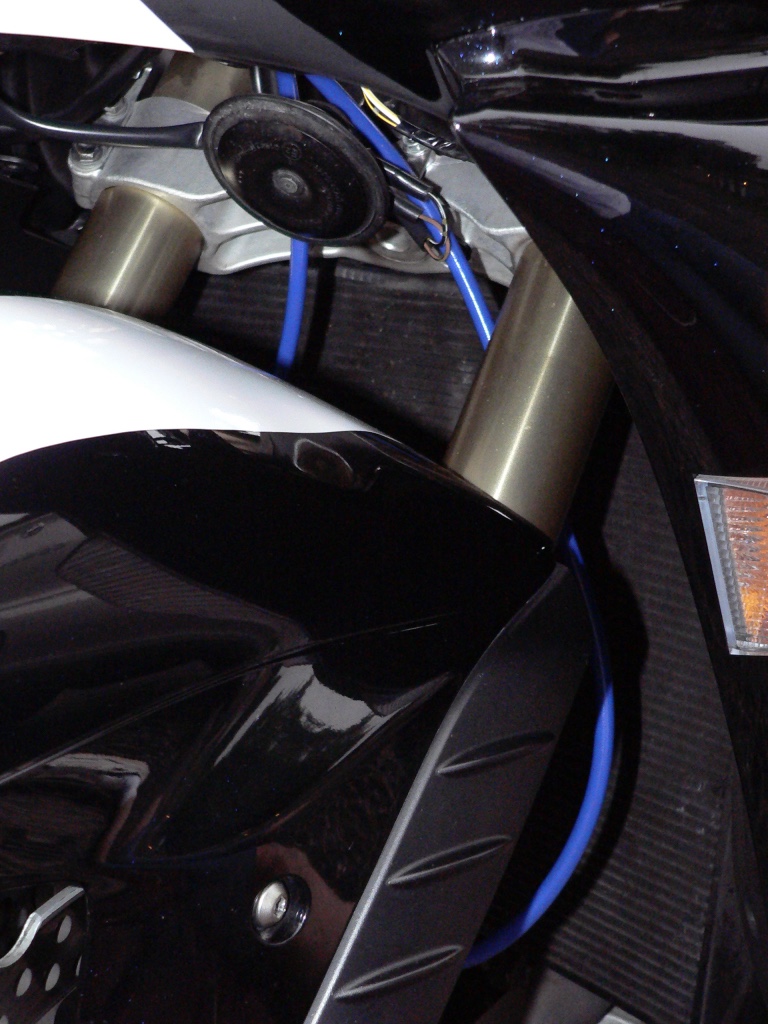
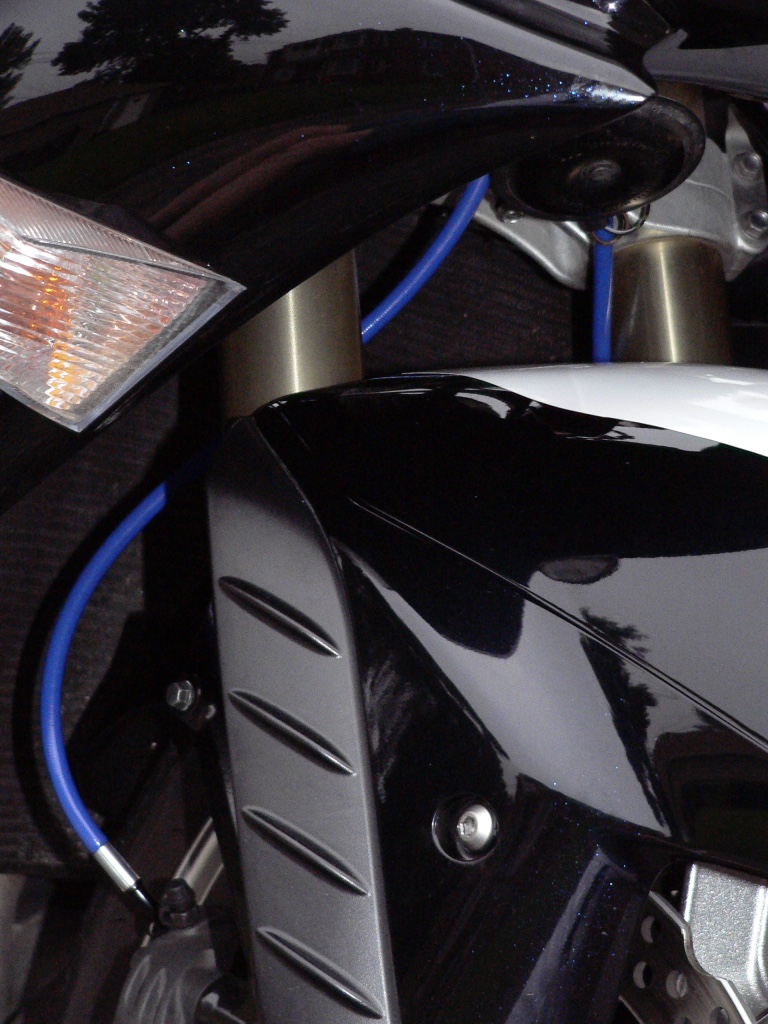
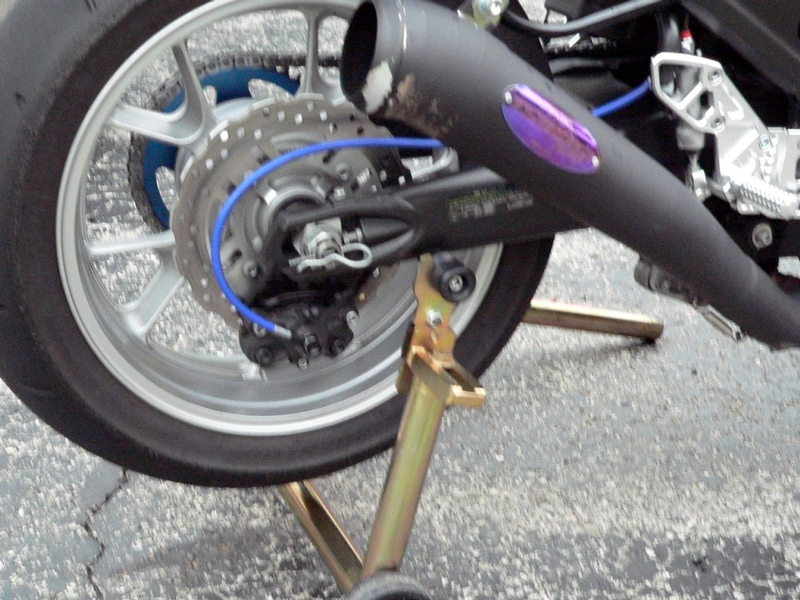
The line is properly installed so that it angles up away from the swing arm. I chose to put the ring coupling on upside down because I feel the line looks better close to the swing arm.
If installed as shown below, the line will touch the swing arm when the rear suspension contracts enough. The paint scuffed off of the swing arm in one spot but the line is undamaged after 25000 miles of use.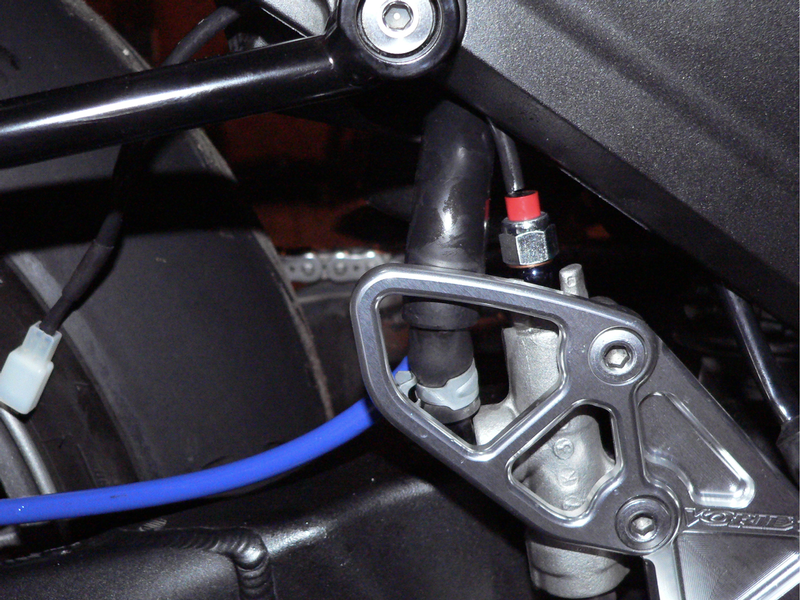
I have installed a rear brake pressure switch which also serves as a banjo bolt (see REAR BRAKE SENSOR REMOVAL, steps 4 and 5).
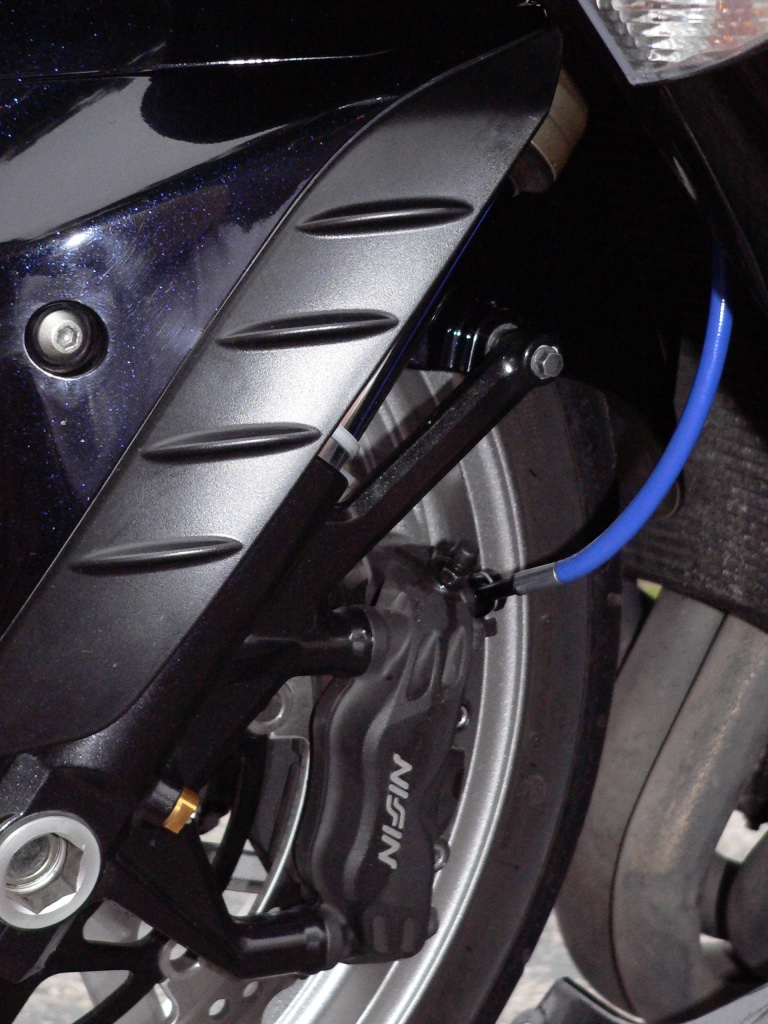
8. Connect ring coupling with straight stem to rear caliper using new gaskets and a banjo bolt. Tighten banjo bolt hand tight. Arrange the angle of both ring couplings so that the new line is routed safely.
Use a 6mm hex tool to tighten the master cylinder to the heel guard.
Torque - Rear Master Cylinder Mounting Bolts: 18 ft lb
9. Carefully tighten both banjo bolts with a socket (may have different sized hex than OEM banjo bolts, mine were 14mm) according to what material they are made of. The lightweight banjo bolts that came with my Goodridge lines seemed too delicate for the 18’ lbs torque spec for stock banjo bolts. I observed them for leakage and tightened as necessary. 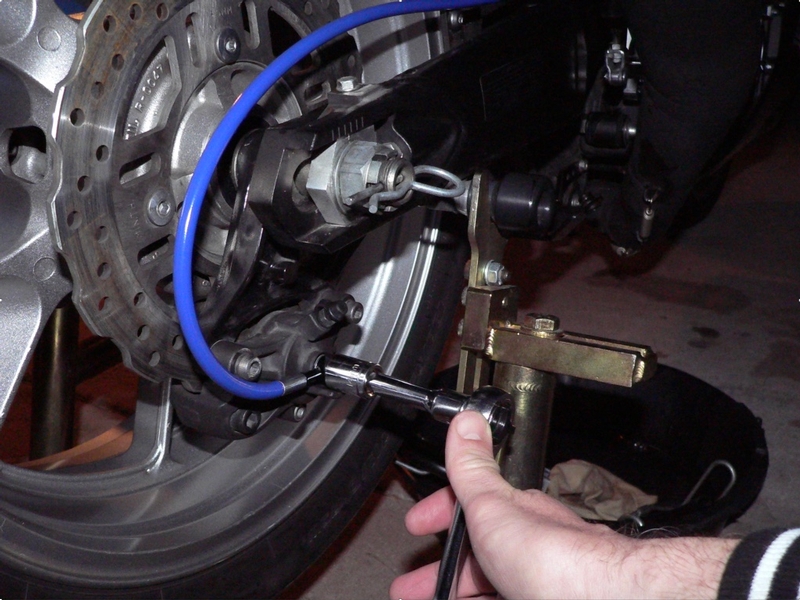
Bleed entire rear brake system (see steps 1 through 18 of BRAKE AND CLUTCH BLEED AND PURGE
I consider reinstalling the rear brake line retainer optional. I have no issues running an aftermarket line installed as shown above without the rear brake line retainer. I use a P-clip fastened to the bolt tab for the OEM rear brake line retainer to secure the aftermarket line.
For installation of the rear brake line retainer bolts, refer to Basic Torque for General Fasteners, p 2-13 of the Gen 1 service manual.
Front Brake Lines Removal
DO FIRST:
Purge all fluid from the front brake system. See BRAKE FLUID BLEED AND PURGE, steps 22 through 24 followed by step 36. Do not replenish fluid. Purge until no fluid comes out.
Remove upper inner fairing and right ram air cover. Remove brake line retainer rings from the front fender. I found it made the brake line work easier to remove the front fender but this is not essential. See FAIRINGS Upper Inner Fairing, Right Ram Air Cover and Front Fender.
Remove the Horn. steps 1, 2 and 3 - HORN REMOVAL
Remove the steering stem cover - steps 1 and 2 - STEERING STEM COVER
Tools
10mm socket
plastic bag and rags
galvanized wire
drip pan
rear stand
front steering stem stand
10. Use a 10mm socket to remove the Brake line block from the triple tree. 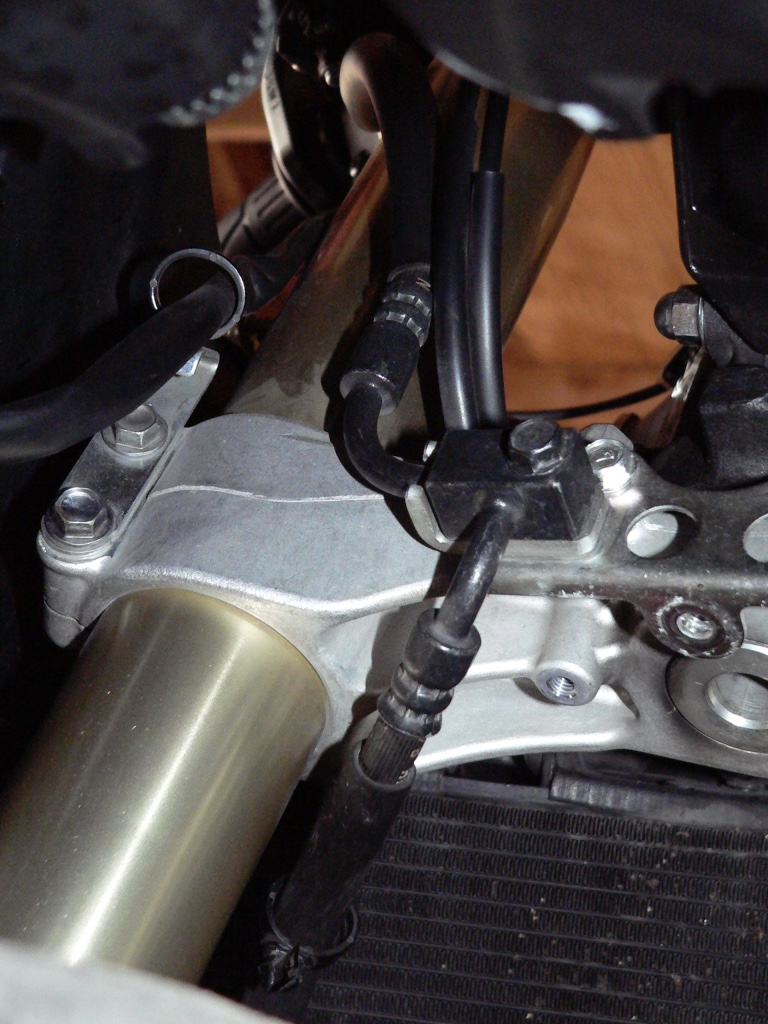
If installing aftermarket brakes, you may use a10mm socket to remove the two screws that hold the front brake line block bracket to the front of the forks bracket. After market lines do not have the block fitting so the bracket is no longer needed.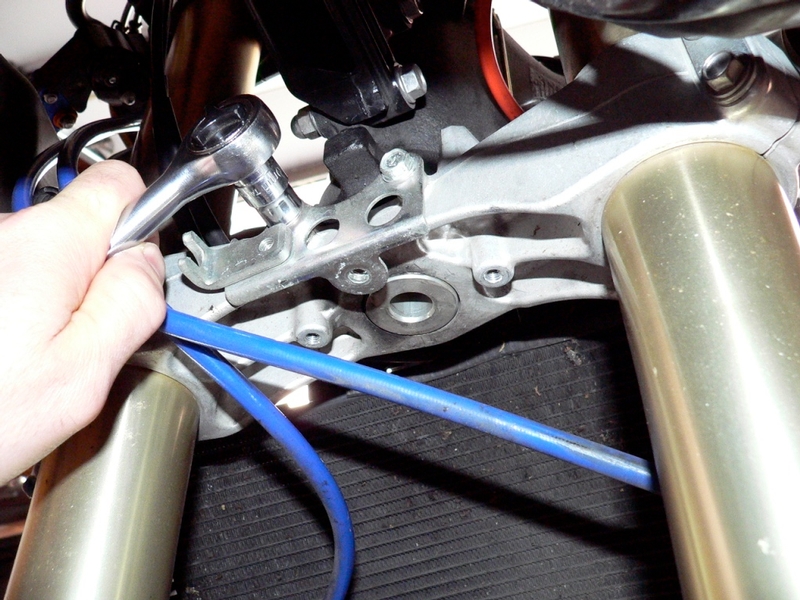
11. Place a plastic bag and rags under the front master cylinder to catch and absorb any drips. Use a 12mm socket to remove the banjo bolt along with the two gaskets and the ring coupling from the bottom of the front brakes master cylinder. Brake fluid will drip from the master cylinder. 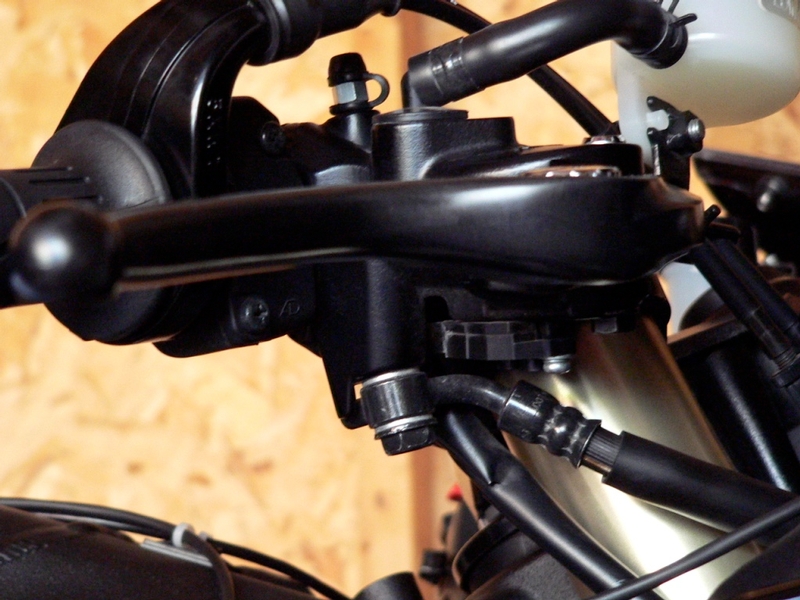
12. Place a drip pan under the right front brake caliper. Use a 12mm socket to remove the banjo bolt, 3 gaskets and 2 ring couplings. 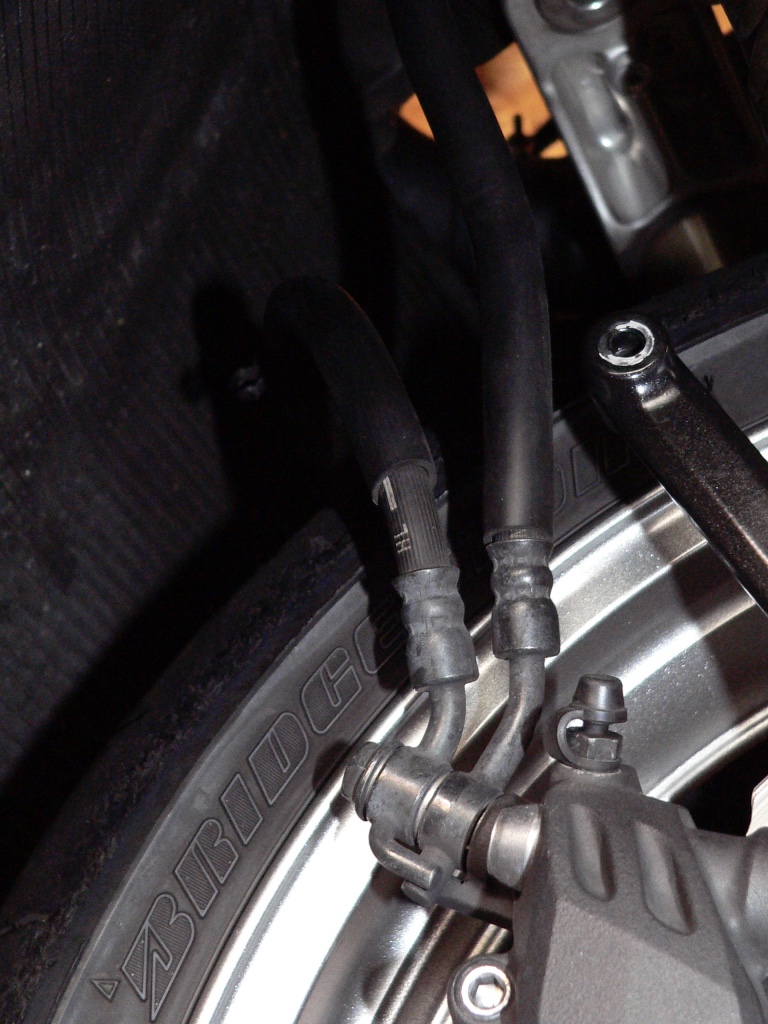
13. Place a drip pan under the left brake caliper. Use a 12mm socket to remove the
banjo bolt, 2 gaskets and ring coupling from the left brake caliper.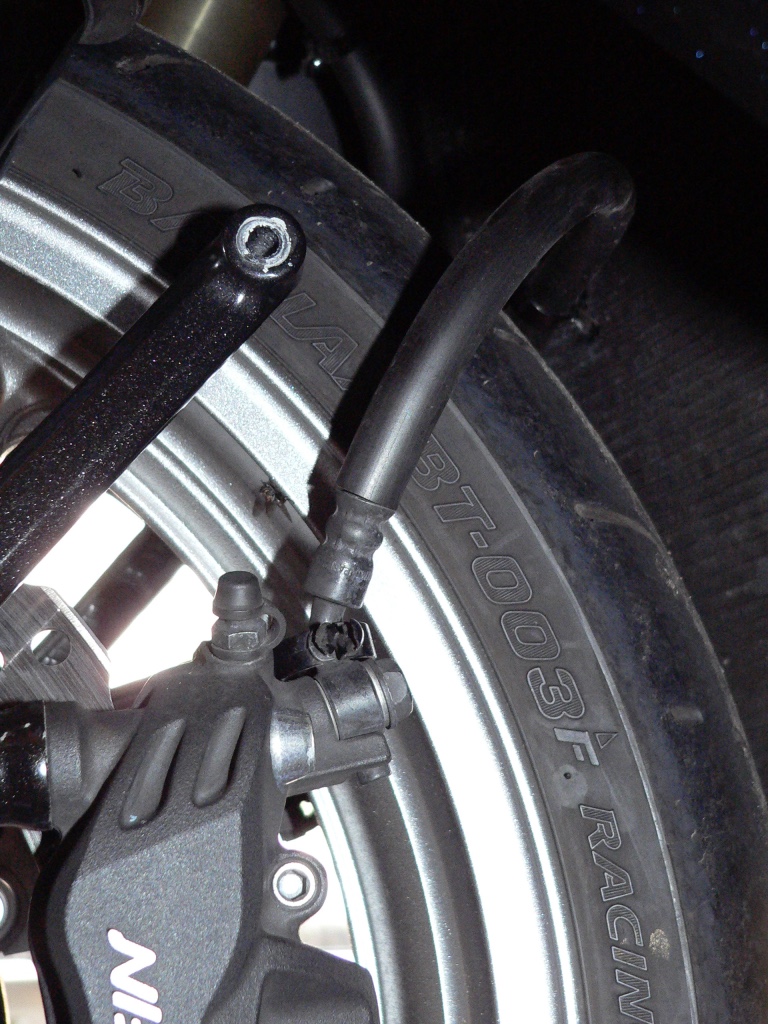
Front Brake line Installation (2 line configuration)
Other than routing and banjo bolt specifics, follow the same procedures described below for installing OEM front brake lines.
14. Arrange the 3 new gaskets and 2 ring couplings of the new brake lines on the long banjo bolt. It does not seem to make any difference if the left ring coupling is on top of the right or vice versa as long as the longer hose is routed to the left caliper.
Tighten the banjo bolt hand tight.
Before starting to install the new lines, I did my best to determine how the
natural bends to the lines would most effectively be used to rout the lines to minimize contact with other parts.
The new brake lines are routed as shown in the diagram below. Note that left line is longer than the right line. 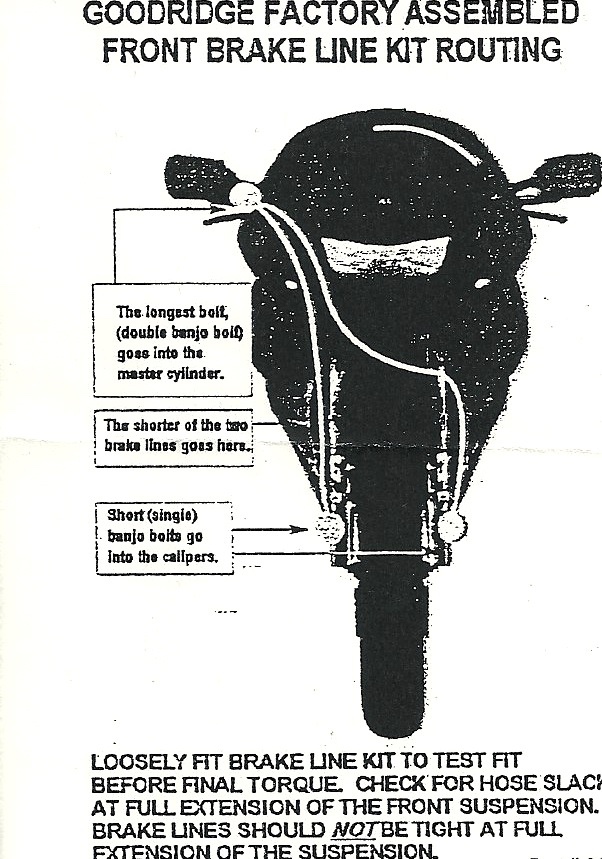
15. Arrange 2 new gaskets, ring coupling and banjo bolt that that will connect to the right front caliper. Thread banjo bolt in hand tight. Perform the same procedures for the left front caliper. There may seem to be a slight twist in the lines when they are positioned at the locations where they connect to the calipers and master cylinder. This is normal and adds rigidity to the lines. 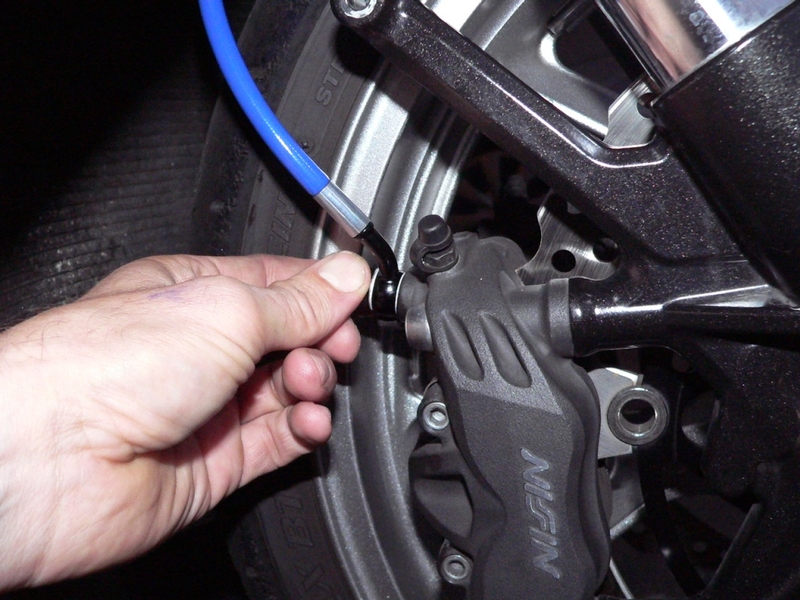
Reinstall:
step 4 - HORN REMOVAL
step 3 - STEERING STEM COVER
Upper Inner Fairing, Right Ram Air Cover, Brake Line Retainer Rings if a three line system was installed, Front Fender. See FAIRINGS Upper Inner Fairing, Right Ram Air Cover and Front Fender.
16. Lift the bike on a rear stand and a front steering stem stand so that front suspension is fully extended. Check that length of new brake lines is adequate for full extension. Turn steering from lock to lock and adjust alignment of couplings until as little contact with surrounding parts as possible is achieved. Snug up all three of the the banjo bolts when the desired angle is found.
17. Carefully tighten all banjo bolts with a socket (may have different sized hex than OEM banjo bolts, mine were 14mm). Stock banjos are torqued to 18 ft lbs. Aluminum banjos should probably have about 12 ft lbs.
Bleed entire front brake system (see steps 19 through 43 of BRAKE AND CLUTCH BLEED AND PURGE. Observe the couplings for leaks and use judgement to tighten them according to what material they are made out of.
The lines will touch the horn if it is reinstalled to the triple tree. The lines may be temporarily wrapped in tape to protect them from abrasion. Using some sort of plastic tubing or hose is a more permanent precaution. I left the steering stem cover off and have had no problems operating the bike. I intend to remove the horn as well.
It’s hard to say if the Goodridge lines I installed improve braking power by themselves. Unless you ride 2 up or pull a trailer with the bike, the stock breaks will probably never get used to maximum potential. So I am happy with the weight reduction, increased durability and improved appearance.
Weight
OEM rear with brake line retainer 11.65 oz 
OEM front 15.35 oz 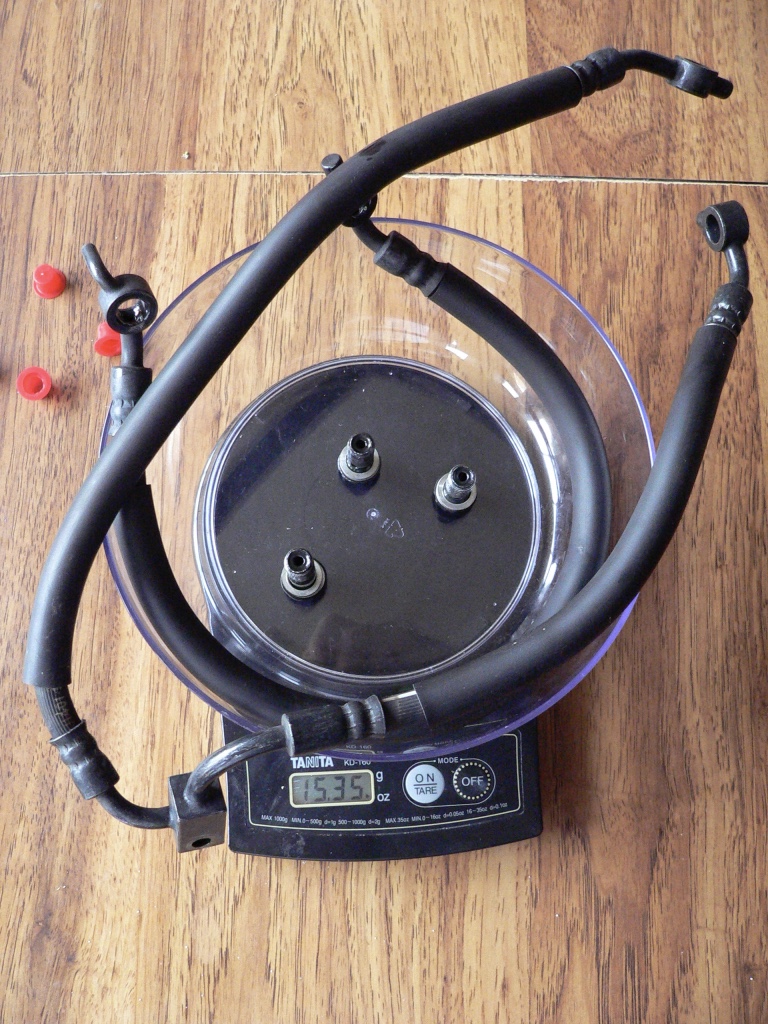
Brake Block Bracket 2.55 oz 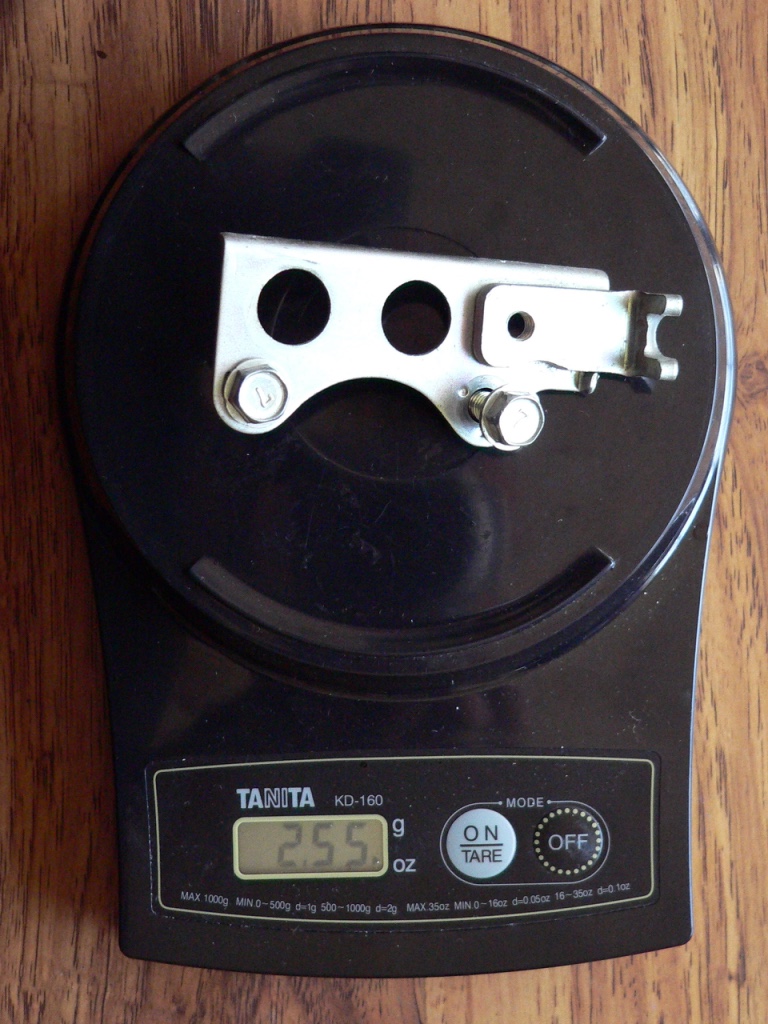
Total 1 lb, 13.55 oz
Goodrigde Rear 2.15 oz 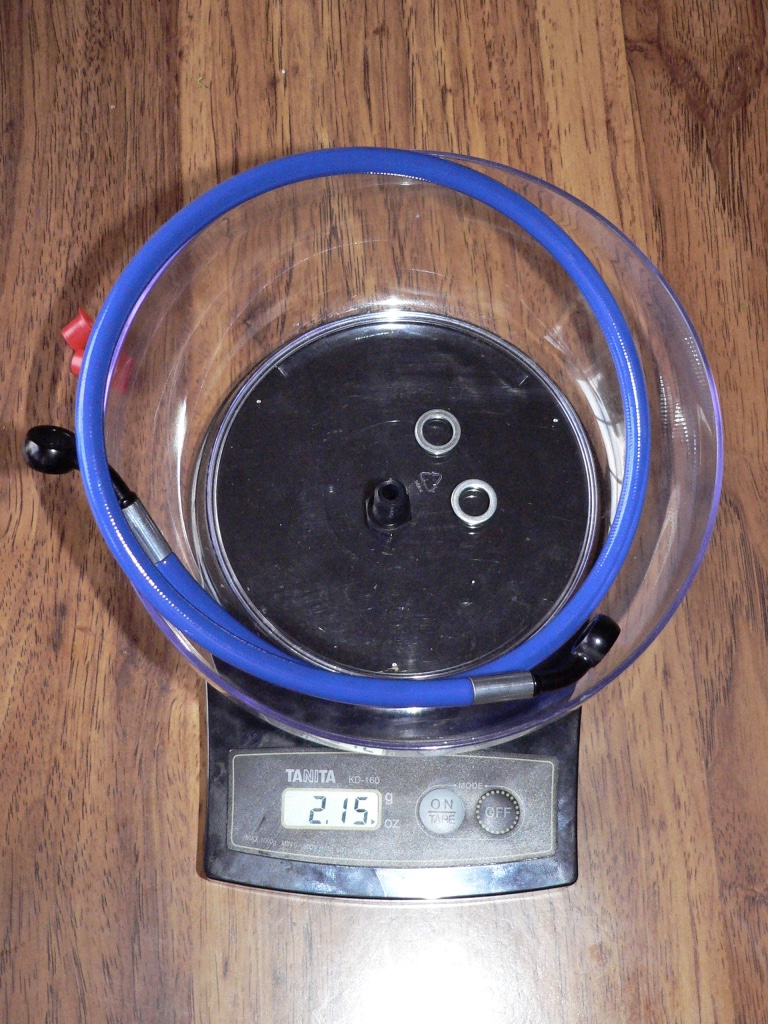
Goodridge front 4.60 oz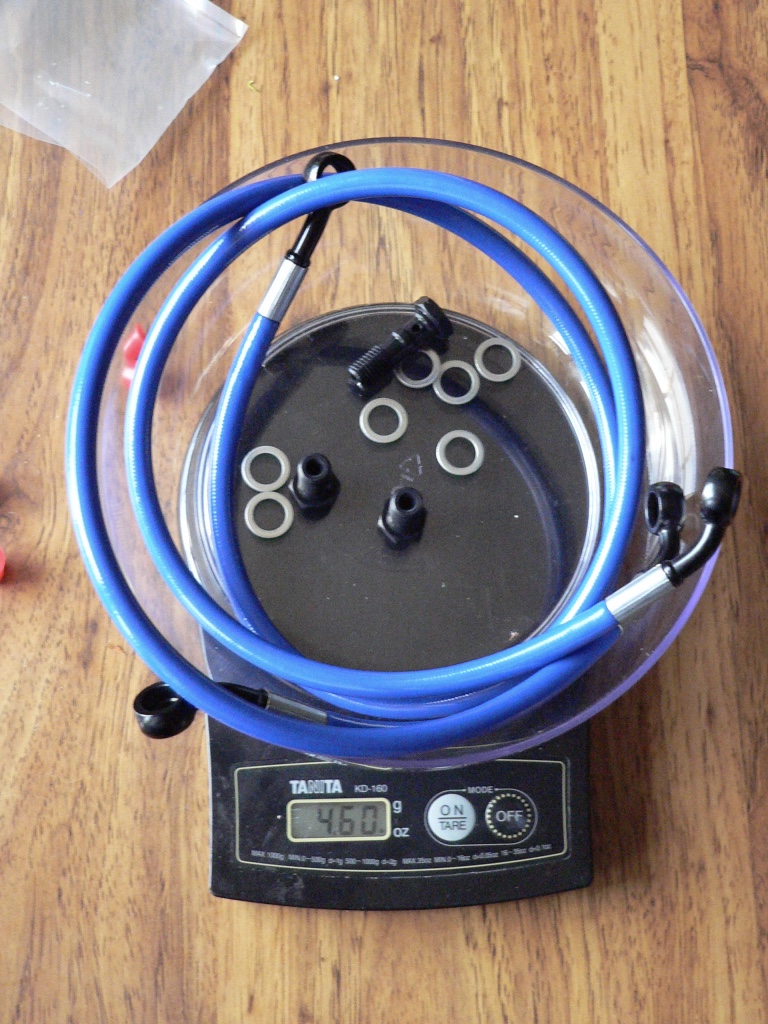
Total 6.75 oz
Net weight loss:
1 lb, 4.25 oz
* Last updated by: Rook on 2/3/2018 @ 10:22 PM *