Move Close
Welcome to zx14ninjaform.com!

You are not logged in.
New Topic Reply
Next Page

Page: 1

Previous Page

Thread: Brake and Clutch Fluid Bleed and Purge

Created on: 12/26/13 05:53 PM

Replies: 22

Rook


Rook's Gravatar

Joined: 03/28/09

Posts: 20577

Brake and Clutch Fluid Bleed and Purge
12/26/13 5:53 PM

Brake and Clutch Fluid Bleed and Purge
There may be numerous threads about brake bleeding. This is the one that got me started.

Hydraulic fluid in brake and clutch systems is bled to rid the system of air that may have entered during maintenance procedures. Fluid may also be purged of old, worn out or contaminated fluid. Some other situations (such as removing brake lines) require that all fluid from the system be drained. The fluid may be purged completely simply by bleeding the system without replenishing the reservoir. In this case, the fluid in the system is displaced by air. The system will need to be refilled with new hydraulic fluid and thoroughly bled until all air is eliminated from the system.

Air can be compressed much easier than brake fluid so the presence of air anywhere within a brake system reduces the internal pressure that is built when brakes are applied. Without maximum brake fluid pressure, the moving parts within the brake system will lack force which results in a loss of braking power. Air within the brake system will be notable by what is often called a “spongy” feel to the brake lever or pedal. Spongy brakes feel soft and the lever actuates more than usual.

Any small amount of water is also undesirable if trapped within the system. Water does not react to compression like brake fluid and it will overheat at a lower temperature. Be careful to keep any water that might be used to wash a brake fluid spill from entering the system. Also avoid using old brake fluid from a previously opened bottle that may have acquired condensation. Dust and dirt particles can contribute to clogs in the systems so take measures to prevent them from entering through an open reservoir.

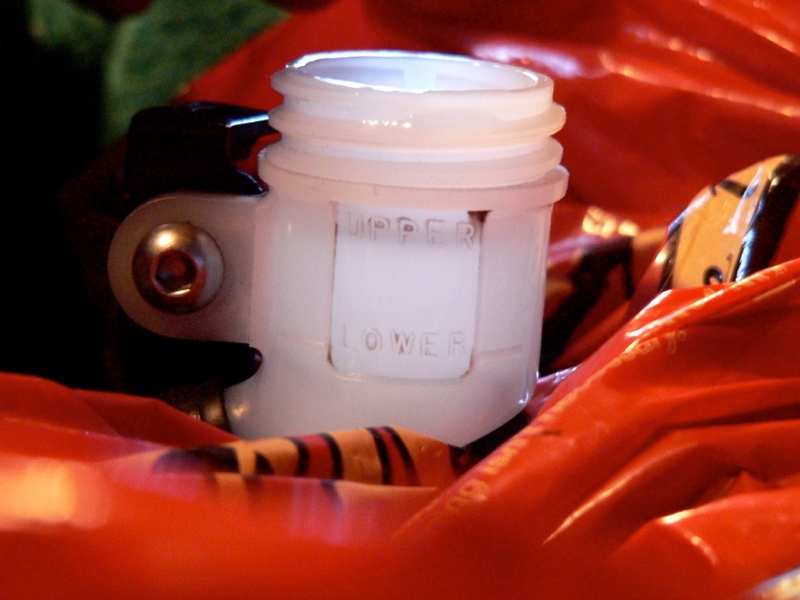
Fill fluid reservoirs to just below the maximum full line and NO HIGHER. Overfilling the reservoir can result in an excessive volume when the fluid gets hot and expands from application of the brake. Excessive volume may cause brakes to lock without warning. Excessive internal fluid may also cause fluid leakage.

DOT #4 is the grade of brake fluid that is recommended for the ZX-14’s brake system. Brake fluids that are labeled for use in systems requiring “DOT #3 or DOT #4” are actually no different than those specifically labeled for use in systems requiring DOT #4. DOT #5 is a higher performance break fluid with a higher boiling point but if DOT #5 is used in systems designed for DOT #4, the fluid may leak past the rubber seals.

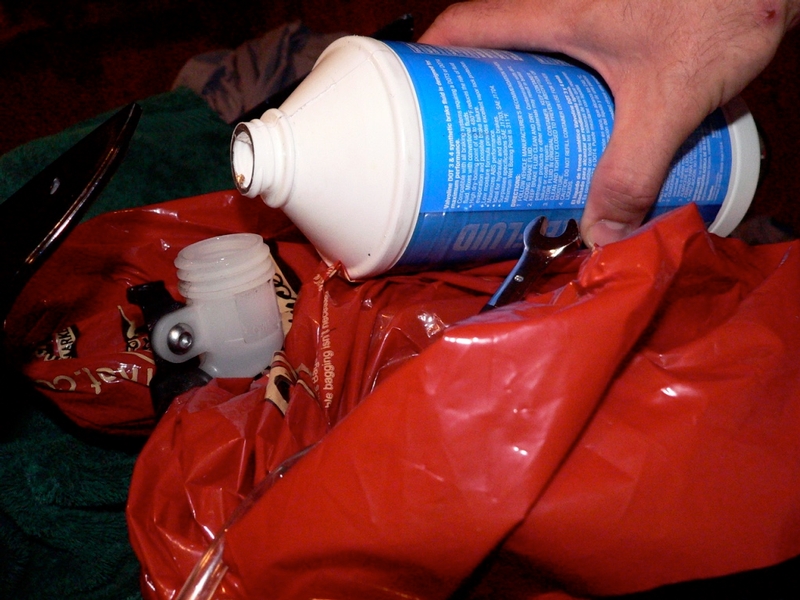
Brake fluid will etch many painted or plastic surfaces that it comes in contact with. Therefore, a pail of water and sponge should be kept prepared for the inevitable drips and spills that occur while working with the brake and clutch fluid systems. It is always wise to cover as much of the bike as possible with a plastic sheet and absorbent towel to prevent damage from spills or spatters that may occur.

The method of bleeding I am showing requires repeated opening and closing of the bleed valves. It’s an important precaution to NOT over-tighten the bleed valve when you close it to build more pressure. The threads on the valve and caliper can suffer wear causing them to leak fluid. Torque the bleed valves properly when done to avoid seepage. (see this thread:

).

Check for seepage from the bleed valves often after bleeding the brakes. Wash with water and Tighten them if necessary. Slight seepage may cause minor damage to the paint on the front brake master cylinder. The OEM calipers have a tough coating that resists minor fluid seepage.
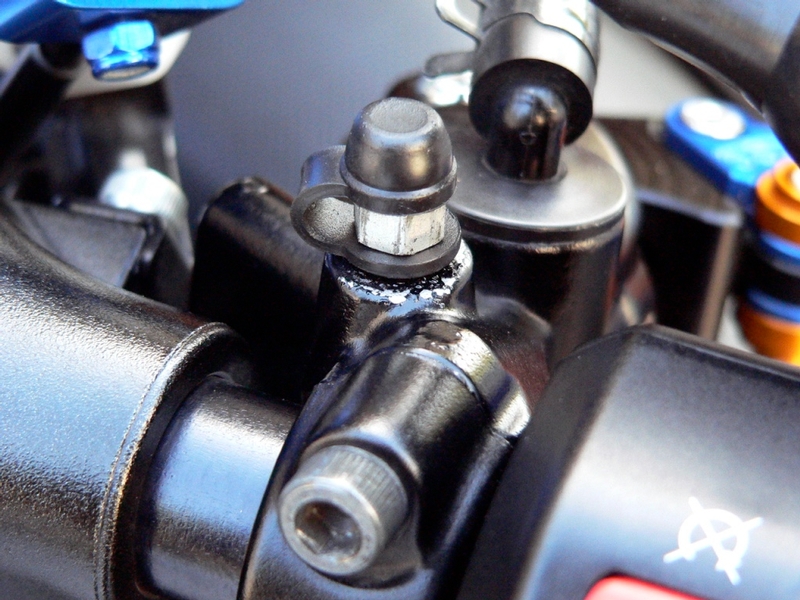
One final word before we start, in this tutorial, I instruct that the master cylinder be bled before the calipers. This is necessary when the system has been previously drained (such as when brake lines have been installed) and new fluid is installed via the reservoir. Bleeding the Master cylinder first is also how the procedure is ordered in the service manual.

However, if brakes require bleeding after the system has been filled with fluid, I think it is better to start at the caliper(s) (or slave cylinder in the case of the clutch) and work toward the master cylinder so the master cylinder is last to get get bled. This is because air bubbles are likely to rise toward the master cylinder during bleeding. There is no chance air will drop to the caliper (or slave cylinder) because it is situated lower than the master cylinder.

For rear brake, front brakes and clutch bleeding, It’s best to set the bike vertical on a rear stand to avoid fluid spills. You can also bleed brakes with the bike on the side stand but it is not as safe.

Tools:
pail of water and sponge
plastic sheet
absorbent towel
10mm box end wrench
1/4 inch OD clear plastic tube
clean receptacle
fresh DOT 4 brake fluid
clean dry cloth
torque wrench
10mm socket
8mm box end wrench
non permanent thread locking agent
8mm socket
phillips screw driver

REAR BRAKE MASTER CYLINDER
We’ll start with the rear brake because it is a little simpler setup than the front.

Remove the seat from the bike.

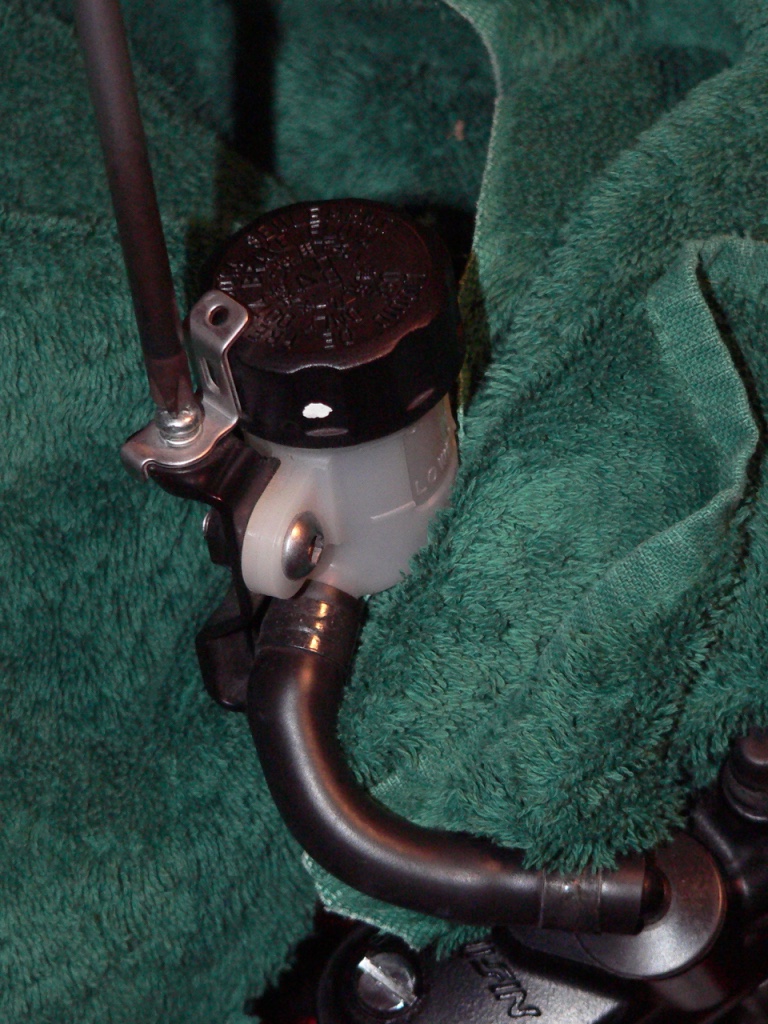
1. Grasp the body of the rear brake fluid reservoir to support it on its mount while twisting the cap off with the other hand.
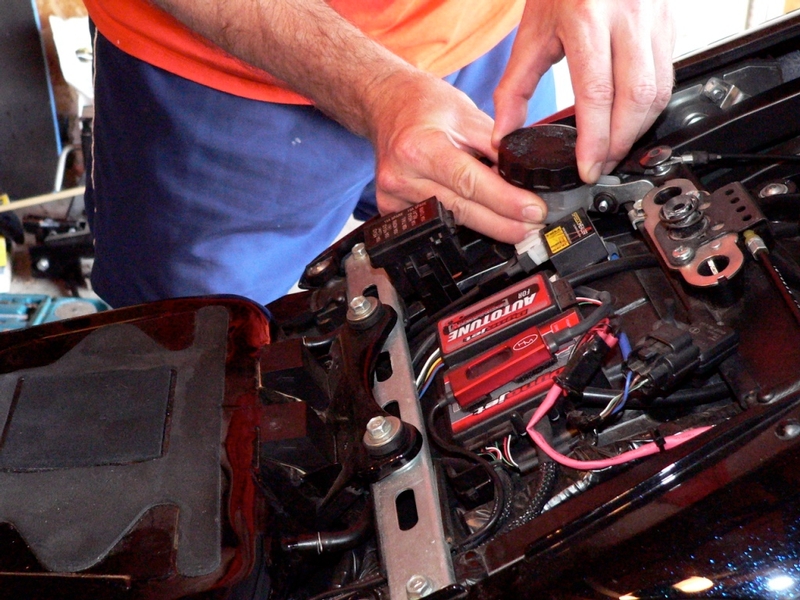

2. Pull the diaphragm plate and diaphragm from the reservoir.
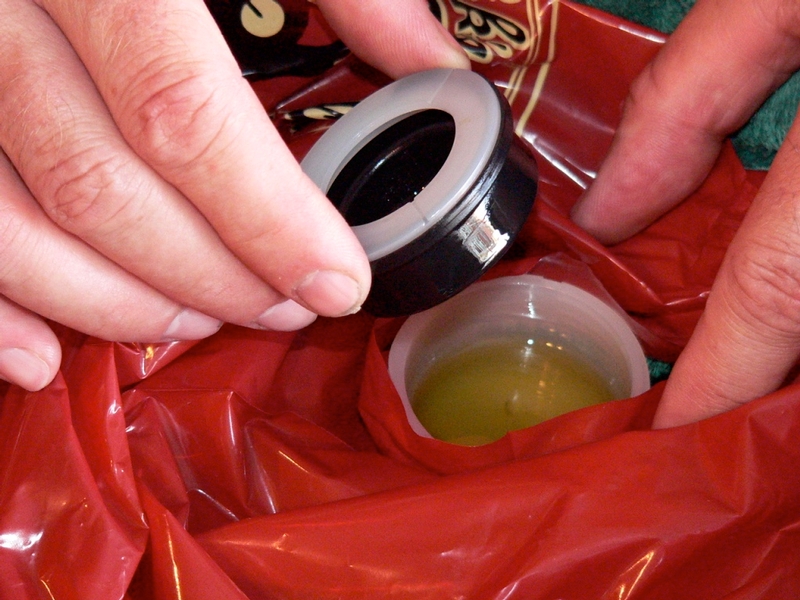

3. Tap on the rear brake line, master cylinder and the pipe that runs from the brake fluid reservoir to the master cylinder. This should help dislodge bubbles that may be clinging inside the system. Pump the rear brake pedal and hold it down. Watch the reservoir for any tiny air bubbles that might rise to the surface of the fluid from the hole in the bottom of the reservoir. If bubbles are observed, continue pumping. When the bubbles stop, the rear brake master cylinder is bled of air. The rear brake line and caliper still need to be bled.
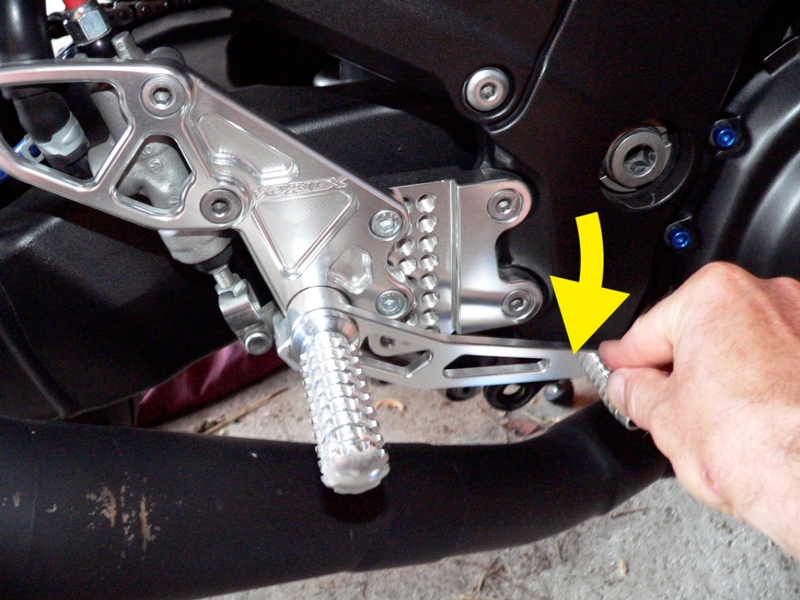
REAR BRAKE CALIPER
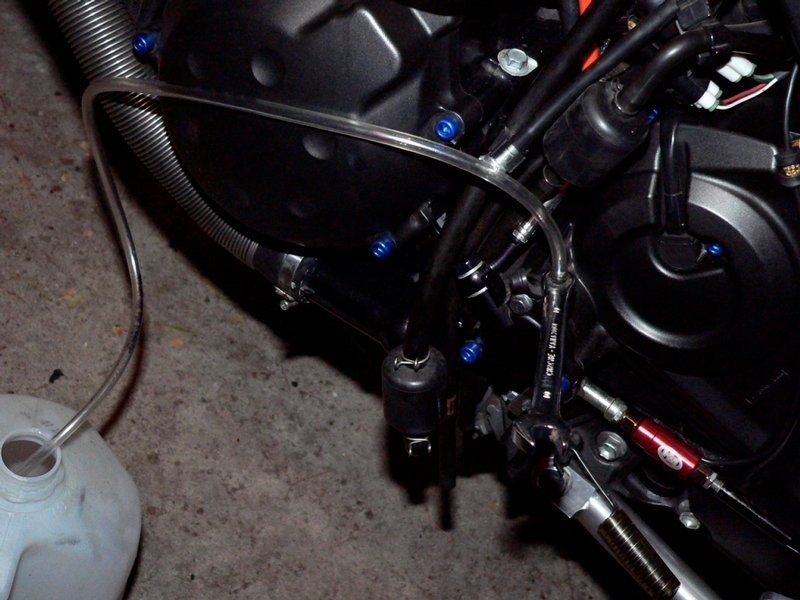
4. Remove the rubber cap from the rear brake caliper bleed valve. Place a 10mm box end wrench on the bleed valve hex. Push a snug fitting 1/4 O.D. clear plastic tube on the nipple. Run the other end of the plastic tube into a clean receptacle.
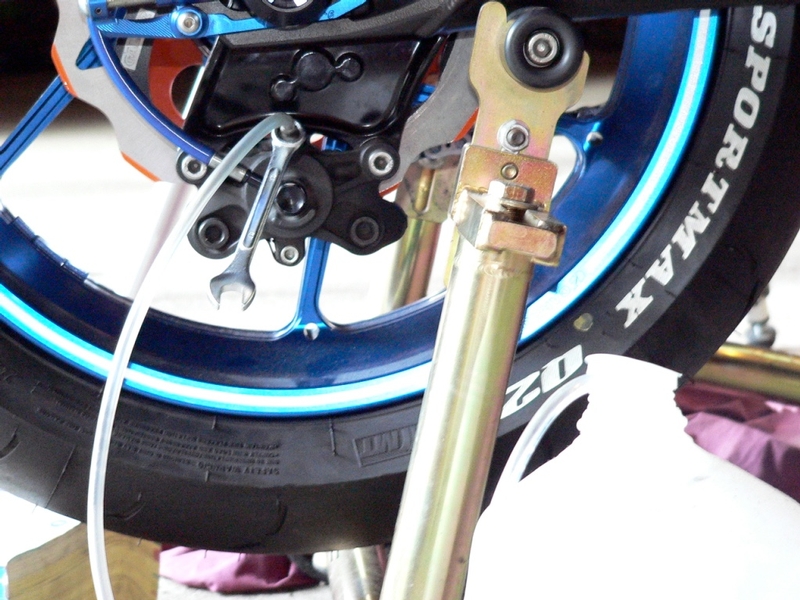

5. Tap on the rear brake line and caliper to dislodge bubbles that cling to the walls of the
system.


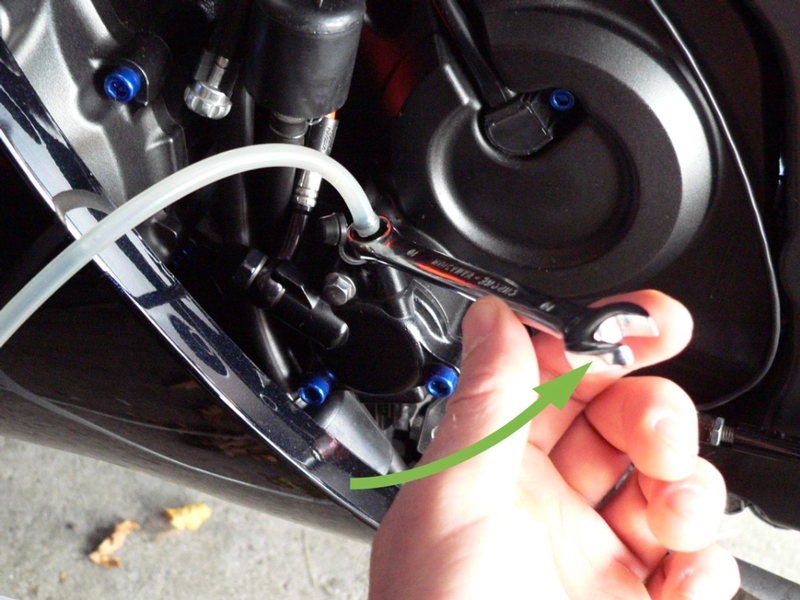
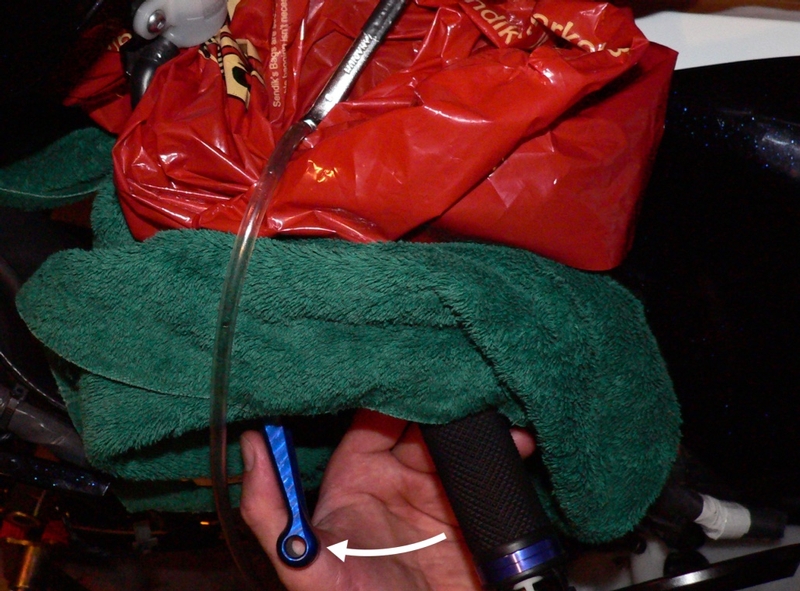
6. Pump the rear brake pedal to build pressure. Hold the pedal down with your right hand. Using your left hand, loosen the rear brake bleed valve one quarter turn with the 10mm wrench. DO NOT RELEASE THE REAR BRAKE PEDAL
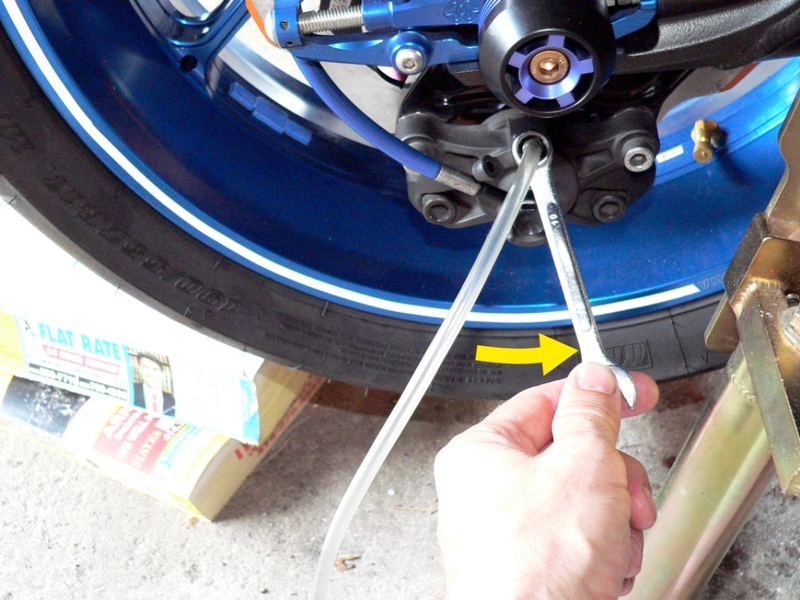

7. You will instantly feel all pressure leave the system. Fluid will surge into the tube and the pedal will bottom out. STILL--DO NOT RELEASE PRESSURE ON THE REAR BRAKE PEDAL. Watch for air bubbles to come out of the bleed and into the hose.
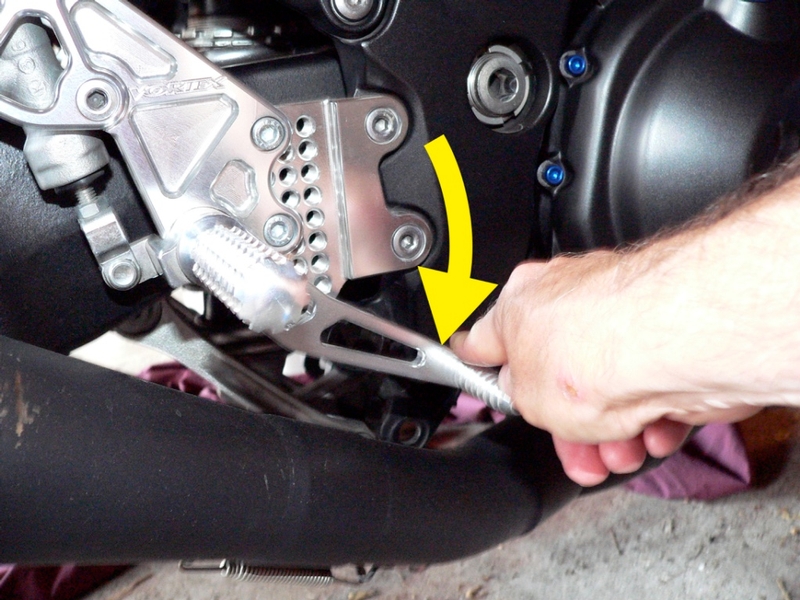

8. Close the bleed valve by turning it clockwise until snug.
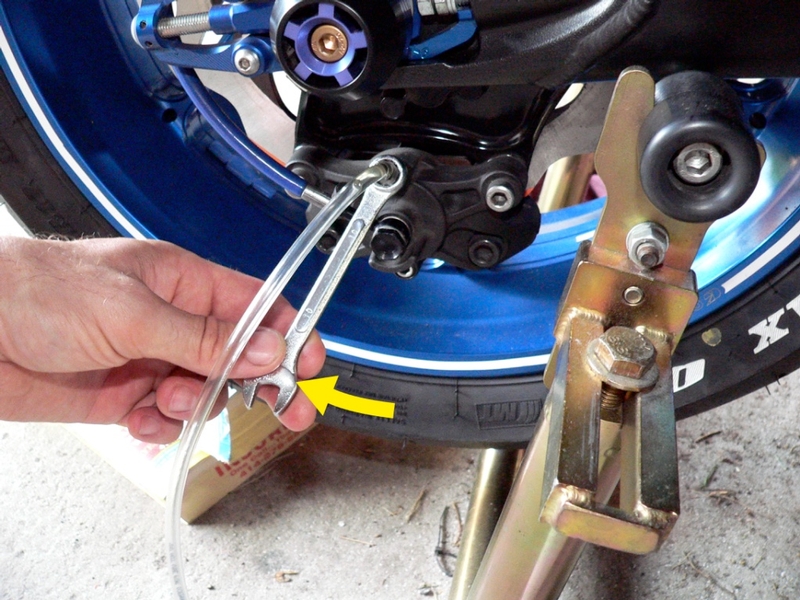

9. OK, the bleed is closed. Now you can release the brake pedal. Pump the pedal to rebuild fluid pressure.
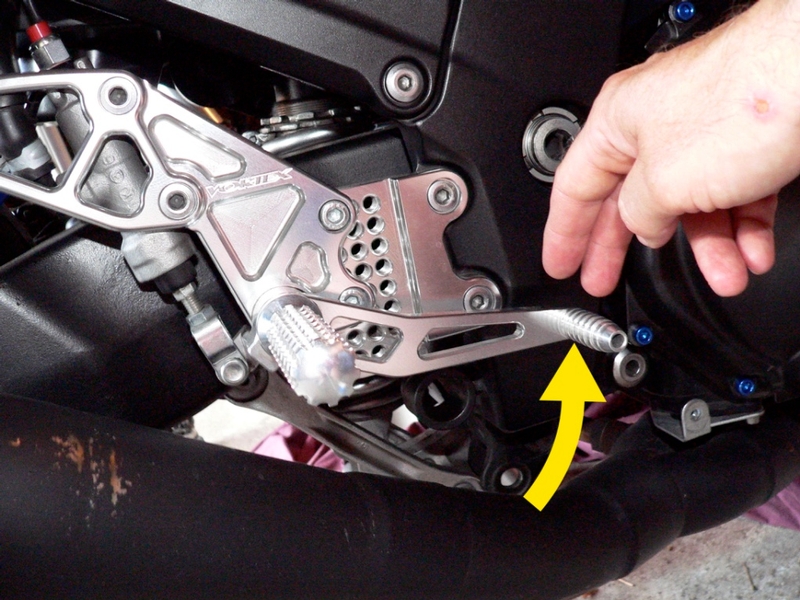

10. If you intend to purge all fluid, do not replenish as you bleed. Allow the reservoir to run dry and continue purging fluid from the remainder of the system.
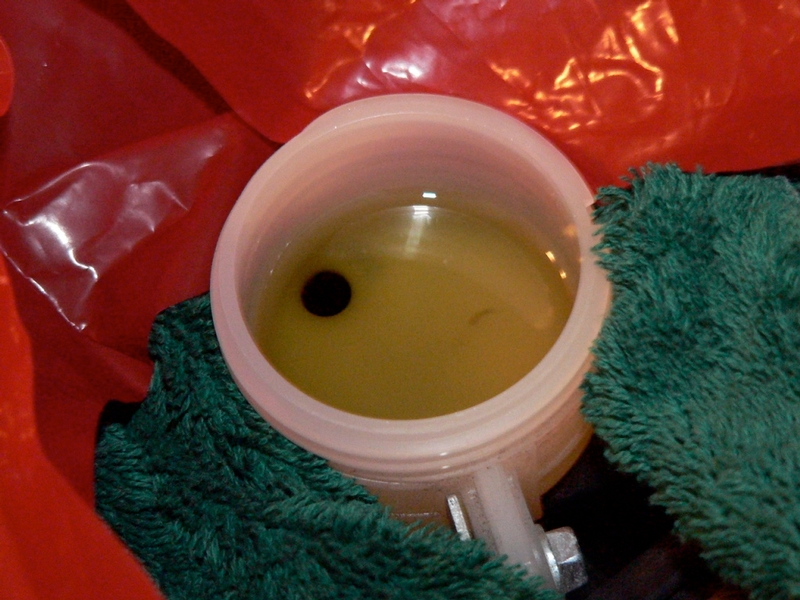

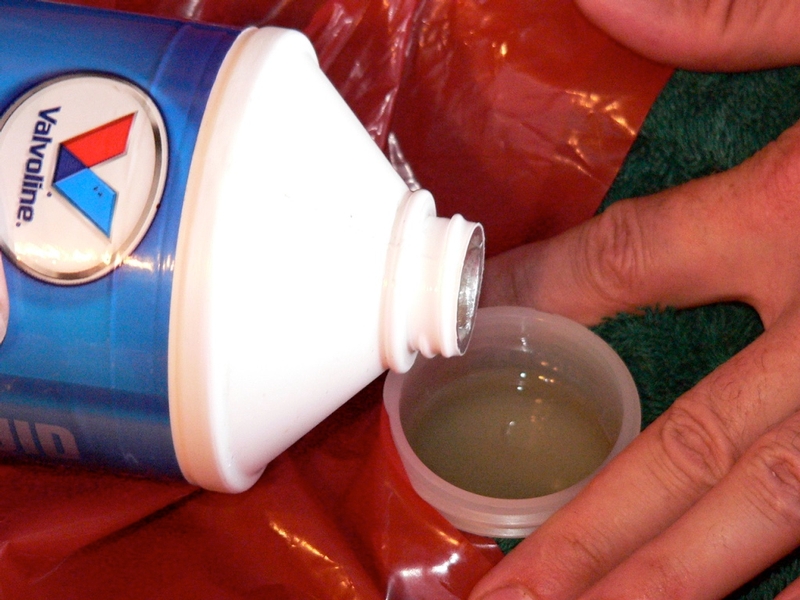
If you are bleeding air from the system and not completely purging, replenish the brake fluid by pouring fresh DOT 4 brake fluid into the reservoir periodically. Do not allow the fluid level to fall to the bottom of the reservoir. Air will be sucked into the master cylinder and additional bleeding will be necessary.
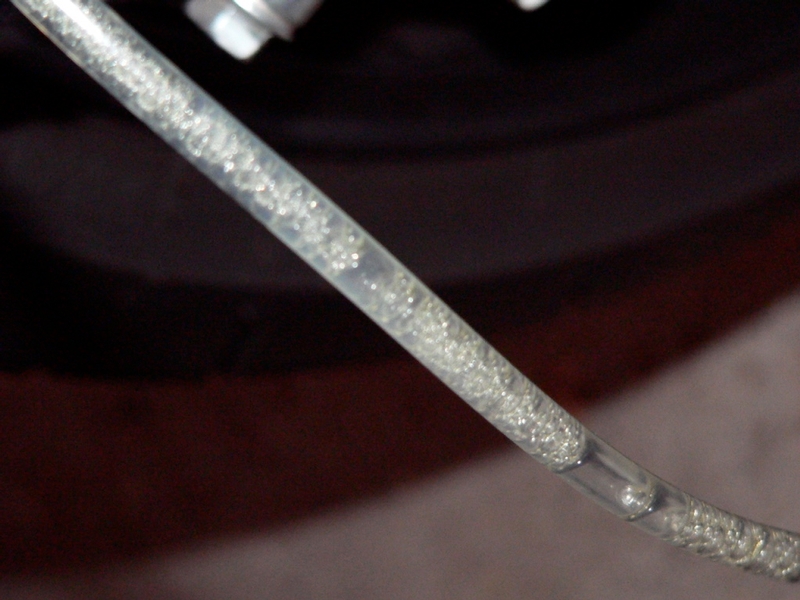
As the system is bled, watch for air bubbles in the fluid that is expressed through the plastic hose attached to the bleed valve.
Repeat steps 5 -10 four or five more times. The process is: pump/press pedal, open bleed, (squirt) close bleed, release pedal, pump pedal...pump/press, open, (squirt) close, release... pump/press, open, (squirt) close, release...

The air bubbles in the plastic hose should stop coming out after a while the. Continue bleeding the system until the fluid is colorless and clear of air. There will always be tiny air bubbles that get sucked past the threads of the bleed valve as fluid is expressed. This is not air within the system.
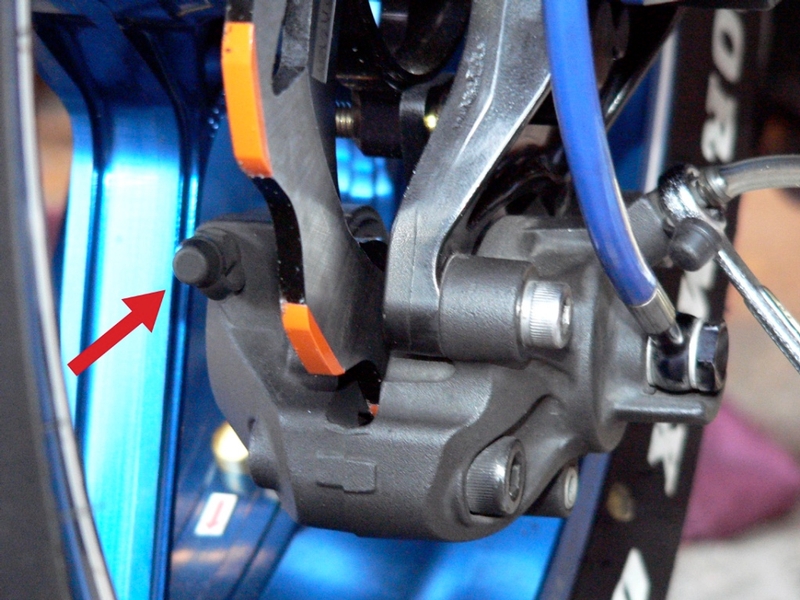
The rear brake caliper has an inner bleed (red arrow). I have never used it to bleed the rear brake. The outer bleed has always been sufficient. HOWEVER CHECK THIS THREAD FOR INFO ABOUT THE INNER BLEEDER

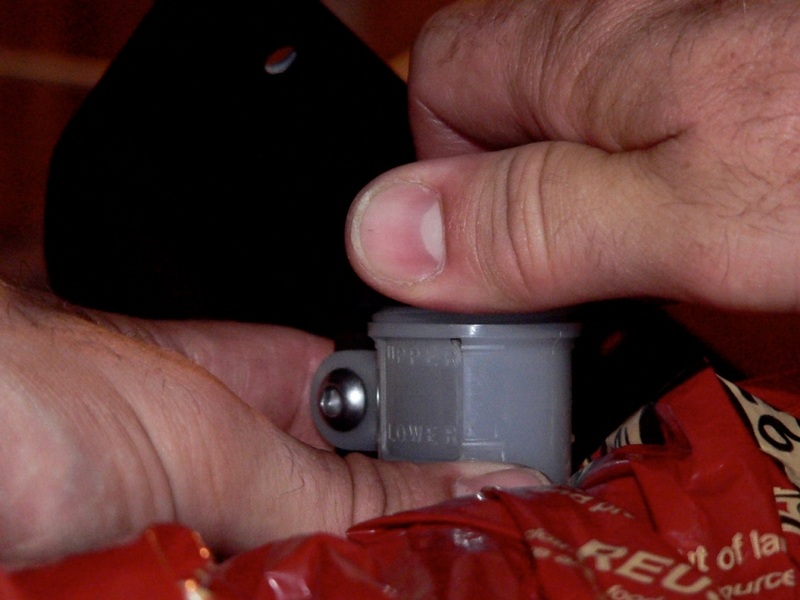
11. After the system is bled or purged, fill the the rear brake fluid reservoir to the upper fill line (never fill the fluid reservoir higher than the upper fill line) with fresh DOT 4 brake fluid.
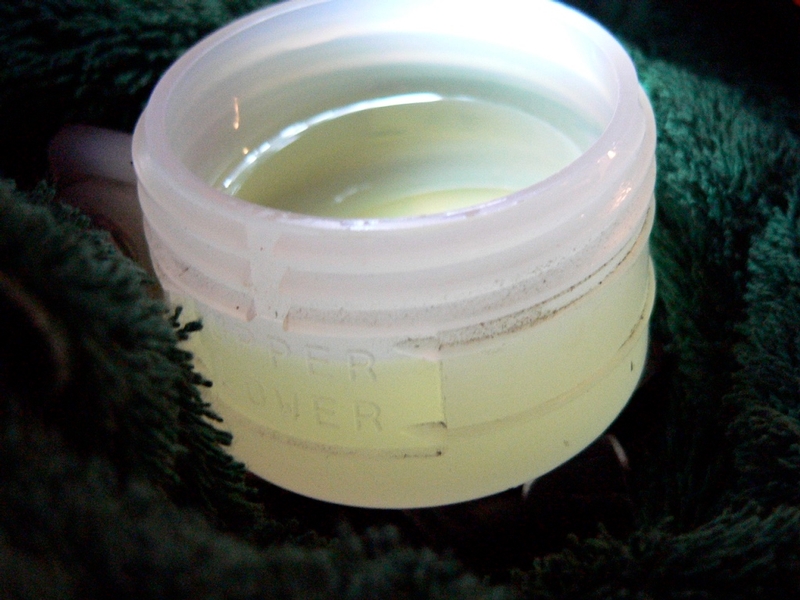

12. Install the reservoir diaphragm.
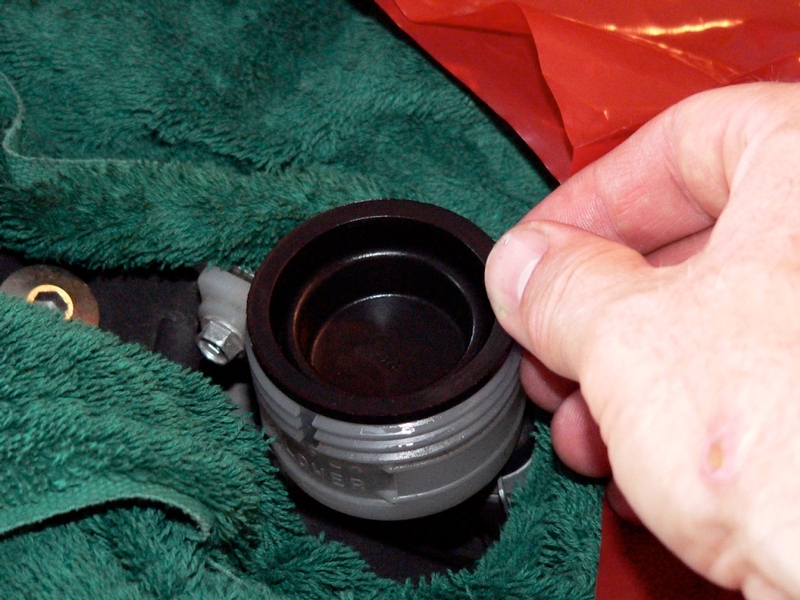

13. Install the diaphragm plate.
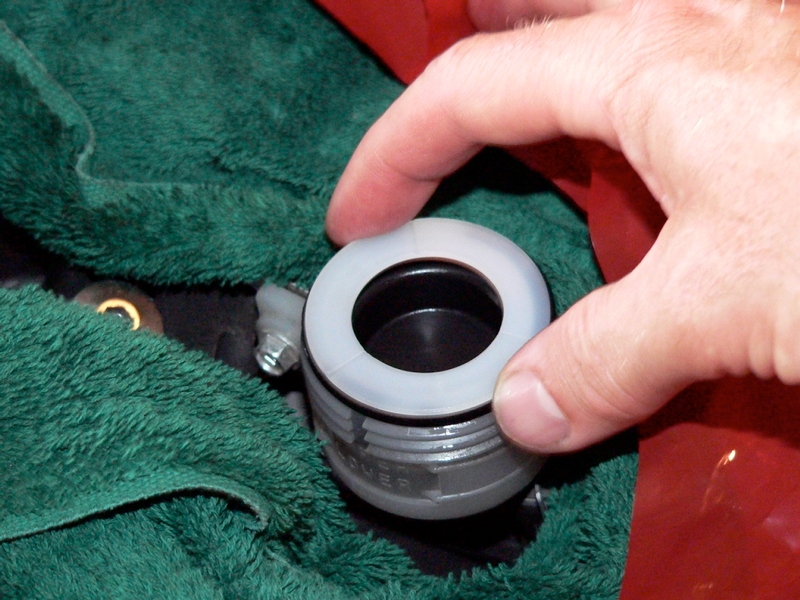

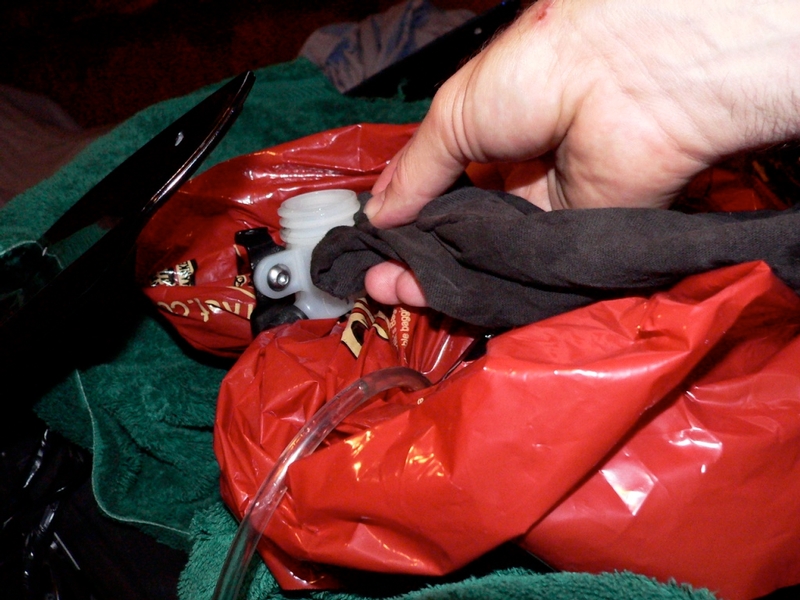
14. Wipe the threads of the reservoir cup with a clean dry cloth to remove any fluid that might seep out of the threads.
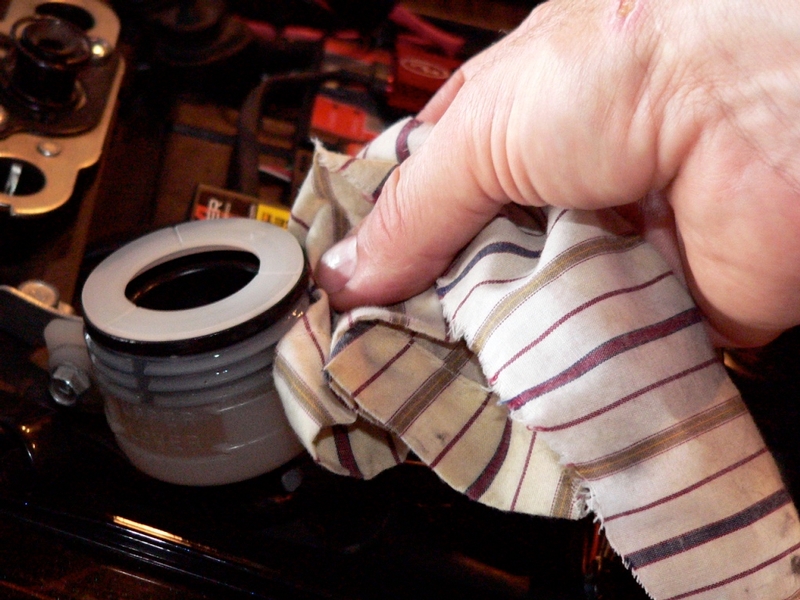

15. Install the reservoir cap. Reverse procedure of step 1.
[Tighten the rear brake fluid reservoir cap clockwise by hand until slight resistance is felt indicating that the cap is seated on the reservoir body, then tighten the cap an additional 1/6 turn while holding the brake fluid reservoir body.]
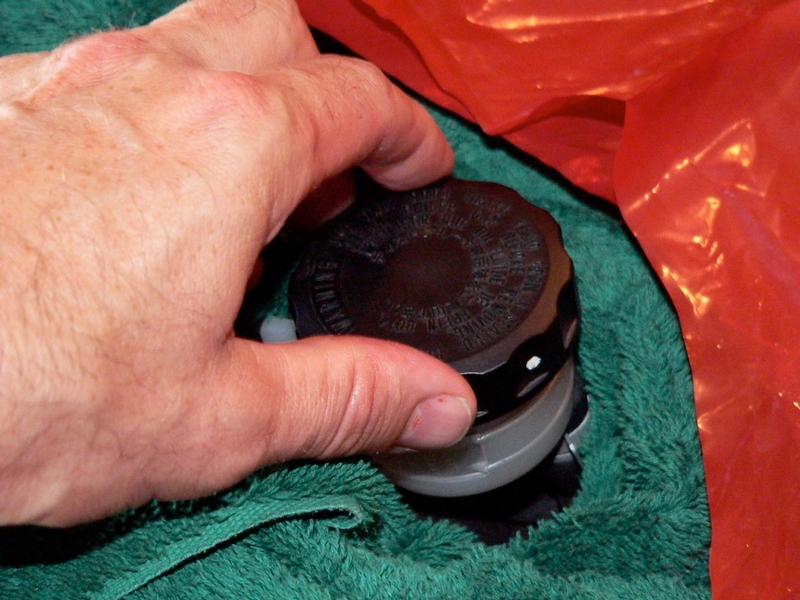

16. Wash the rear brake fluid reservoir with water and a sponge.
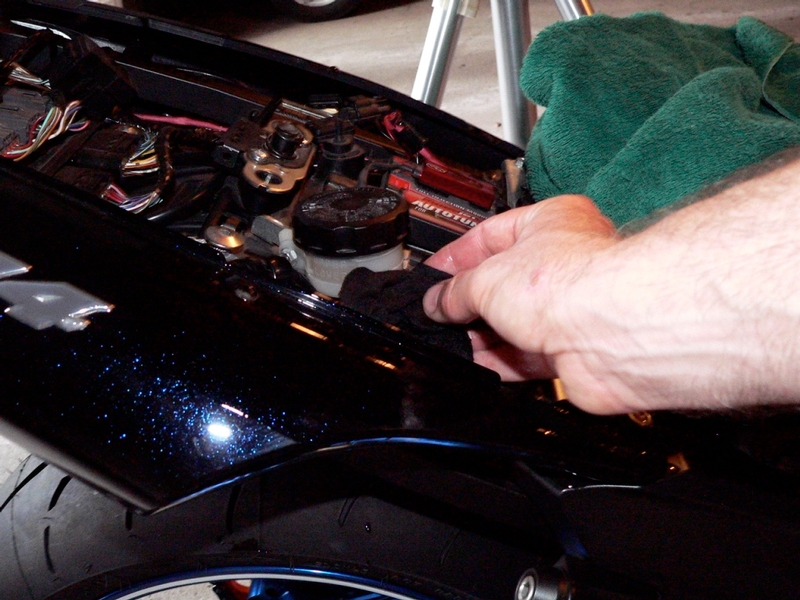

17. Remove the plastic tubing from the bleed valve nipple. Close the rubber cap on the bleed valve. Tighten the rear brake fluid bleed valve with a torque wrench and 10mm socket.
[Torque - Bleed valves: 69 in lbs.]
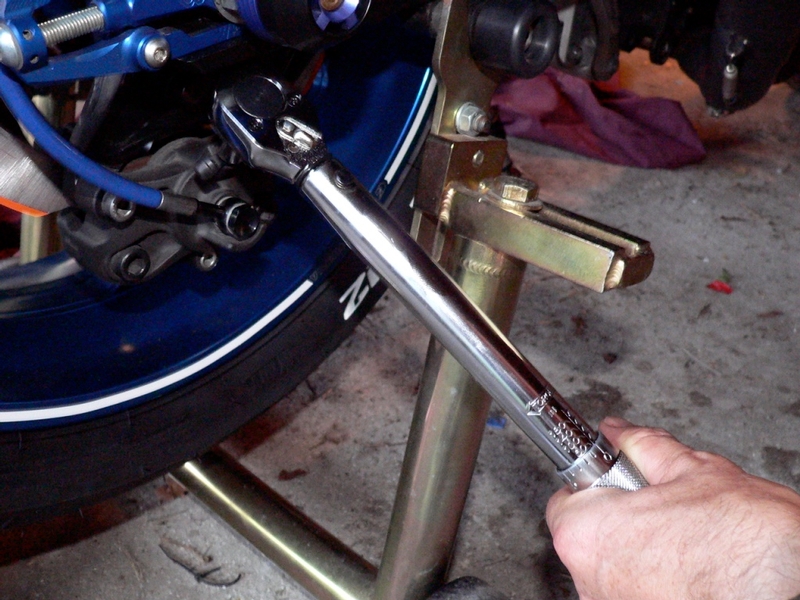

18. After bleeding is done, check the brake for good braking power, no brake drag, and no fluid leakage.

FRONT BRAKE MASTER CYLINDER
19. Cover the entire front of the motorcycle with a plastic sheet to protect painted and plastic surfaces from accidental spills and spatters of brake fluid. Leave the front brake fluid reservoir uncovered by the plastic.
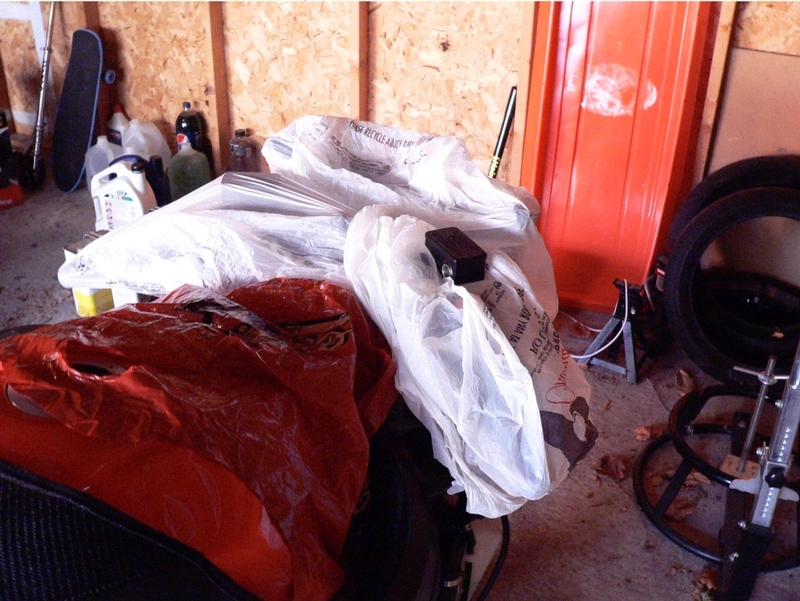
This is my busa covered up to protect it from fluid spills. I set the 14 up the same way.


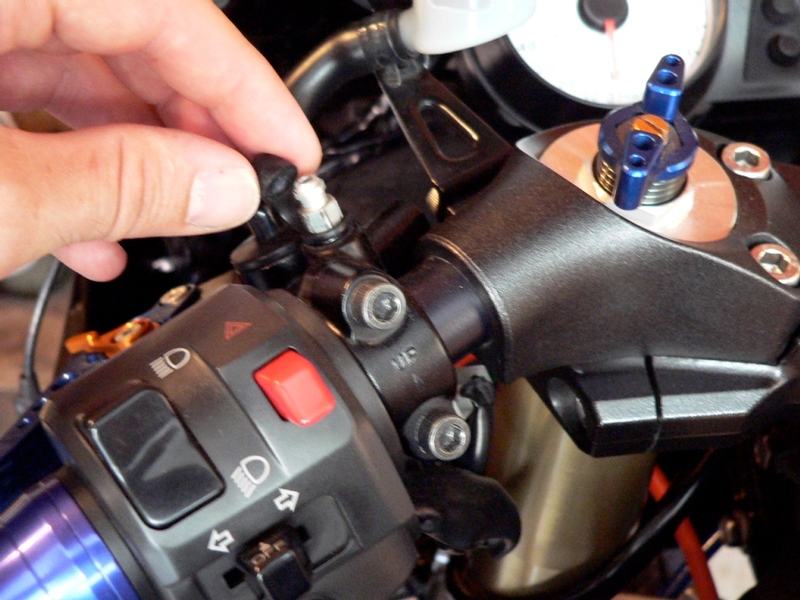
20. Remove the rubber cap from the front brake master cylinder bleed valve.
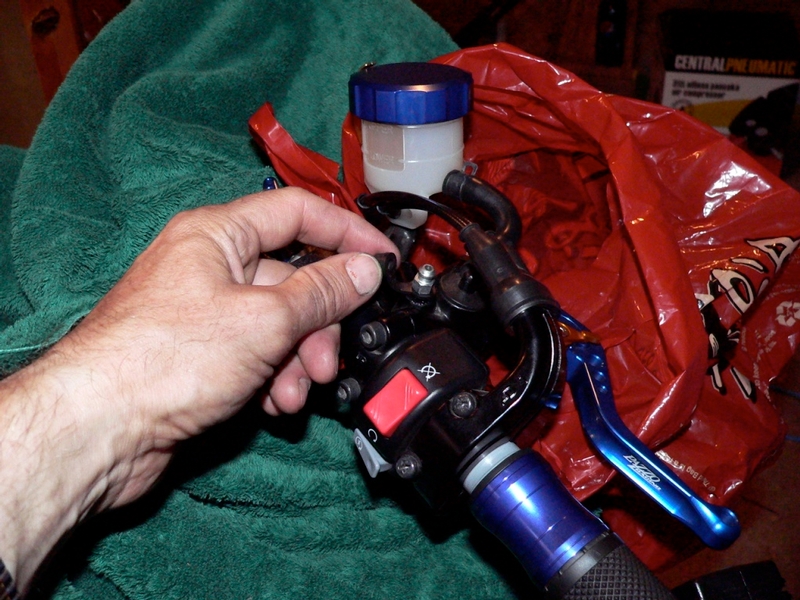

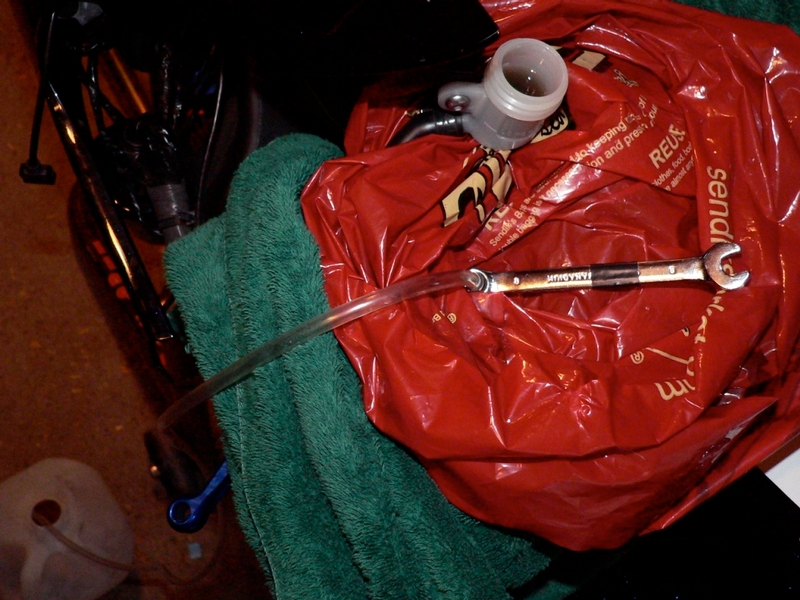
21. Place an 8mm box end wrench on the bleed valve. Push one end of a 1/4 inch O.D. plastic tube on the bleed valve nipple and run the other end of the tube into a clean receptacle.
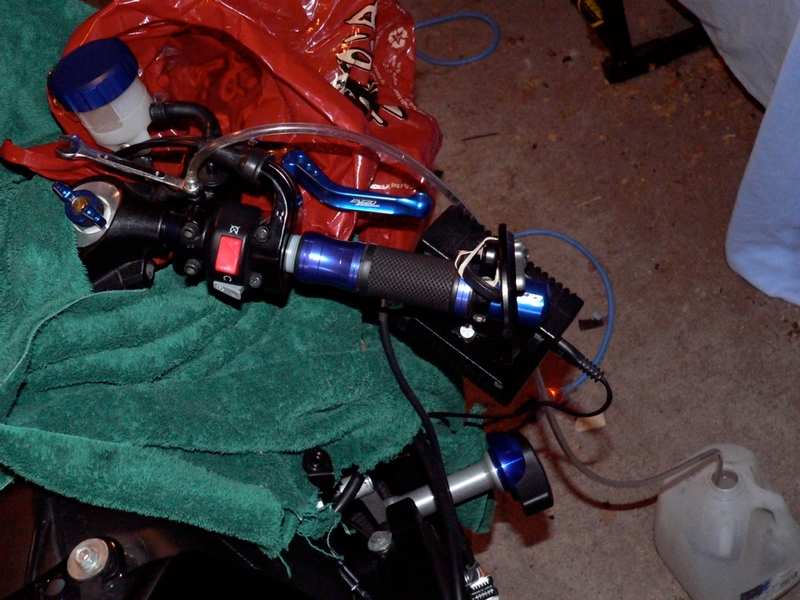

22. Remove the front brake master cylinder reservoir cap stopper screw. Careful, there is a tiny nut in a slot on the side of the reservoir that can fall out.
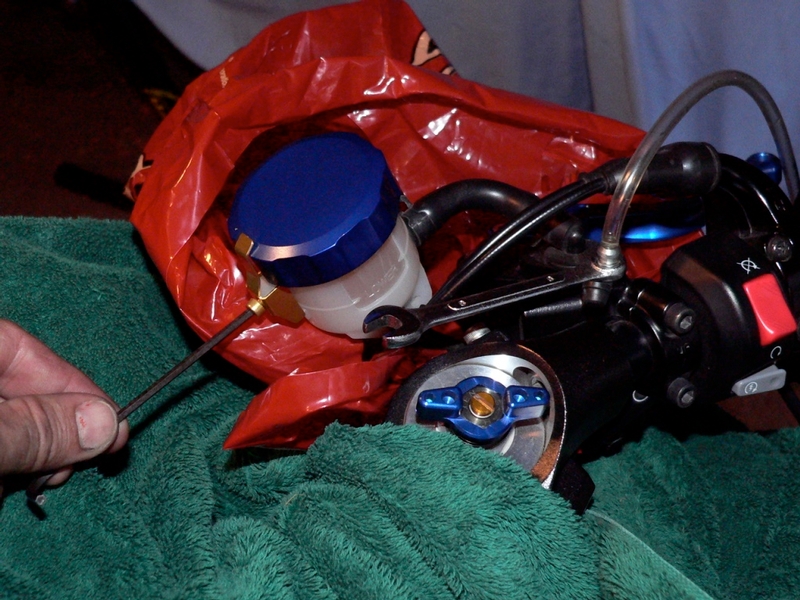

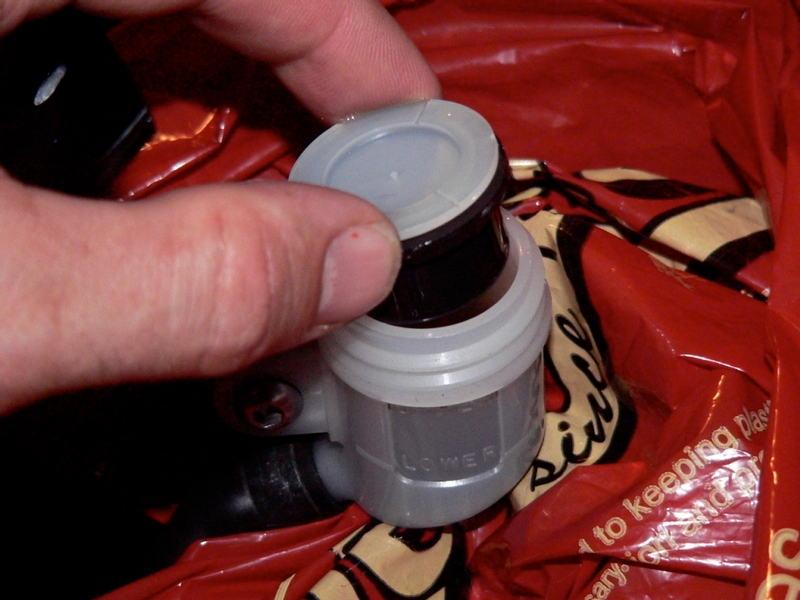
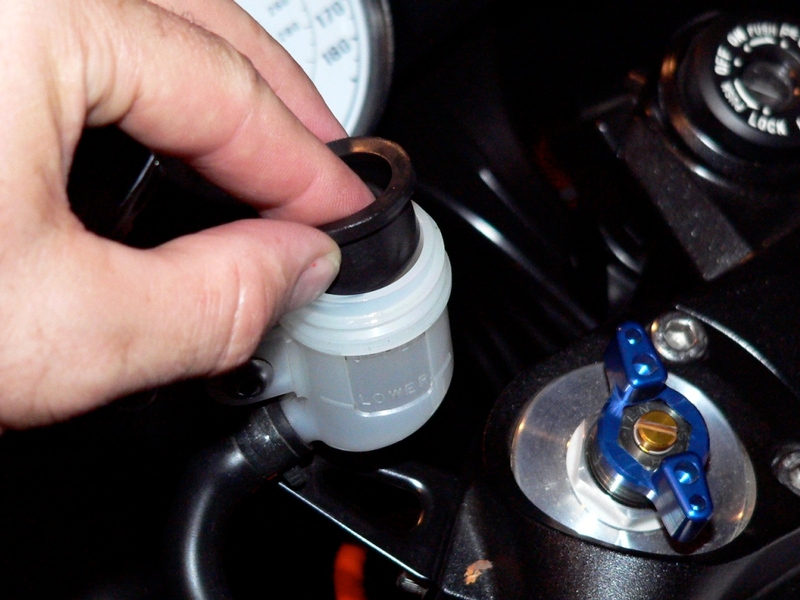
23. Grasp the body of the front brake fluid reservoir to support it on its mount while twisting the cap off with the other hand.
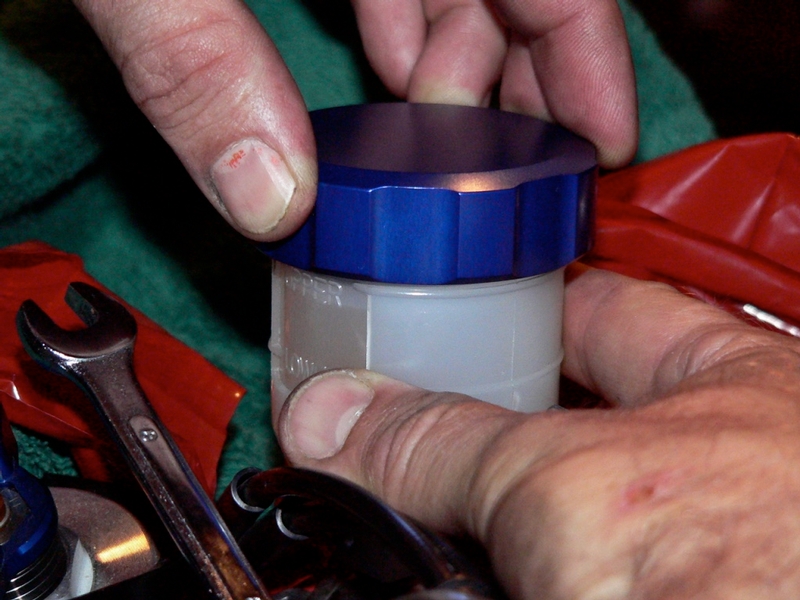

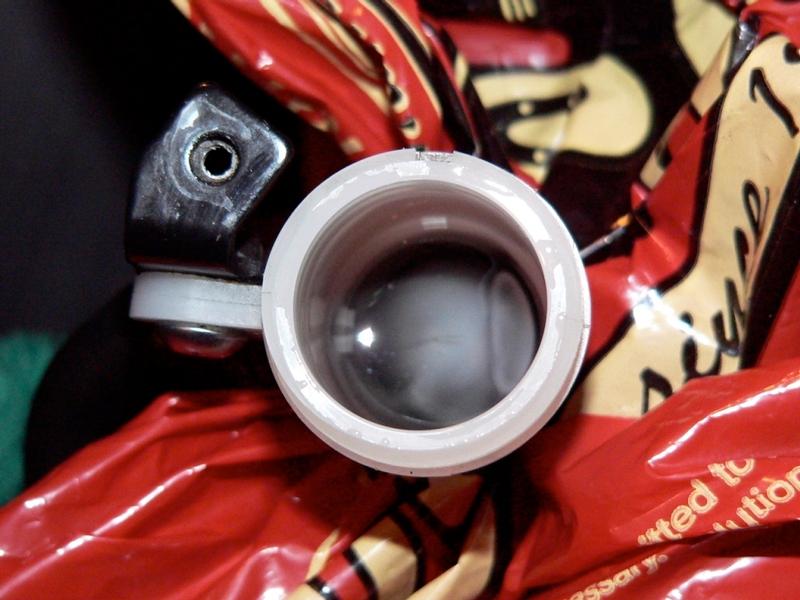
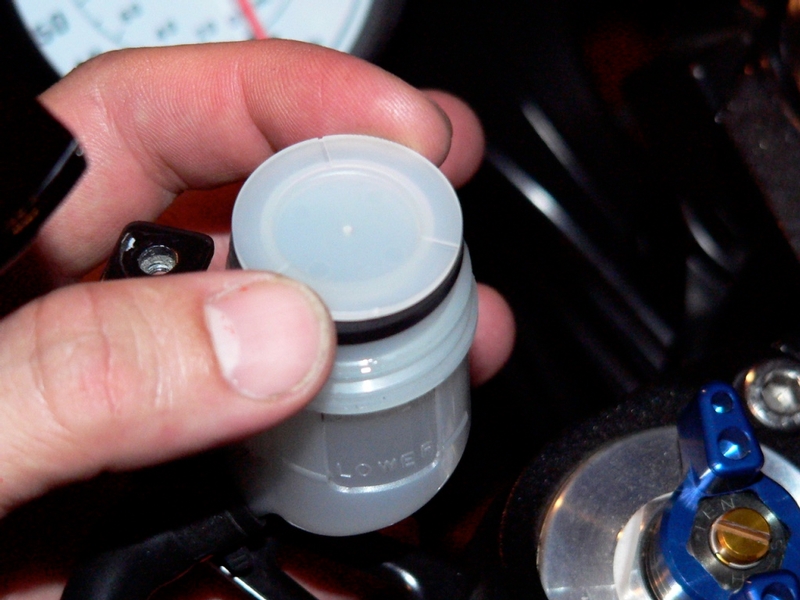
24. Remove the plastic ring and the rubber diaphragm from the front brake master cylinder reservoir.
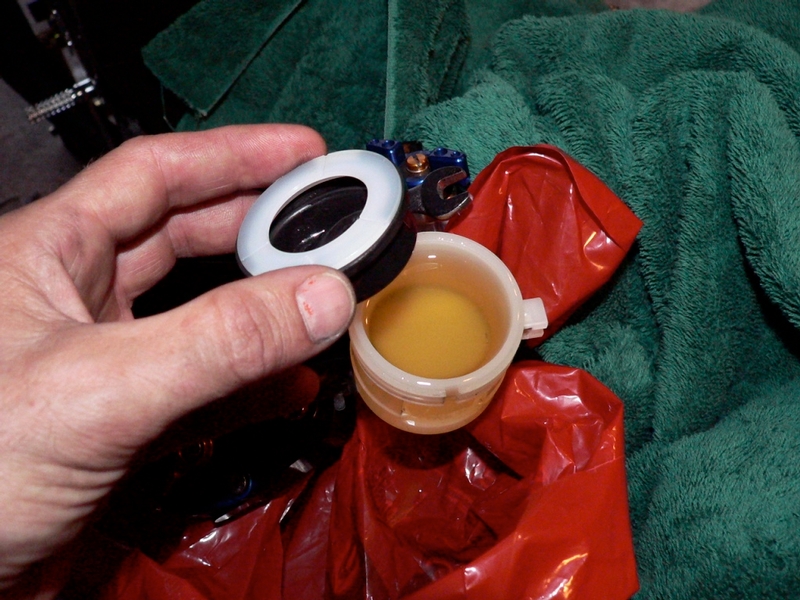

25. The front brake master cylinder is bled in the same way the rear brake master cylinder is bled (see step 3). You simply pump/hold the lever and watch for tiny air bubbles rising in the reservoir. Repeat this until the bubbles stop. No need to open the bleed, just remove the reservoir cap.


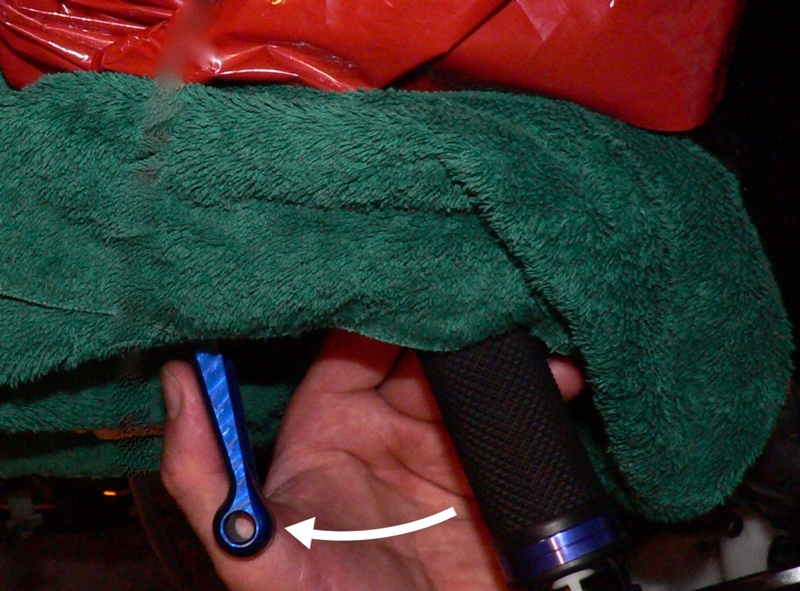
26. In addition to pumping the lever, we have a bleed valve on the front master cylinder. It ensures thorough bleeding and it also makes drawing fluid through a dry master cylinder a snap. Tap the front brake master cylinder, front brake lines and calipers to dislodge air that may be clinging inside. Squeeze the front brake lever with your right hand, pumping to build fluid pressure if necessary.

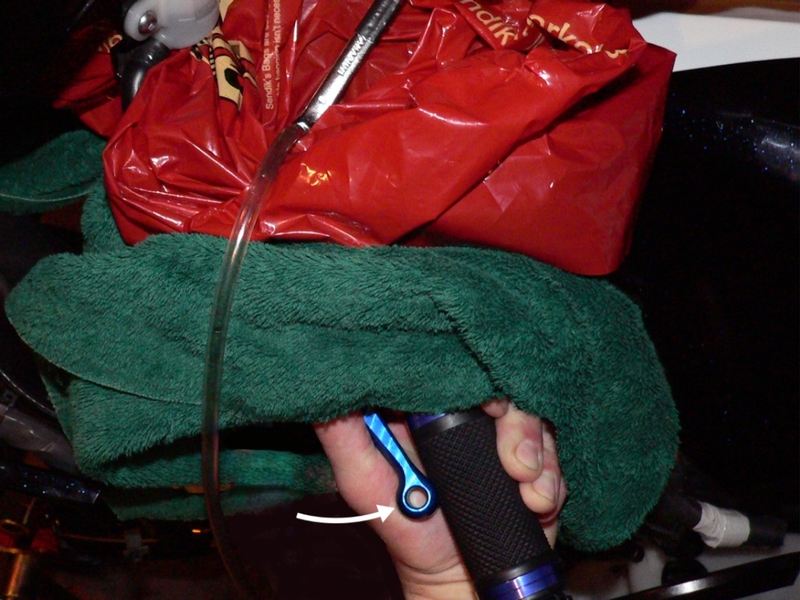
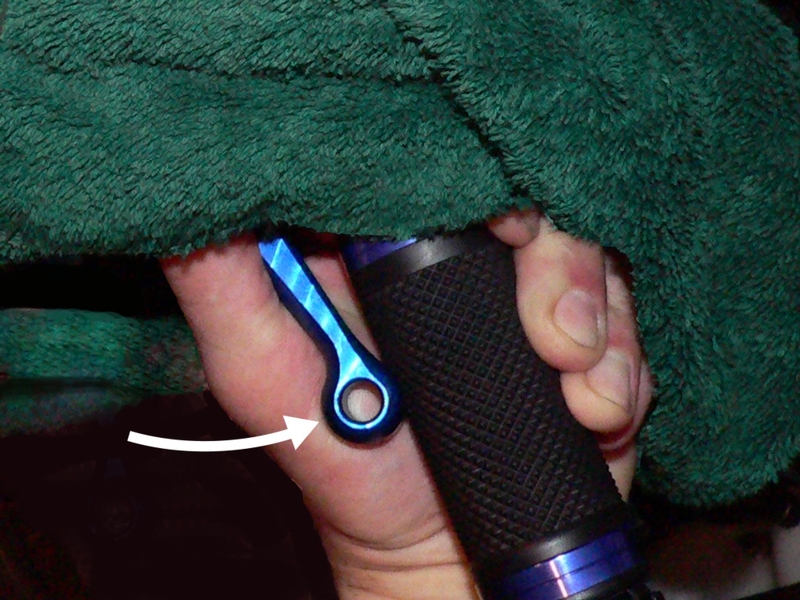
Hold pressure on the lever. DO NOT RELEASE THE LEVER.
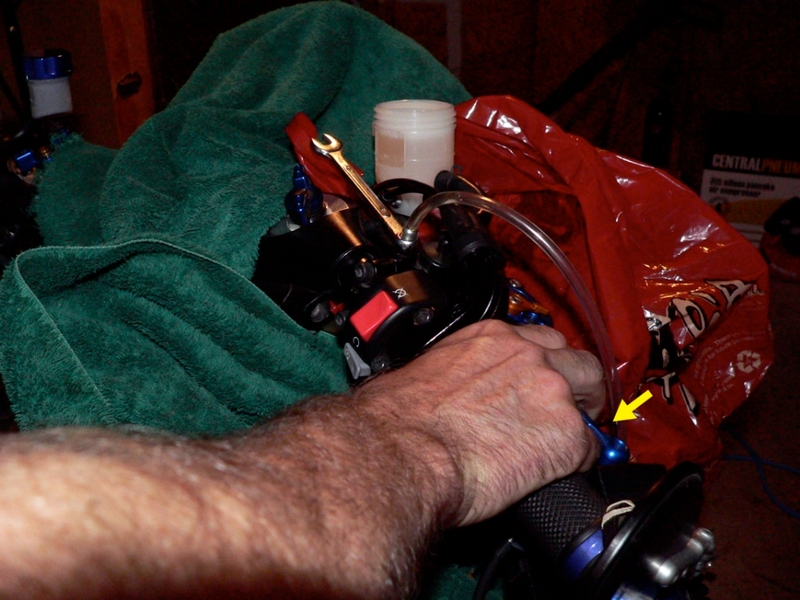

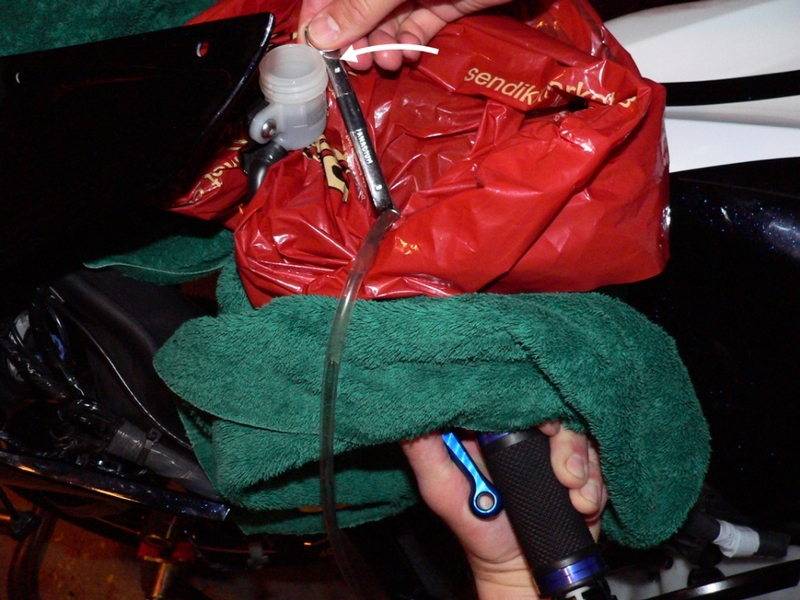
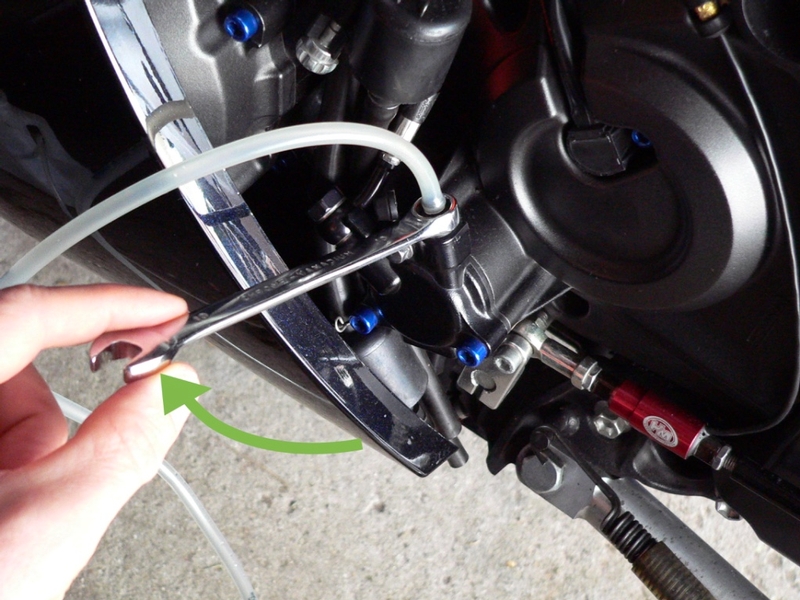
27. Maintain pressure on the lever with your right hand. Open the front brake master cylinder bleed valve with your left hand by turning the 8mm wrench counter-clockwise one quarter turn.
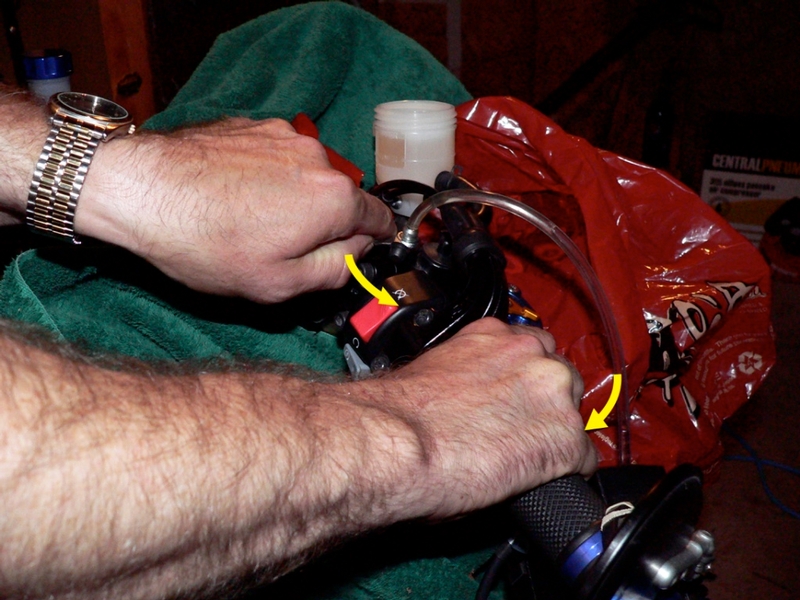
The front brake lever will pull to the grip. MAINTAIN HAND PRESSURE. DO NOT LET GO OF THE LEVER. You will see fluid surge through the plastic tube. Watch for air bubbles in the fluid coming through the tube.


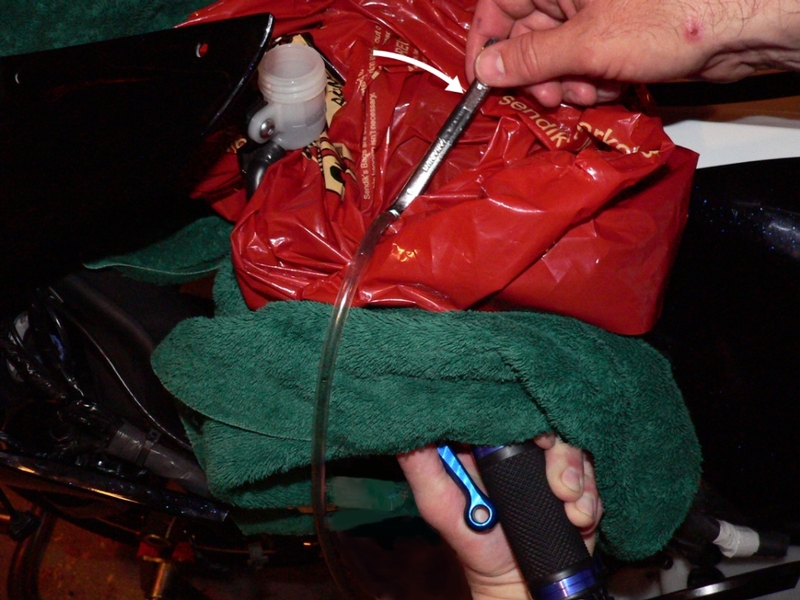
28. Still holding the front brake lever to the grip, close the bleed valve gently with the 8mm wrench.
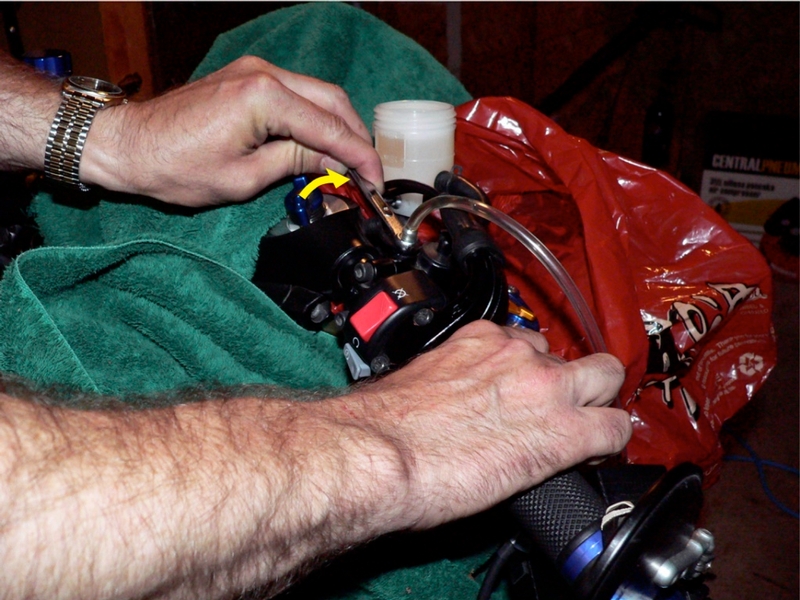

29. Now you can release the lever. With the bleed valve still closed, pump the lever to build fluid pressure.
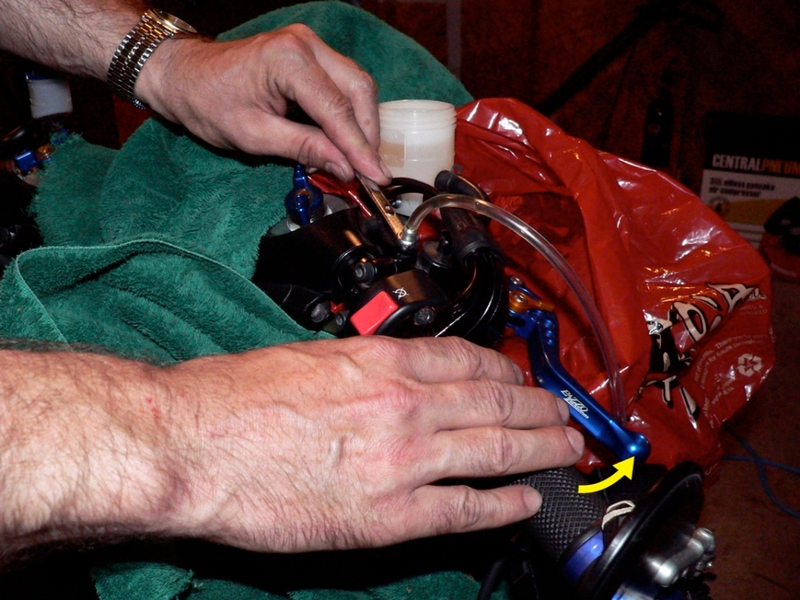
The process is: squeeze/pump lever, open bleed, close bleed, release lever, pump lever...
pump/squeeze, open, (squirt) close, release... pump/squeeze, open, (squirt)close, release...

If you are purging all fluid from the system, let the reservoir go dry and continue the process until air comes out of the bleed valve.


30. If you are only bleeding the master cylinder of air, replenish the reservoir with fresh DOT 4 brake fluid between pumps as necessary.
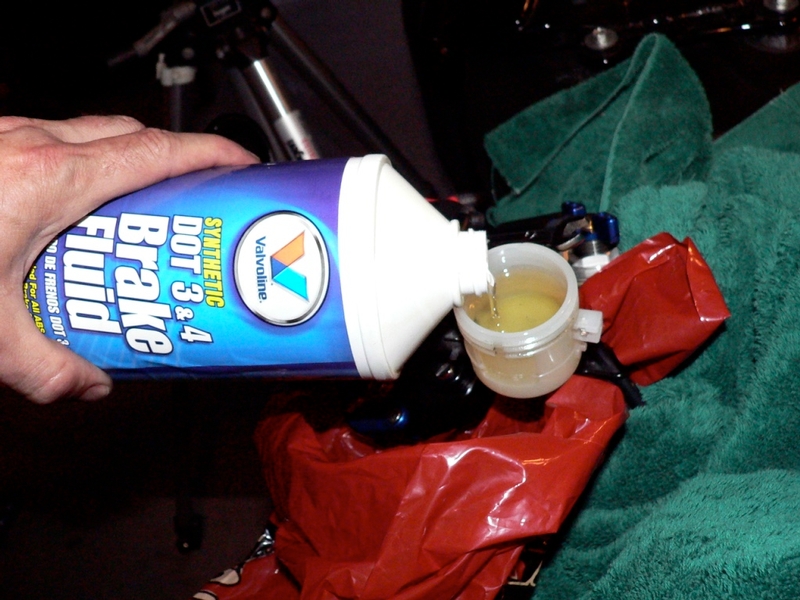
WHILE BLEEDING, DO NOT LET THE FLUID LEVEL IN THE RESERVOIR DROP TO THE OUTLET IN THE BOTTOM. THIS WILL SUCK A LARGE AMOUNT OF AIR INTO THE MASTER CYLINDER AND YOU WILL NEED TO RE-BLEED IT THOROUGHLY.
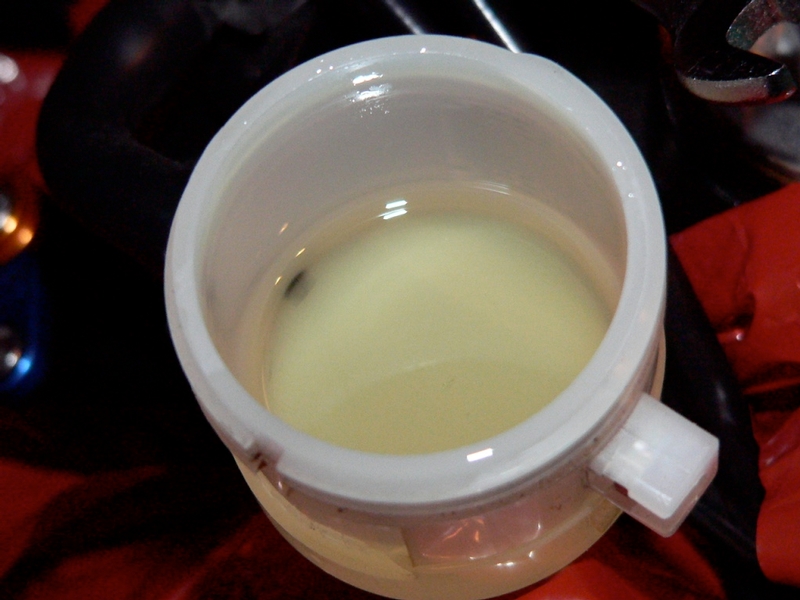

31. Repeat steps 25 through 29 four or five more times watching for air bubbles in the
plastic tube.

The air bubbles in the plastic tube should stop coming out after a while. Continue bleeding the system until the fluid is colorless and clear of air. Then tighten the bleed valve and proceed to bleeding the front calipers.

FRONT BRAKE CALIPERS
32. The process for bleeding the front brake calipers is the same as the process for the rear caliper (see steps 4-11). Remove the rubber cap from the front brake bleed valve located on the right front brake caliper. Place a 10mm box end wrench on the bleed valve hex and push a 1/4 inch O.D. clear plastic tube onto the nipple. Run the other end of the tube into a clean receptacle.
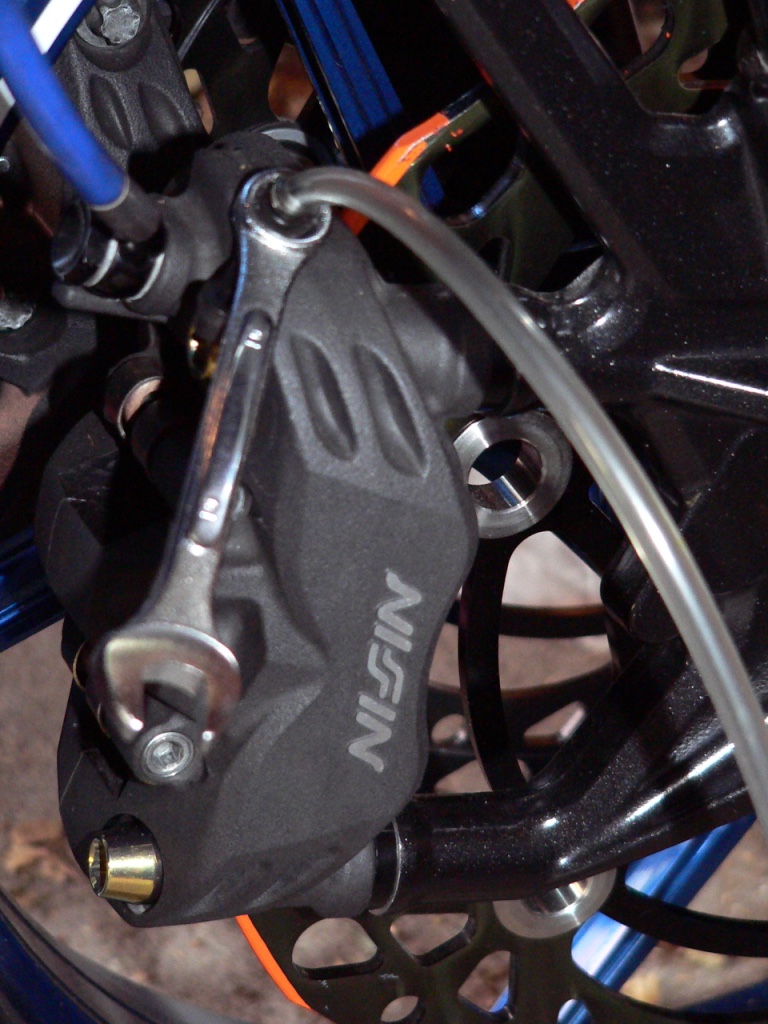

33. Tap on the right front brake caliper and brake line to dislodge air bubbles. Slowly actuate the front brake lever, pumping if necessary to build pressure in the system. Hold the lever pressed.

34. While squeezing the brake lever, use the 10mm box end wrench to turn the bleed valve one quarter turn counterclockwise. Squeeze the brake lever to the grip and hold it there to express fluid. DO NOT RELEASE THE LEVER. Watch for air bubbles in the hose. Turn the bleed valve closed again. Release the brake lever.

35. Repeat steps 33 and 34 four or five more times. The process is: pump/squeeze
lever, open bleed, close bleed, release lever.
pump/squeeze, open, (squirt) close, release...spump/queeze, open, (squirt) close, release...

If you are purging, just continue the process without replenishing the reservoir.

If you are just bleeding air, do not allow the fluid to level to fall to the bottom of the reservoir or air will be sucked into the master cylinder. Replenish the brake fluid with fresh DOT 4 brake fluid while bleeding as needed (see step 30).

Watch for air bubbles in the fluid that is expressed through the hose.
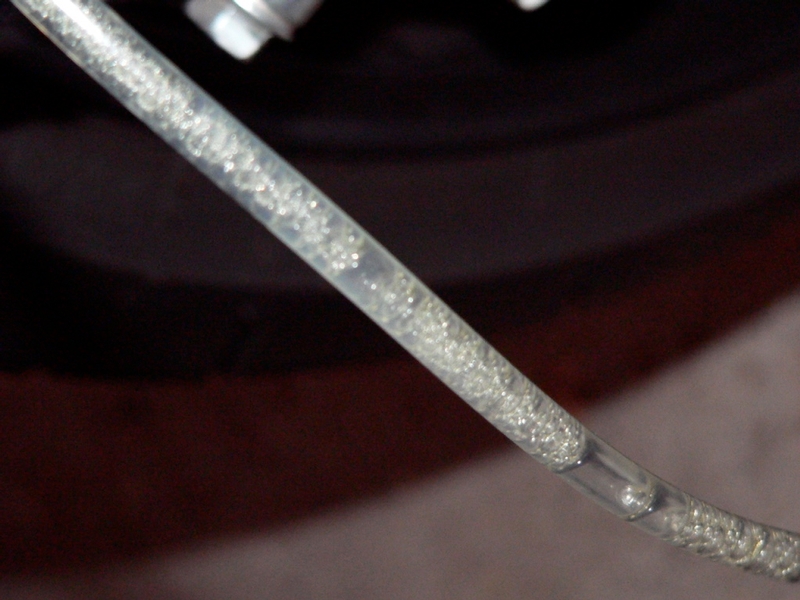
Continue bleeding the system until the fluid is colorless and clear of bigger air air bubbles. Tiny air bubbles will probably always be present because of air entering past the bleeder valve threads.
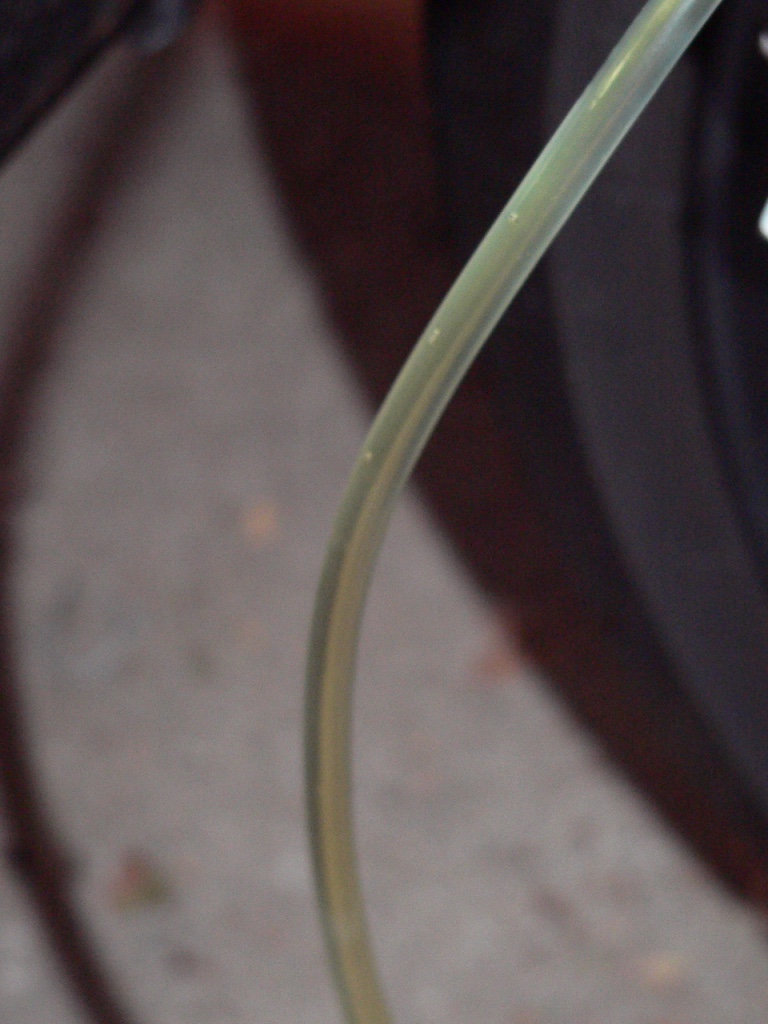

36. Repeat steps 32 through 35 on the left front brake caliper.
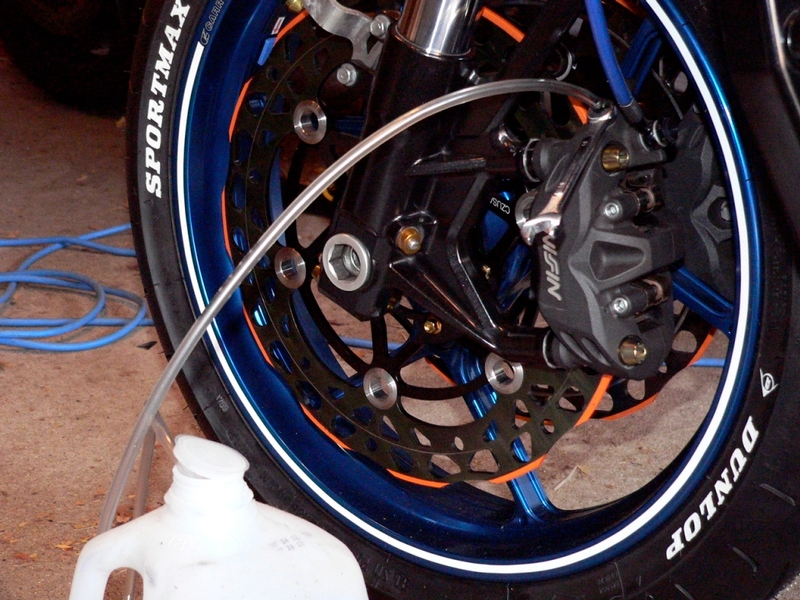

37. Fill the the fluid reservoir with fresh DOT 4 brake fluid to just below the upper fill line (never fill the fluid reservoir higher than the fill line).

If you have purged the front brake of all fluid, you will need to repeat steps 21 through 37 to bleed all air from the system.
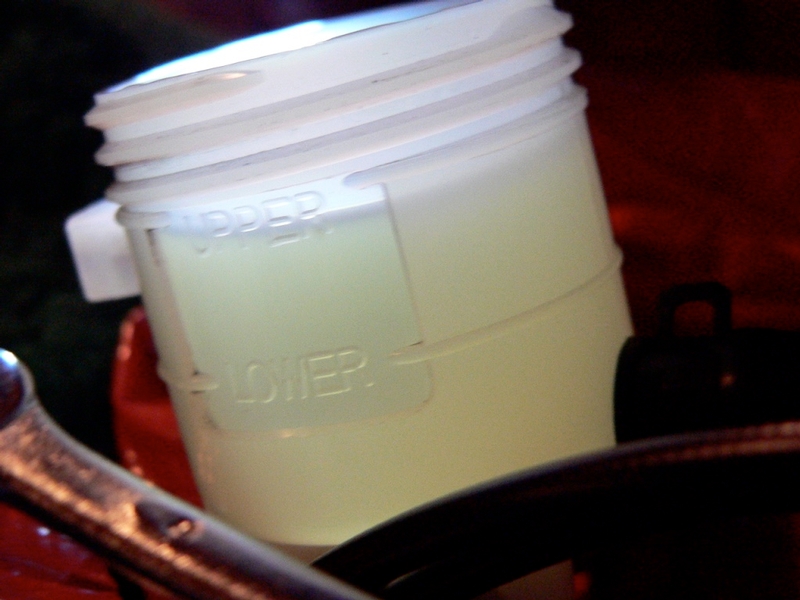

38. Install the diaphragm and the diaphragm plate to the front brake master cylinder.
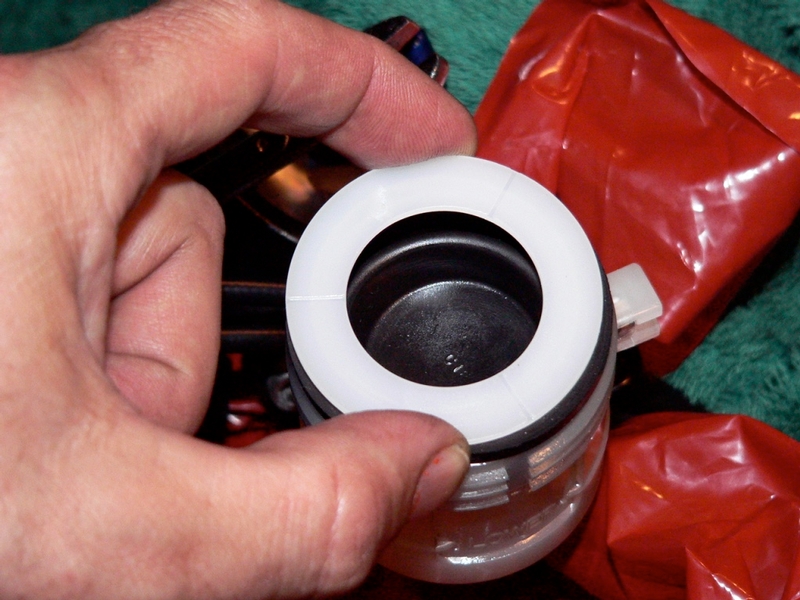

39. Wipe the threads of the reservoir cup with a dry, clean rag to remove any fluid that might seep.
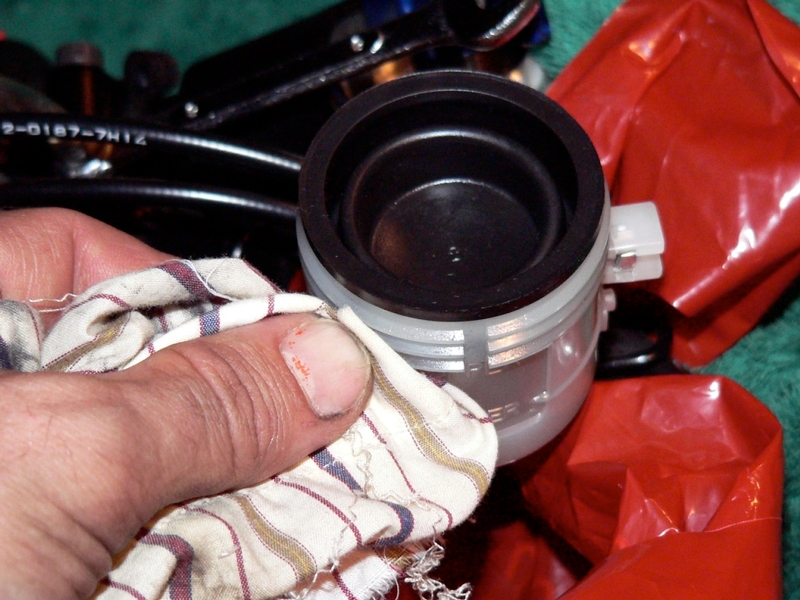

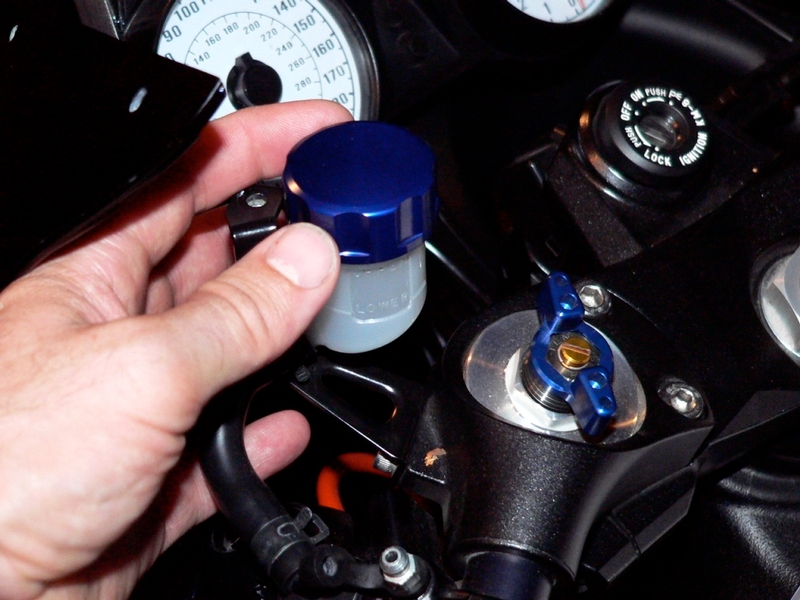
40. Install the cap to the front brake fluid reservoir. Install the front brake reservoir cap stopper screw. You must use non permanent thread locking agent on the screw or it will vibrate out.

[Tighten the front brake fluid reservoir cap clockwise by hand until slight resistance is felt indicating that the cap is seated on the reservoir body, then tighten the cap an additional 1/6 turn while holding the front fluid reservoir body.]

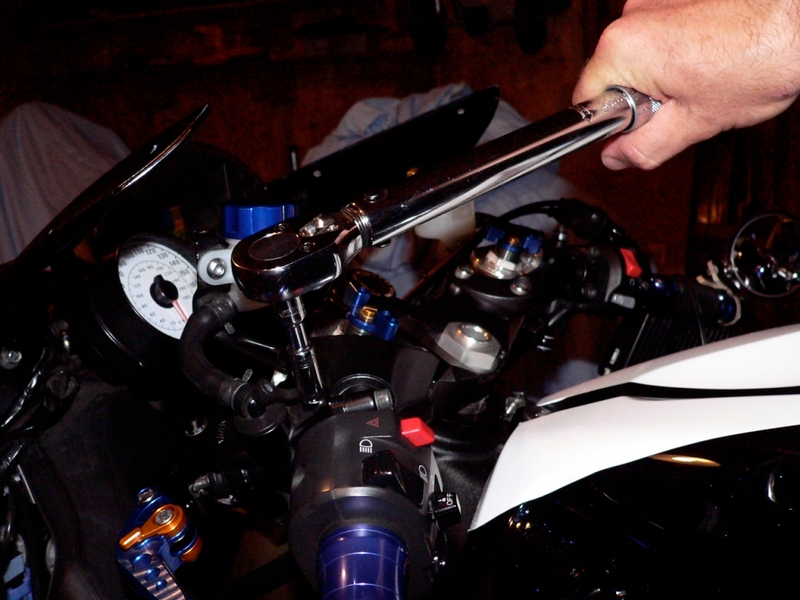
[Torque - Front Reservoir Cap Stopper Screw: 11 in·lb)] (just use blue locktight on the stopper screw and tighten it snug.)


41. Carefully remove the tubes from the bleed valves. Tighten the front brake master cylinder bleed valve and each front caliper bleed valve with a torque wrench and 8mm socket (master cylinder)or a 10mm socket (calipers).
[ Torque - Bleed Valves: 69 in lbs]
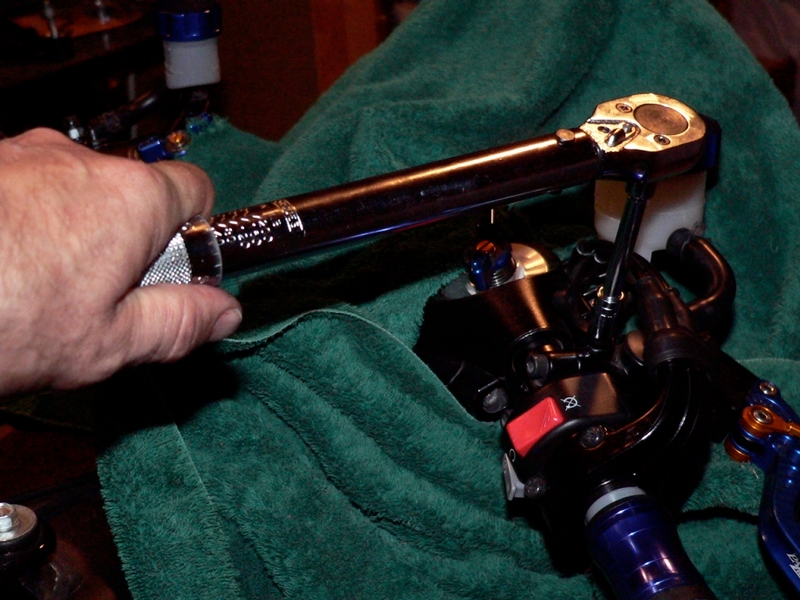

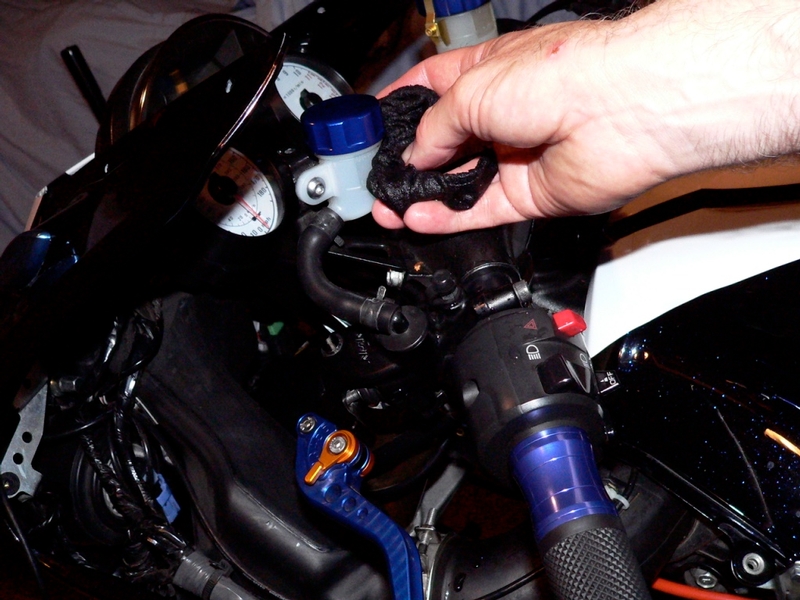
42. Wash the Front Brake Master Cylinder and each Front Brake Caliper with a sponge and water.
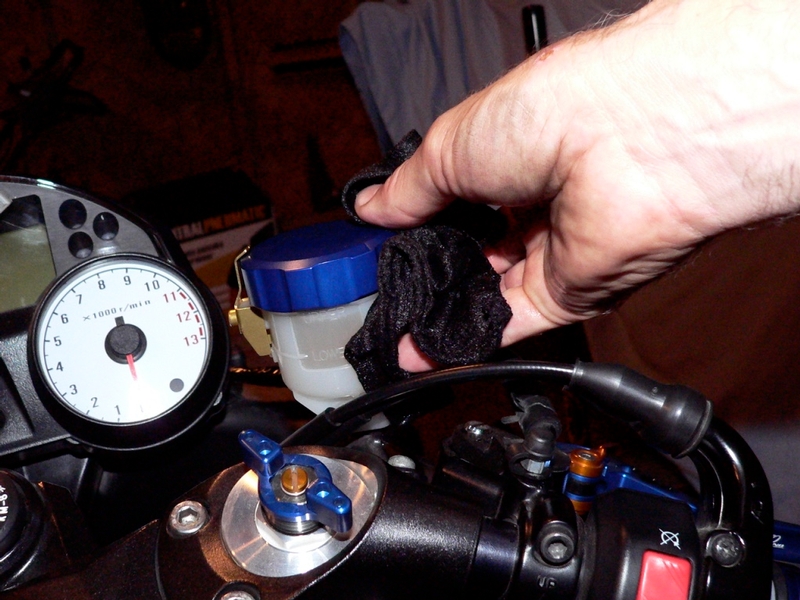

43. After bleeding is done, check the brake for good braking power, no brake drag, and no fluid leakage.


* Last updated by: Rook on 9/8/2017 @ 8:59 PM *


'08 MIDNIGHT SAPPHIRE BLUE Now Deceased

Link | Top | Bottom

Rook


Rook's Gravatar

Joined: 03/28/09

Posts: 20577

RE: Brake and Clutch Fluid Bleed and Purge
12/26/13 5:59 PM

Clutch Master Cylinder
44. Remove the clutch fluid reservoir cap stopper screw using a phillips screw driver.


45. Grasp the body of the clutch fluid reservoir to support it on its mount while twisting the cap off with the other hand.


46. Pull the diaphragm plate and diaphragm from the reservoir.


47. Remove the rubber cap from the clutch master cylinder.


48. Place an 8mm box end wrench on the clutch master cylinder bleed valve. Push one end of a 1/4 inch OD plastic tube on the bleed valve nipple and run the other end of the tube into a clean receptacle.


49. Tap on the clutch master cylinder and clutch line to dislodge air that may be clinging inside. Squeeze the clutch lever with your left hand, pumping to build fluid pressure if necessary.

Hold pressure on the lever and watch for tiny air bubbles rising from the hole at the bottom of the reservoir. If bubbles are being released, pump and hold until the bubbles stop.


50. Maintain pressure on the lever with your left hand. Open the clutch master cylinder bleed valve with your right hand by turning the 8mm wrench counter-clockwise one quarter turn. DO NOT RELEASE THE CLUTCH LEVER.

MAINTAIN HAND PRESSURE. You will see fluid surge through the plastic tube. Watch for air bubbles in the tube.


51. Still holding the clutch lever to the grip, close the bleed valve gently with the 8mm wrench just snug so no air can get in past the threads.


52. Release the lever and pump it to build fluid pressure.


53. If you are purging all hydraulic fluid, repeat the process until air comes from the bleed valve.

If you are bleeding, do not allow the fluid level to fall to the bottom of the reservoir or air will be sucked into the master cylinder and you will need to start bleeding all over.


54. If you are bleeding, replenish the brake fluid by pouring fresh DOT 4 fluid into the reservoir. Continue bleeding until the fluid comes through the tube colorless (old fluid is yellow or red-brown) and clear of air. If you are purging all fluid, continue without adding fluid.

Repeat steps 49 through 54 four or five more times. The process is: pump/squeeze lever, open bleed, close bleed, release lever.

pump/squeeze, open, (squirt) close, release...pump/squeeze, open, (squirt) close, release...

Watch for air bubbles in the fluid that is expressed through the quarter inch tube.

When no bubbles are visible in the tube, close the clutch master cylinder bleeder valve and move on to the clutch slave cylinder.

Clutch Slave Cylinder
55. Remove the rubber cap from the clutch slave cylinder. Place a 10mm box end wrench on the bleed valve hex. Push one end of a 1/4 inch O.D. plastic tube onto the bleed nipple and place the other end of the tube in a clean receptacle.


56. Tap on the clutch slave cylinder, and clutch line to dislodge air that may be clinging inside. Squeeze the clutch lever with your left hand, pumping to build fluid pressure if necessary.

Hold the lever to the grip. DO NOT RELEASE THE LEVER.


57. While squeezing the clutch lever, open the clutch slave cylinder bleed valve by turning one quarter turn counterclockwise with the 10mm box end wrench. Fluid will surge through the tube. DO NOT RELEASE THE LEVER. Watch for air bubbles in the hose.


58. Still holding the clutch lever to the grip, turn the bleed valve closed again just enough to prevent air from entering past the threads.


59. Now, release the clutch lever. Pump the clutch lever to build fluid pressure.


60. Repeat steps 55 through 59 four or five more times. The process is: pump/squeeze lever, open bleed, (squirt) close bleed, release lever.

pump/squeeze, open, (squirt) close, release...pump/squeeze, open, (squirt) close, release...

If you are bleeding, replenish the fluid by pouring fresh DOT 4 brake fluid into the reservoir. Continue bleeding until the fluid comes through the tube colorless (old fluid is yellow or red-brown) and clear of air. If you are purging all fluid, continue the process without adding fluid.


61. When the slave cylinder is bled or completely purged, you are done. Fill the the fluid reservoir to just below the upper fill line (never fill the fluid reservoir higher than the fill line). If you were purging you will now need to bleed it by repeating steps 48 through 61.


62. Wipe the threads of the clutch fluid reservoir with a clean, dry cloth to remove any fluid that might seep past the threads.


63. Install the diaphragm to the clutch fluid reservoir.


64. Install the diaphragm plate to the clutch fluid reservoir.


65. Install the clutch fluid reservoir cap to the clutch fluid reservoir and install the stopper and the stopper screw with a phillips screwdriver. You must use non permanent thread locking agent on the stopper screw or it will vibrate out.

[Tighten the clutch fluid reservoir cap clockwise by hand until slight resistance is felt indicating that the cap is seated on the reservoir body, then tighten the cap an additional 1/6 turn while holding the clutch fluid reservoir body.]

[Torque - Clutch Reservoir Cap Stopper Screw: 11 in·lb] <<Just snug and use blue locktite.


66. Carefully remove the tube from the bleed valves. Tighten the clutch master cylinder and slave cylinder bleed valves with a torque wrench that has been fitted with an 8mm socket.

[ Torque - Bleed Valves: 69 in lbs]


67. Wash the clutch fluid reservoir, master cylinder and slave cylinder with water and a sponge.


68. Check the clutch for good clutch operation and no fluid leakage. If necessary bleed the clutch fluid system again.


* Last updated by: Rook on 4/3/2018 @ 6:20 PM *


&#x27;08 MIDNIGHT SAPPHIRE BLUE Now Deceased

Link | Top | Bottom

Bobby914


Bobby914's Gravatar

Location: Chester, VA

Joined: 04/19/13

Posts: 1859

RE: Brake and Clutch Fluid Bleed and Purge
12/26/13 9:03 PM

What brand of torque wrench do you use? I don't trust mine with small increment torque settings, as it twisted a bolt off before.


Full Muzzy, flies out,K&amp;N, black wind screen, pc3, pm wheels, blue led gauges and lights, scorpip alarm, roaring toyz kickstand and lowering links, tinted turn sigs.

Link | Top | Bottom

Rook


Rook's Gravatar

Joined: 03/28/09

Posts: 20577

RE: Brake and Clutch Fluid Bleed and Purge
12/26/13 9:31 PM

Saw your question in the test section where I was working on this tutorial. I don't have any fancy torque wrenches. All are under $20. I have a long handled half inch drive that goes over 120 foot lbs and then I have a short 1/4 inch drive torque wrench that goes something like 20-180 in lbs. i have another 3/8 in drive but that one needs to be calibrated. It overtorques. I also have a good old flex beam torque wrench that I feel is vert safe and reliable. All torque wrenches are most accurate at the middle of their range of settings.

The video below makes the calbrating of a torque wrench look a lot more complex than it is. You do not need to look at equations to do this. It is as straightforward as setting the torque wrench at its midrange value, putting the square drive in a vice, measuring 1 foot up the handle from the center of the square drive, then hang some weights there and see if the thing clicks or not. You set the clicker to go harder or softer according to how it reacts to the weight you hang on it. As long as your weights are accurate, this method is foolproof.

I use a cheap, 1/4" drive Pittsburg torque wrench for low torques. Got it at Harbor Freight. I think it goes from 10-120 inch lbs. Seems to be calibrated on the light side so it is safe. You prolly have a torque wrench that is calibrated hard. I have one of those too and I avoid using it.

You can calibrate your own clicker torque wrenches if you have a vice, ruler and some accurate weights. I've never done it before but really should.

also, i am finding that torquing is a matter of judgement. I usually try to go about 15-20% under spec on external bolts to save the thread ware. Some bolts you are well advised to torque to spec or use locktight. Rotor bolts will come loose. Fairing fasteners that screw into a solid bracket rather than a well nut will come loose. I think anodized bolts are more likely to come loose than steel so use locktite with alums and colored finish Ti bolts---prolly not good to use antiseize agent. Have not had any alum engine cover bolts come loose and i neverseized all of them so go figure?

Brake fluid bleed valves seem to weep if not torqued to spec. ....but then again, I am the guy who has never calibrated his torque wrenches so pretty hard to give exact advice.....but i can tell you the best thing to do is to calibrate your own t wrenches so they are accurate at the center of their torque range. You won't get it perfectly calibrated across the range unless it is a expensive torque wrench.


BTW Bobby, I have a thread on here about busted off bolts.

If you need to get the shank out, it can be done with some patients and you probably won't even need to drill.


* Last updated by: Rook on 12/26/2013 @ 9:39 PM *


&#x27;08 MIDNIGHT SAPPHIRE BLUE Now Deceased

Link | Top | Bottom

Rook


Rook's Gravatar

Joined: 03/28/09

Posts: 20577

RE: Brake and Clutch Fluid Bleed and Purge
12/29/16 4:07 PM

To me; check pics


&#x27;08 MIDNIGHT SAPPHIRE BLUE Now Deceased

Link | Top | Bottom

CoolBrzBlu


CoolBrzBlu's Gravatar

Location: Texas

Joined: 05/19/16

Posts: 384

RE: Brake and Clutch Fluid Bleed and Purge
01/27/17 2:29 AM

Still need to check pics.


2016 ZX14R SE, 2007 ZX10R SE, 2018 z900rs

Link | Top | Bottom

Rook


Rook's Gravatar

Joined: 03/28/09

Posts: 20577

RE: Brake and Clutch Fluid Bleed and Purge
01/27/17 4:14 AM

will do...have it tonight.


&#x27;08 MIDNIGHT SAPPHIRE BLUE Now Deceased

Link | Top | Bottom

Nightmare


Nightmare's Gravatar

Location: Okotoks, AB

Joined: 04/07/09

Posts: 602

RE: Brake and Clutch Fluid Bleed and Purge
01/27/17 9:39 AM

An alternate to using weights to check the torque wrench calibration is to use a fish weight scale, they have a hook that fits nicely on the handle, keep pulling on the scale until it clicks and you can see the weight/force applied. :)

Link | Top | Bottom

Rook


Rook's Gravatar

Joined: 03/28/09

Posts: 20577

RE: Brake and Clutch Fluid Bleed and Purge
01/27/17 12:57 PM

That would work no matter what angle the handle was at....although it should not be hard to get the handle to perfectly horizontal if you adjust the square drive in the vice.

Recently needing to use my inch lb torque wrench, I thought it might be valuable to consider the weight of the handle somehow. If you are doing very light torques, that could be a factor. Just stand the handle vertical and use the fish scale to calibrate!


* Last updated by: Rook on 1/27/2017 @ 12:58 PM *


&#x27;08 MIDNIGHT SAPPHIRE BLUE Now Deceased

Link | Top | Bottom

bgordon

Forum Administrator

bgordon's Gravatar

Location:

Grand Junction, CO

Joined: 07/19/09

Posts: 1520

RE: Brake and Clutch Fluid Bleed and Purge
09/08/17 6:10 PM

Hi Rook.

Any chance you could re-upload the pictures for the front brake bleed? I could sure use 'em.

Thanks! -bg

Link | Top | Bottom

Rook


Rook's Gravatar

Joined: 03/28/09

Posts: 20577

RE: Brake and Clutch Fluid Bleed and Purge
09/08/17 8:19 PM

i'm on it now, bg. No problem.


&#x27;08 MIDNIGHT SAPPHIRE BLUE Now Deceased

Link | Top | Bottom

Rook


Rook's Gravatar

Joined: 03/28/09

Posts: 20577

RE: Brake and Clutch Fluid Bleed and Purge
09/08/17 9:48 PM

One more tip--when you screw your reservoir cover back on, have a good look at it. It should spin down over thw threads easily. I cross threaded mine the last time and I was wondering why it was leaking for days on end. Probably will need a new OEM cup now because the threads are gouged. Still seals but I hate to use damaged parts. I might switch to aftermarket reservoirs anyway.


&#x27;08 MIDNIGHT SAPPHIRE BLUE Now Deceased

Link | Top | Bottom

bgordon

Forum Administrator

bgordon's Gravatar

Location:

Grand Junction, CO

Joined: 07/19/09

Posts: 1520

RE: Brake and Clutch Fluid Bleed and Purge
09/09/17 6:33 AM

Thank you so much! -bg

Link | Top | Bottom

doznkoz


doznkoz's Gravatar

Joined: 02/27/16

Posts: 163

RE: Brake and Clutch Fluid Bleed and Purge
09/11/20 8:02 PM

Doing this tomorrow. Thanks for this tutorial Rook.

Link | Top | Bottom

Rook


Rook's Gravatar

Joined: 03/28/09

Posts: 20577

RE: Brake and Clutch Fluid Bleed and Purge
09/12/20 8:52 AM

Two things I recommend:

Keep an eye on the bleeders because they will seep a little for a while after torquing them. I don't tighten those too hard. I Think they are M8 threads but they're not very long.

Use a reservoir sock on the front master cylinder because the cap seems to seep for a while too. If that fluid gets on the instrument cluster or the ram air covers, it will leave an etched spot. I polished some out once but it was some work.


&#x27;08 MIDNIGHT SAPPHIRE BLUE Now Deceased

Link | Top | Bottom

doznkoz


doznkoz's Gravatar

Joined: 02/27/16

Posts: 163

RE: Brake and Clutch Fluid Bleed and Purge
09/24/20 9:58 AM

Thanks for the tips Rook. I just finished purging and refilling both front and back brakes - DOT 4. I also purged the clutch reservoir and master cylinder - refilled with DOT 4. I did not realize how dirty the fluid had gotten even though I could see it in both reservoirs.
Thanks again. Think I am going to replace all brake pads now. They are still originals on it. On to the next tutorial.
You Da Man.

Link | Top | Bottom

Rook


Rook's Gravatar

Joined: 03/28/09

Posts: 20577

RE: Brake and Clutch Fluid Bleed and Purge
09/24/20 4:50 PM

Thanks, Doznkoz. I hope they will be helpful and I hope all the pics are on the tutorials. One of these days I hope to post pdfs on the tutorials without pics because I can't load any more pics to my briefcase here. I need to change brake pads on both bikes too. I think I will try carbon Lorraine on one of them.


* Last updated by: Rook on 9/24/2020 @ 4:51 PM *


&#x27;08 MIDNIGHT SAPPHIRE BLUE Now Deceased

Link | Top | Bottom

doznkoz


doznkoz's Gravatar

Joined: 02/27/16

Posts: 163

RE: Brake and Clutch Fluid Bleed and Purge
09/25/20 5:50 AM

The photos were all there Rook. Very professional tutorial.

Link | Top | Bottom

Rook


Rook's Gravatar

Joined: 03/28/09

Posts: 20577

RE: Brake and Clutch Fluid Bleed and Purge
09/25/20 7:54 PM


&#x27;08 MIDNIGHT SAPPHIRE BLUE Now Deceased

Link | Top | Bottom

yannih


yannih's Gravatar

Location:

Queenstown New Zealand

Joined: 11/08/12

Posts: 2163

RE: Brake and Clutch Fluid Bleed and Purge
10/10/22 7:44 PM

Well Rook, your legacy lives on!
All that initial effort on your part is still helping people ongoing.

Decided to jump onto the bike for a trip to work as I haven't ridden it for around 4 months.

Ready to go, pulled the clutch in and no resistance.
Checked the master cylinder fluid level and all good.
So theres air in there somewhere.
Knew I had to bleed the clutch.
A relatively simple process but buggered if I could remember how.

Checked the "Rook How To's", followed along, and now all done.

Thanks again mate.
Champion...


2012 Metalic Spark Black Kawasaki ZX-14R. Yoshimura carbon R-77 slip ons,Custom dyno ECU flash,Striker rearsets,Hyperpro RSC steering damper,HM Plus quickshifter,ASV C5 levers,Hel SS transparent red front/rear brake and clutch lines,Kawasaki/MRA vented spoiler screen,Carbon heel guards,R&G radiator guard,Powerbronze carbon rear hugger,ZX-10 front fender with fender extender,Yoshimura frame sliders,M-Factory rear stand stoppers,Escort Redline radar detector,Techspec tank grips and tank protector,Versys 1000 fender eliminator,Kaoko cruise control,Moto red oil cap,Oxford heated grips,Red magnetic oil drain plug,Red and black Bagster Spider rear seat bag (for touring only).

Link | Top | Bottom

Rook


Rook's Gravatar

Joined: 03/28/09

Posts: 20577

RE: Brake and Clutch Fluid Bleed and Purge
10/11/22 9:47 PM

You and anyone else who finds the information helpful are most welcome, yan.


&#x27;08 MIDNIGHT SAPPHIRE BLUE Now Deceased

Link | Top | Bottom

EtriganReins


EtriganReins's Gravatar

Location: Evansville IN

Joined: 01/07/23

Posts: 3

RE&#x3a; Brake and Clutch Fluid Bleed and Purge
01/22/23 11:18 AM

Rook,
How hard is this for a newbie at maintenance? I have done my own oil changes and air filter change and switched my windscreen. Considering changing my Full Exhaust to a Akrapovic, but not sure if I am confident enough for that. I have done my own Plugs on a Yamaha FZ6R before.

2014 ZX14R Your text to link here...


* Last updated by: EtriganReins on 1/22/2023 @ 4:09 PM *

Link | Top | Bottom

VicThing


VicThing's Gravatar

Joined: 07/17/14

Posts: 2361

RE: Brake and Clutch Fluid Bleed and Purge
02/16/23 3:59 PM

This is on the lower/medium. Most risk IMO is damaging the bleeders, do not over torque and torque to spec when bleeding is completed.

Check for sponginess, if your good your good, if not, bleed again. Learning a little about reading air bubbles and that is just trial and air.

I recommend using a vacuum bleeder, it eliminates the whole back and forth of tightening/pumping/loosen and you can just suck the fluid through, although you need to be careful not to empty the reservoir entirely while doing this process. It's not the end of the world if you do, you just might need to bleed at the cylinder (follow manual).

Link | Top | Bottom


Welcome to zx14ninjaform.com!
 
New Topic Reply
Next Page

Page: 1

Previous Page

New Post

Please login to post a response.