Move Close
Welcome to zx14ninjaform.com!

You are not logged in.
New Topic Reply
Next Page

Page: 1 2

Previous Page

Thread: Gen2 ZX14 Stage 2 RCC Turbo Build

Created on: 01/10/26 03:52 PM

Replies: 49

bryan468


Joined: 03/29/16

Posts: 31

Gen2 ZX14 Stage 2 RCC Turbo Build
01/10/26 3:52 PM

Hello everyone,

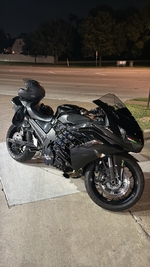
I’ve been away from this forum for a long time now. I use to have a gen 1 zx14 that I installed a stage 1 rcc turbo kit on but I hit a deer with it and the bike ended up being totaled. Then I bought a H2SX which was a nice bike but I always missed the zx14. I held on to the H2SX for a while as I started a business making parts for it. Last year I was offered a good price for the H2SX so I let it go and decided to build another zx14. I found a completely stock 2023 zx14 with 48k miles on it for a decent price so I bought it. The miles didn’t concern me as I intended to go through the whole bike anyway and I have no intention of selling it.

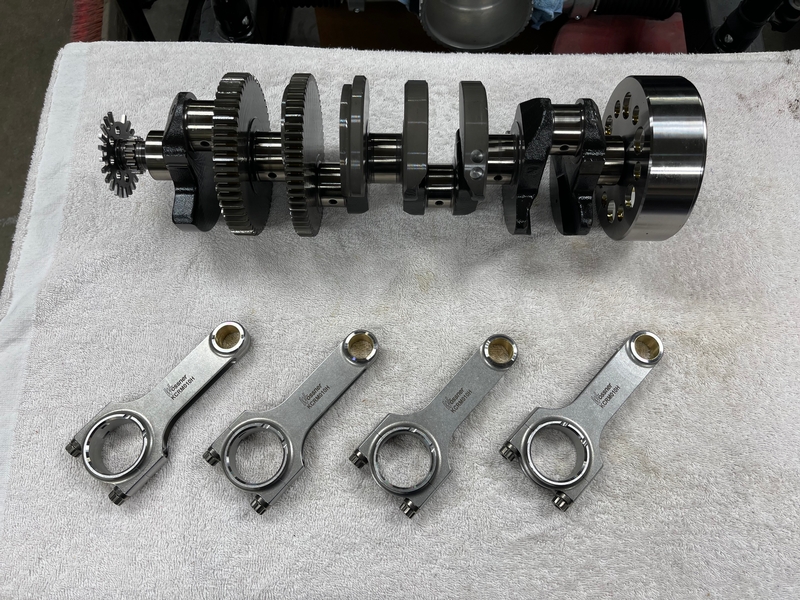
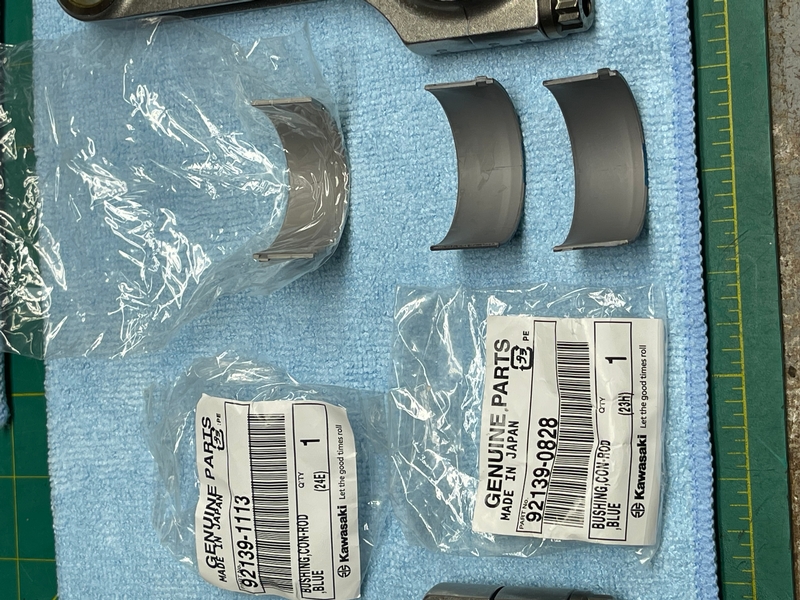
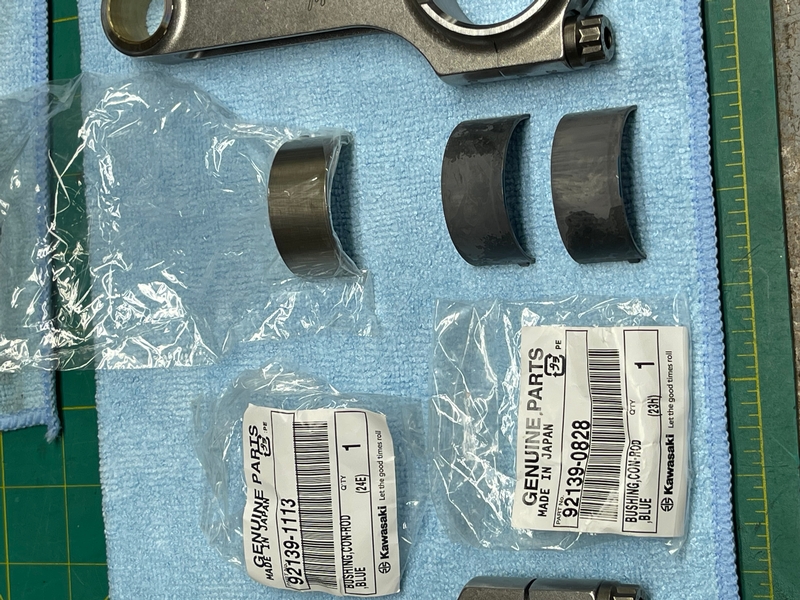
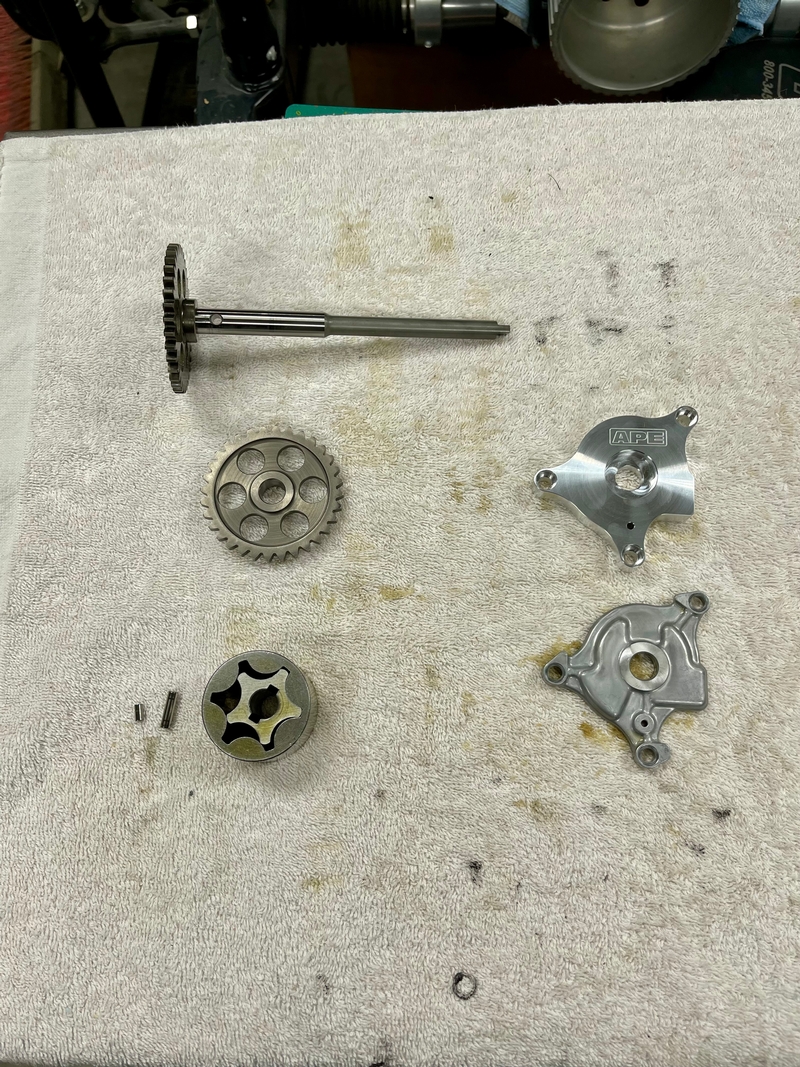
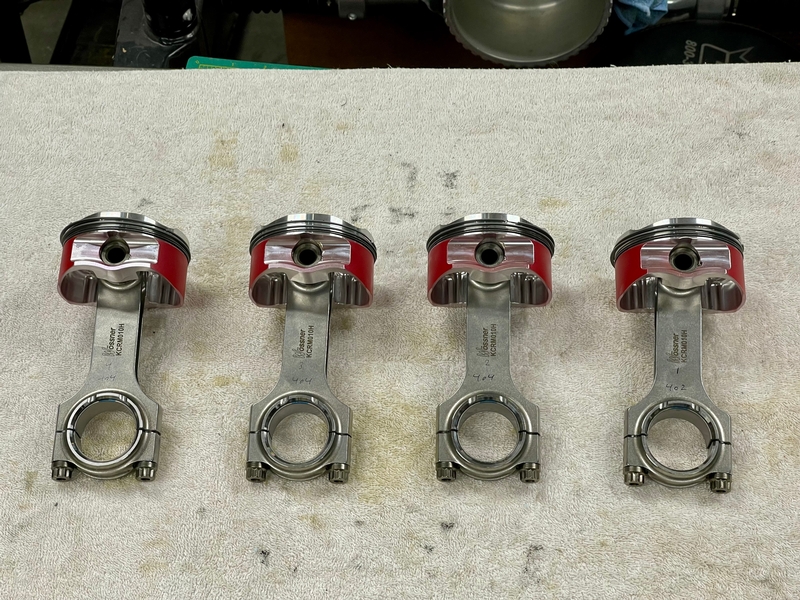
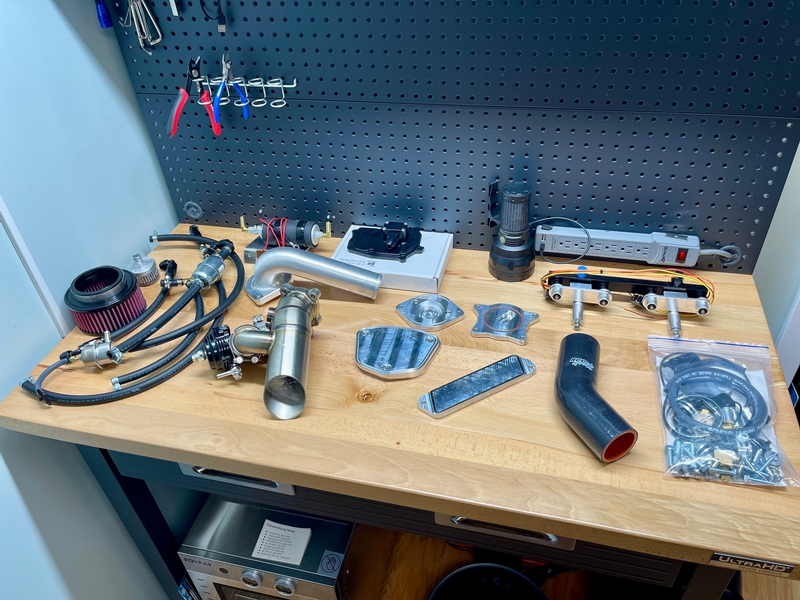
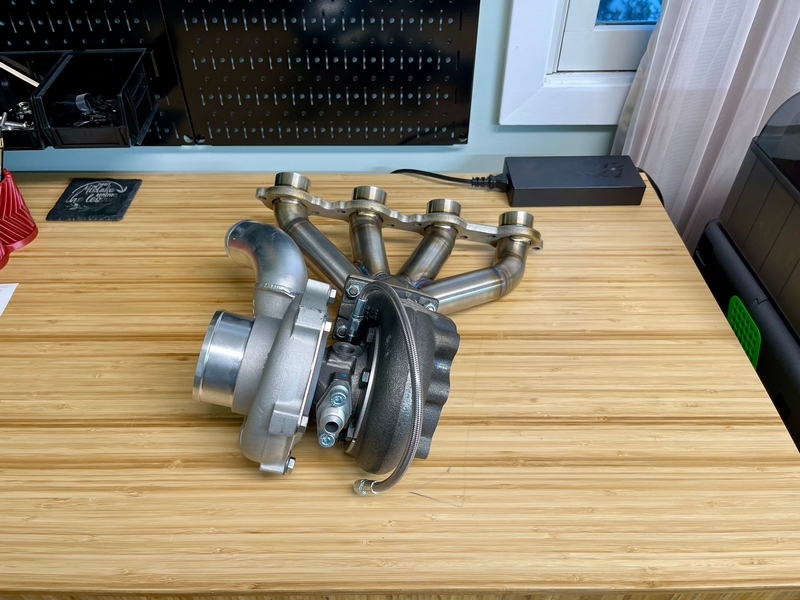
I’m fairly far along with the build at this point but I will start from the beginning and post updates when I have time. The basic plan for the build is a stage 2 rcc turbo kit, fully built motor, maxx ecu, and flex fuel setup.

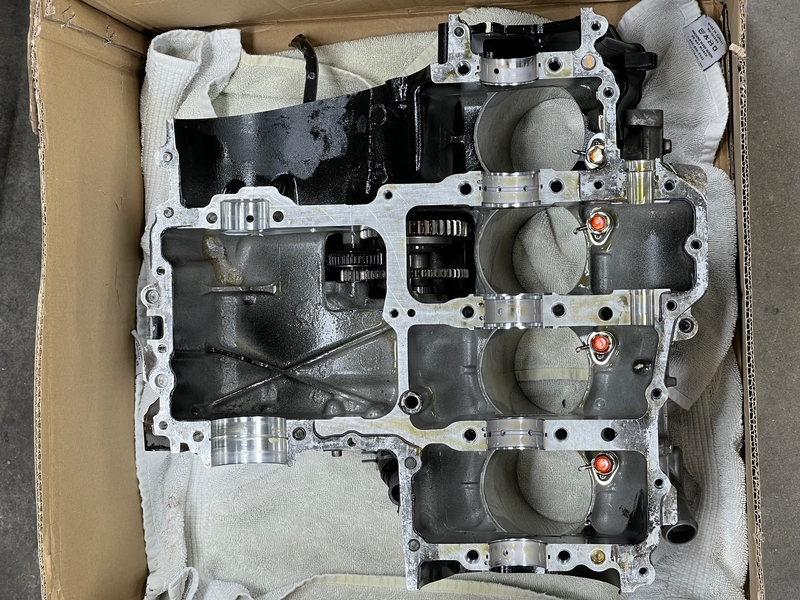
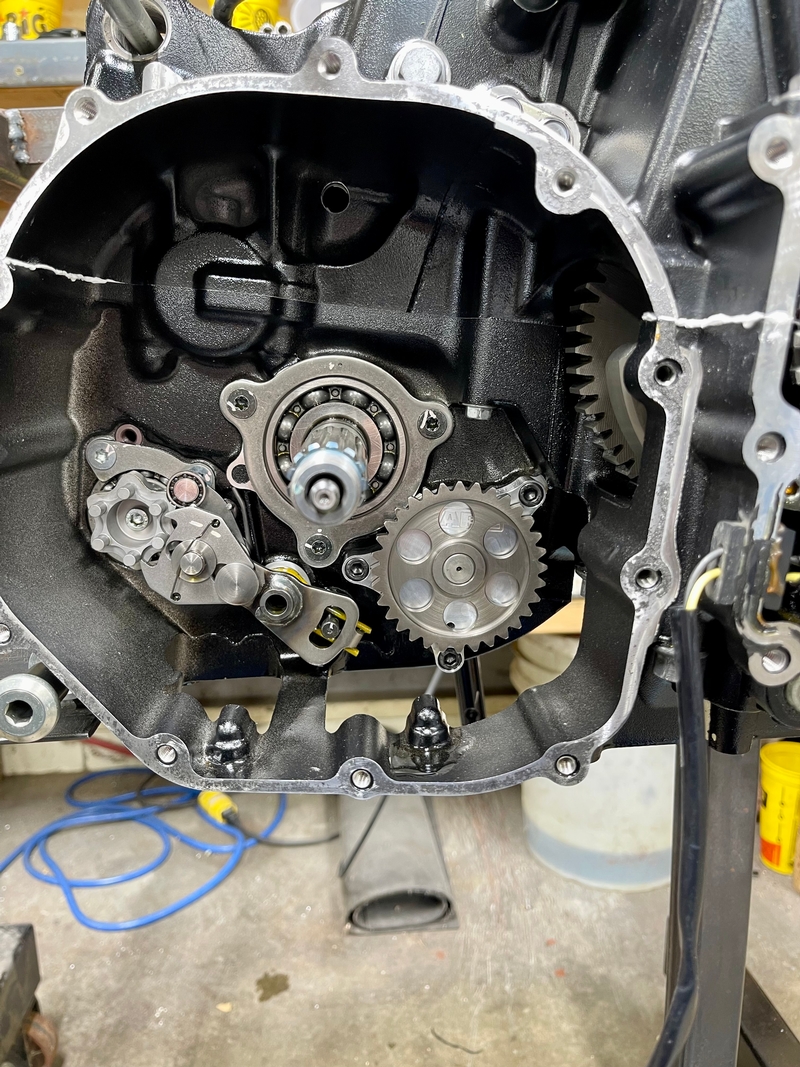
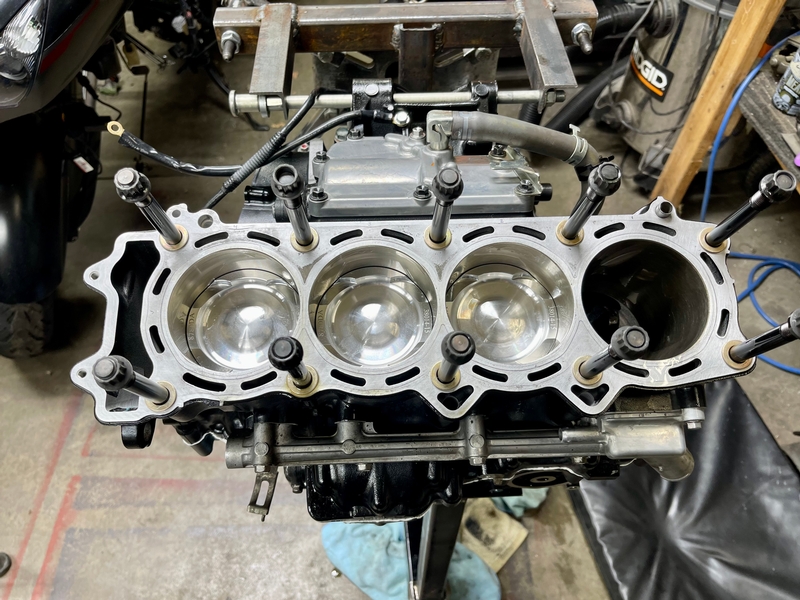
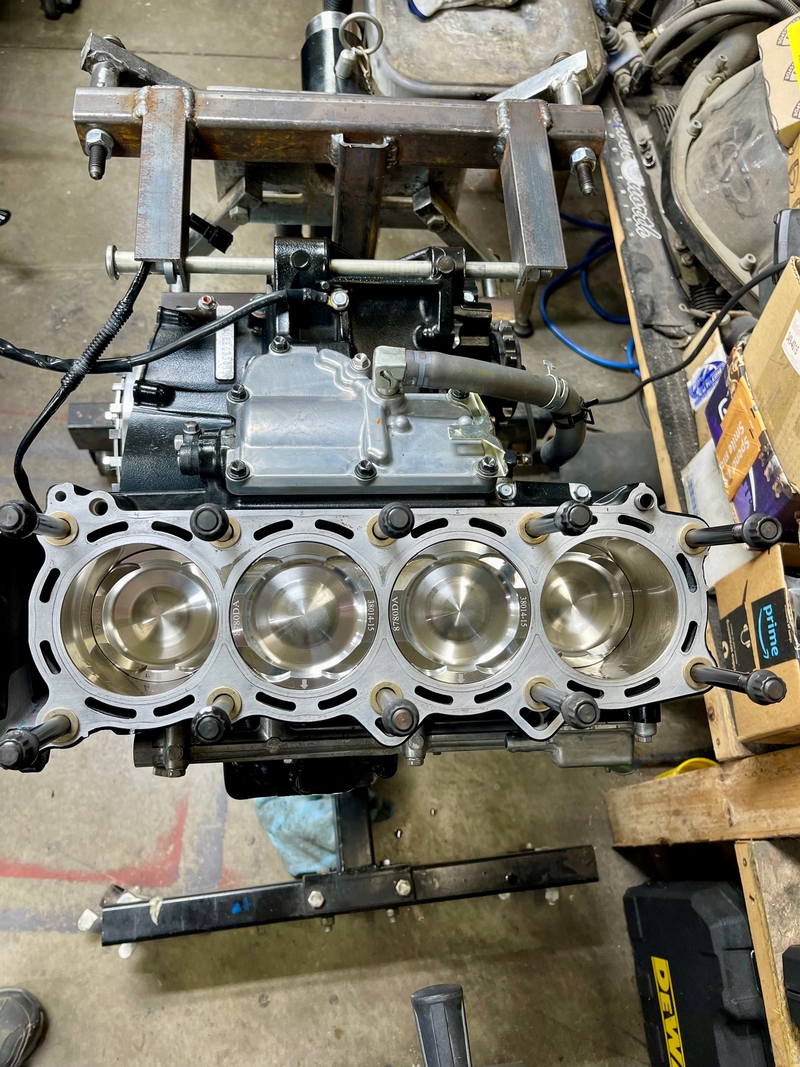
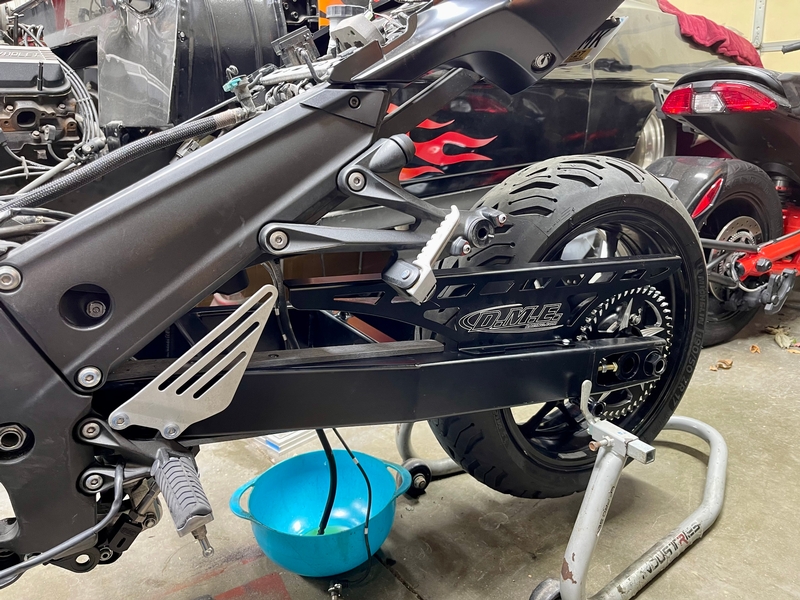
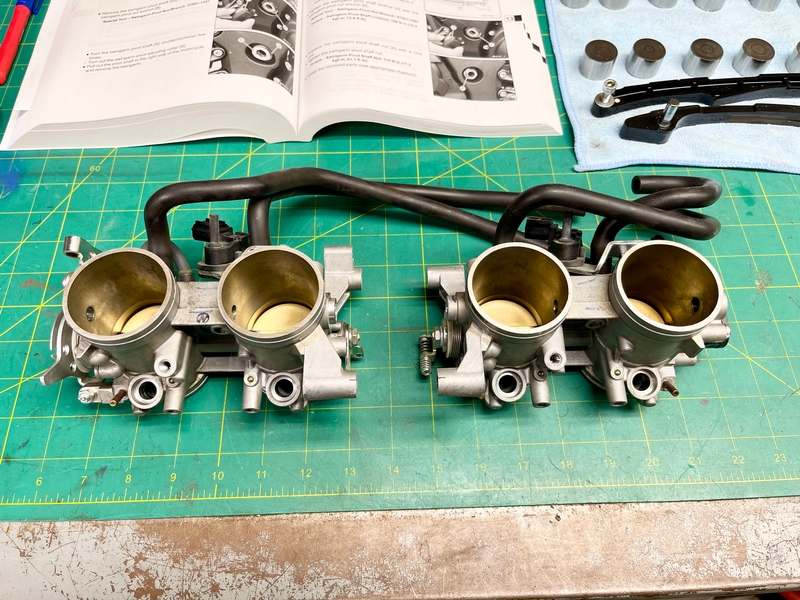
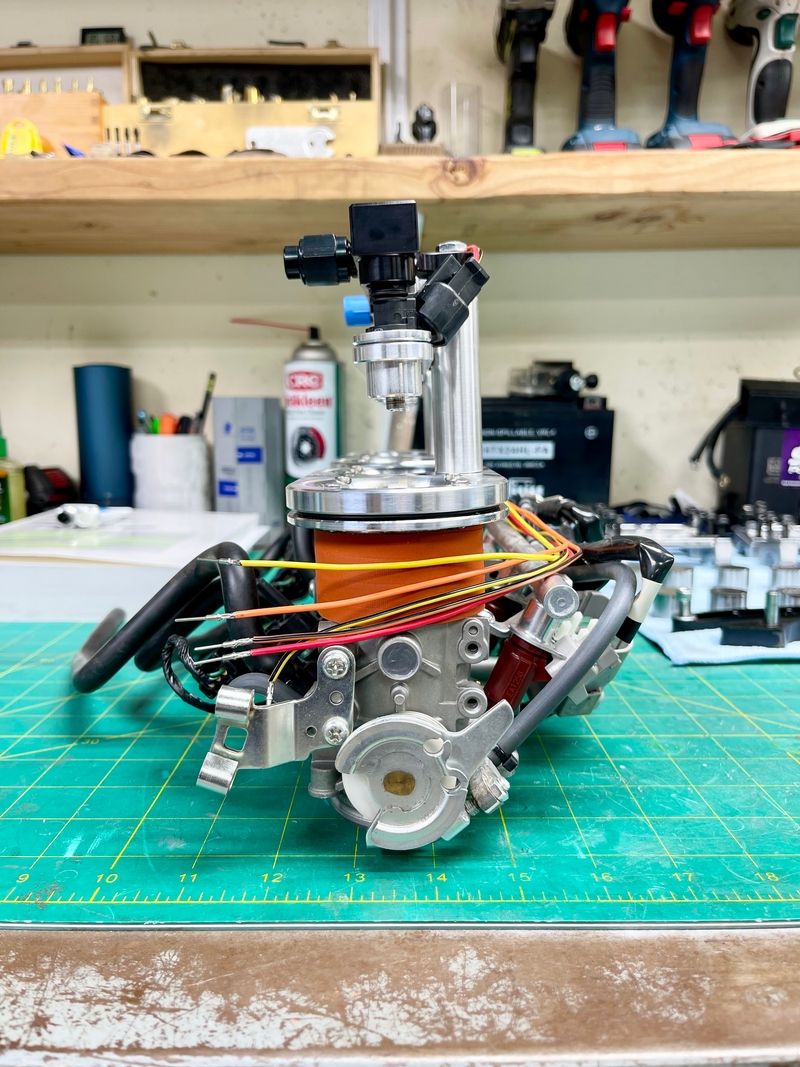
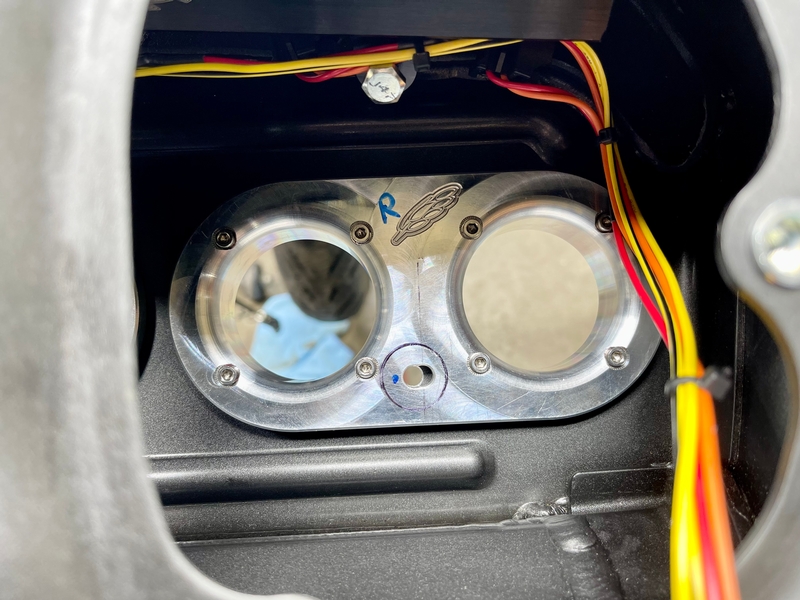
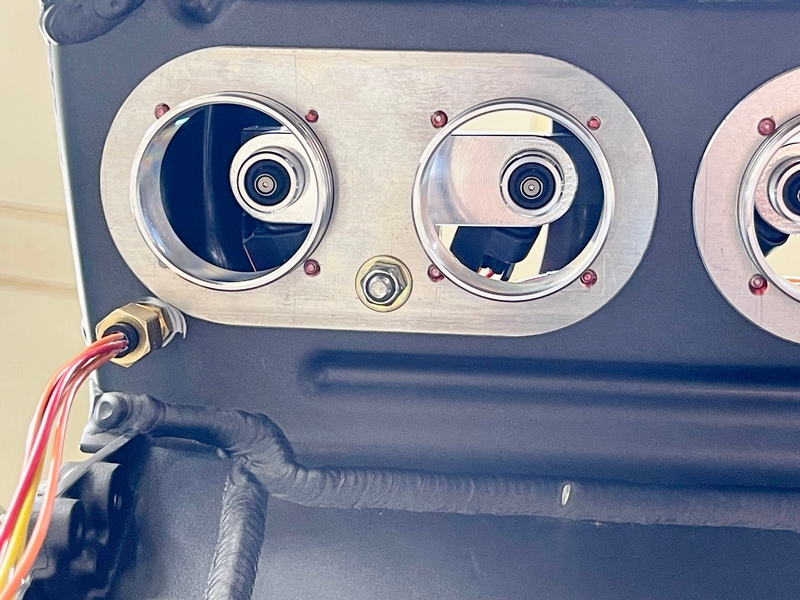
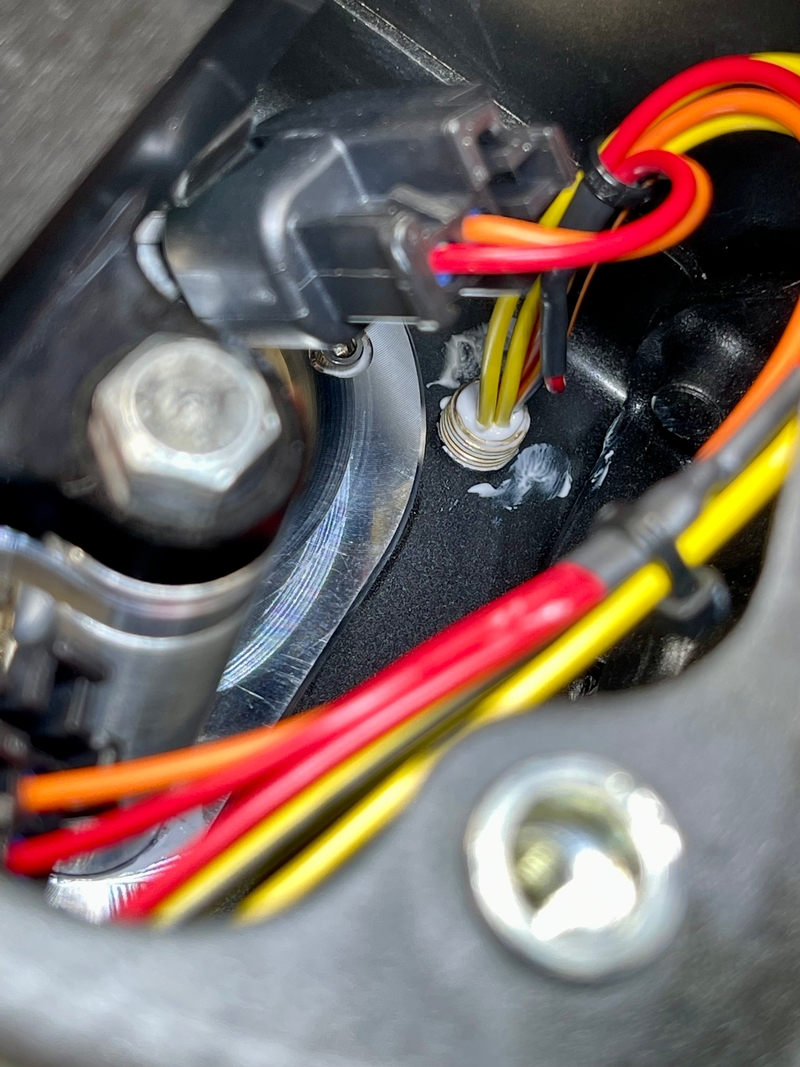
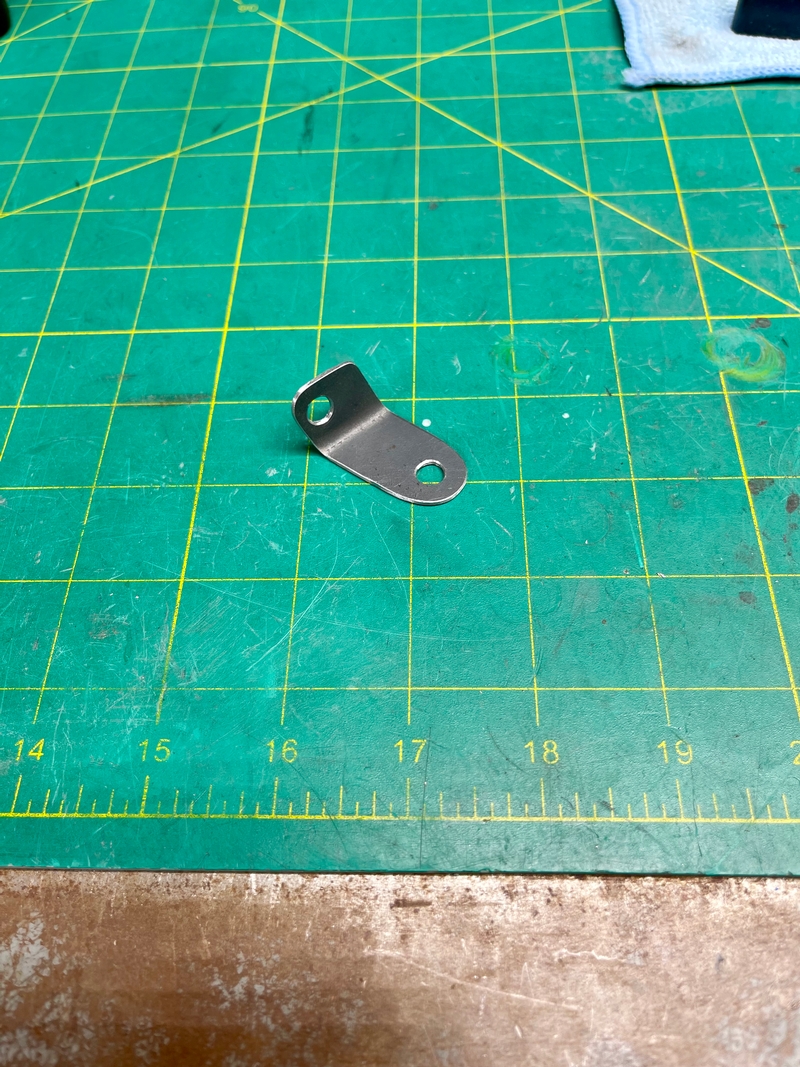
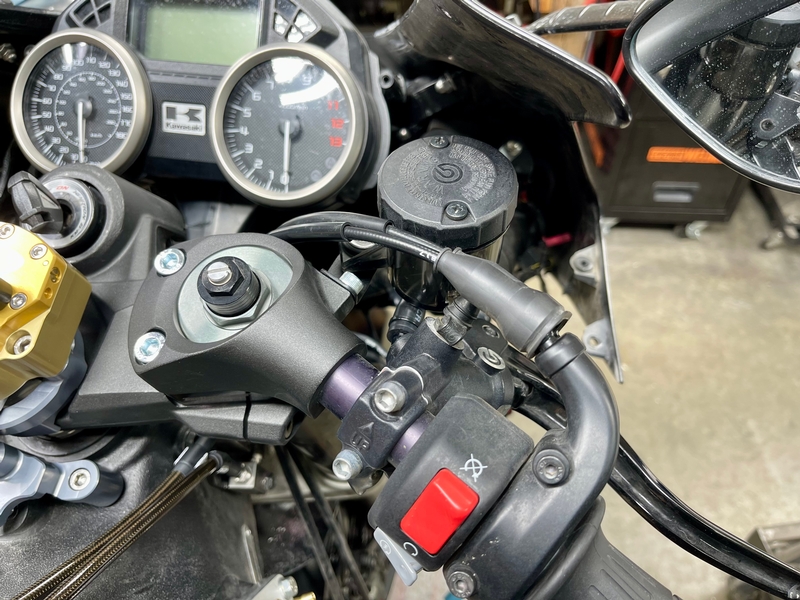
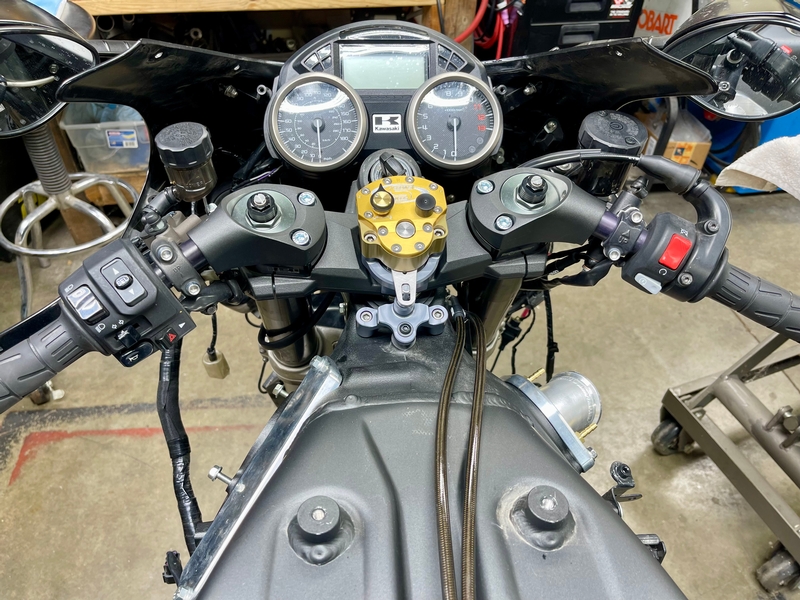
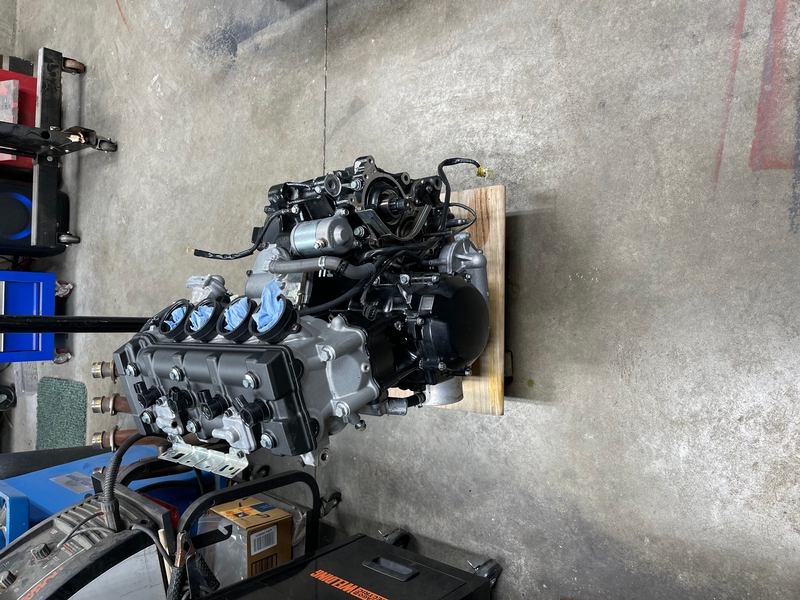
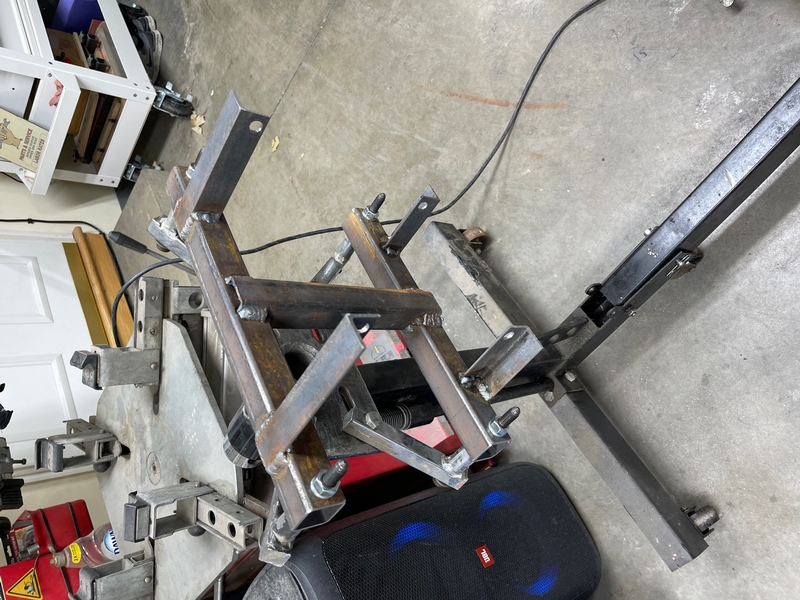
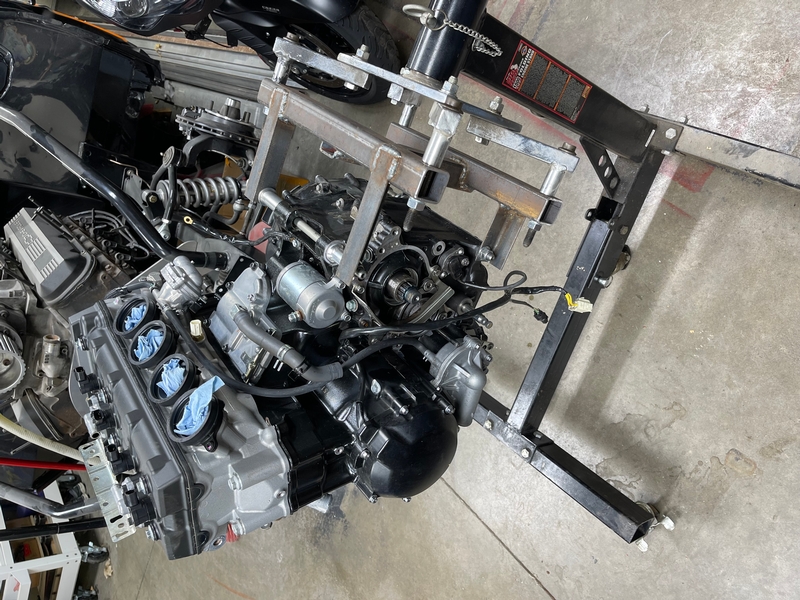
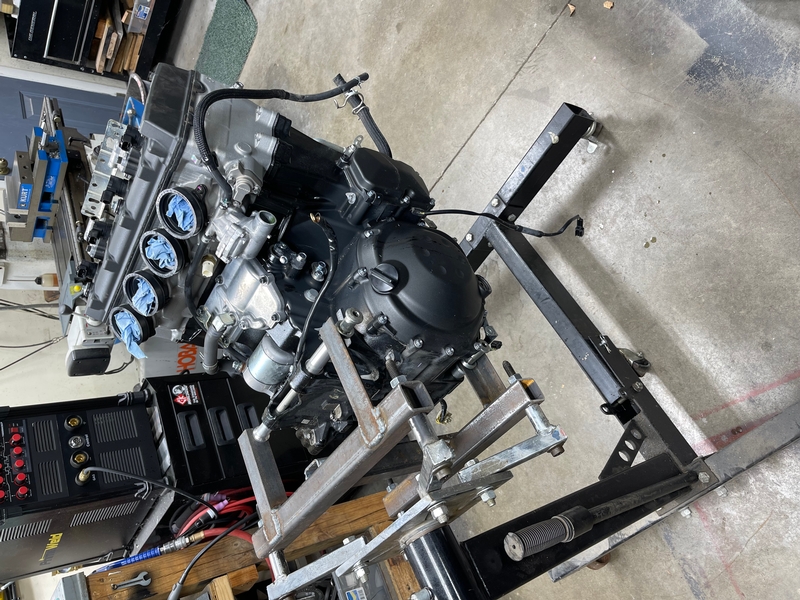
The first step was to get the bike home, pull the motor, and build a fixture so I could mount the engine in my engine stand. Here’s some pictures.


* Last updated by: bryan468 on 1/10/2026 @ 4:01 PM *


Bamperformance.Us@gmail.com 507-571-2777

Link | Top | Bottom

bryan468


Joined: 03/29/16

Posts: 31

Update 2
01/10/26 4:57 PM

• Disassembled the engine
• Built a front support bracket for the engine so I could split the case.
• Split the case
• Inspected crank and rod bearings
• Inspected transmission gears
• Inspected cams and buckets
• Ordered the first batch of parts

I found that the oil pan had a bit of a jelly like oil buildup on it, the bearings all looked like they were in good shape considering the amount of miles on the bike, the cam lobes had some damage, cam buckets have some wear, some of the valve clearances were 0 on cylinders 1 and 4 so it’s unlikely the bike ever had a valve job done, valve seats are heavily pitted, transmission gears look excellent, output shaft seal was leaking, output shaft collar had a groove wore in it from the oil seal, cylinders look good.


* Last updated by: bryan468 on 1/10/2026 @ 5:55 PM *


Bamperformance.Us@gmail.com 507-571-2777

Link | Top | Bottom

bryan468


Joined: 03/29/16

Posts: 31

Update 3
01/10/26 5:53 PM

•Due to the damage to the valve seats I decided to send the head out to SRW Performance Engines to have new valves installed, full port job, and carpenter valve springs installed.
• Due to the damage to the camshafts I decided to try and get some used ones off eBay. I tried twice, the first set was not what was pictured in the listing and the second set had the same damage my cams had plus additional damage from poor packaging so I decided to order a new set of .395/.395 cams from carpenter racing.
• The output shaft collar was on back order so I pressed it off the output shaft, cleaned it up, replaced the bearing, and reinstalled it.
• Honed the cylinders to deglaze them.
• File fit the rings.
• Installed new rod bearings into wossner rods.
• Checked rod bearing clearances.


* Last updated by: bryan468 on 1/10/2026 @ 5:56 PM *


Bamperformance.Us@gmail.com 507-571-2777

Link | Top | Bottom

Rook


Rook's Gravatar

Joined: 03/28/09

Posts: 21691

RE: Gen2 ZX14 Stage 2 RCC Turbo Build
01/10/26 11:08 PM

Wow, my Gen1 ran great although the compression was barely in spec. My dream is to turbo a Gen2 sometime in the future. When I see what you guys go through, I think my project will be a lot less ambitious but I'll follow this one through to the end and learn what I can. Did you have a look at danmin's threads?


08 MIDNIGHT SAPPHIRE BLUE ZX-14 Now Deceased, will be resurected 2024 ZX-14R bran friggin NEW!

Link | Top | Bottom

Puck


Joined: 12/19/25

Posts: 9

RE: Gen2 ZX14 Stage 2 RCC Turbo Build
01/11/26 9:40 AM

Awesome build, will definitely be following. Doing it right the first time with supporting mods and upgrades will always be worth the extra effort and cost in the long run.


* Last updated by: Puck on 1/11/2026 @ 9:40 AM *

Link | Top | Bottom

bryan468


Joined: 03/29/16

Posts: 31

RE: Gen2 ZX14 Stage 2 RCC Turbo Build
01/11/26 3:25 PM

Rook,
On my gen 1 the stage 1 rcc kit was pretty easy to install and the setup on that bike was pretty basic but still worked well. I did everything with just a basic set of tools at a relatively low cost. Stage 1 rcc turbo kit, wossner low compression pistons, pcv, trac king clutch plates/steels, and heavy duty clutch springs. Made around 280whp. If you want a turbo on your bike while keeping cost, labor, and complexity to a minimum that’s the way to go.

I looked at a few different turbo build threads on here which did help me prepare for this project.


Puck,
Thank you, I’m certainly trying to do it right. I will definitely have a very extensive build sheet when it’s done.


Bamperformance.Us@gmail.com 507-571-2777

Link | Top | Bottom

danmin


danmin's Gravatar

Location: Granbury, Texas

Joined: 03/19/25

Posts: 298

RE: Gen2 ZX14 Stage 2 RCC Turbo Build
01/11/26 11:42 PM

Hey, if you haven't ordered it yet- don't get a stage 2 RCC kit. You recieve a bunch of parts you aren't going to need/use and you'll lose money trying to resell them. Check the threads on this topic and you'll see my current build.

RCC stage 1 with intercooler and Blow off valve is all you need from Richard.


* Last updated by: danmin on 1/11/2026 @ 11:43 PM *

Link | Top | Bottom

bryan468


Joined: 03/29/16

Posts: 31

RE: Gen2 ZX14 Stage 2 RCC Turbo Build
01/12/26 2:05 AM

Danmin,

I already have the stage 2 kit. The only thing I won’t use is the microtech ecu but I wanted it just in case I didn’t go with a maxxecu. I’m planning to run e85 so I want the second set of injectors.


Bamperformance.Us@gmail.com 507-571-2777

Link | Top | Bottom

danmin


danmin's Gravatar

Location: Granbury, Texas

Joined: 03/19/25

Posts: 298

RE: Gen2 ZX14 Stage 2 RCC Turbo Build
01/12/26 8:21 AM

Gotcha. Have you installed the secondary rail yet? If not- a set of ID1050x injectors are $500 and let you run pump and e85 with them. I got rid of my secondary rail since it made engine install/removal really tricky with the turbo 'velocity stacks' I have. I ended up ditching the rail as well as the RCC fuel system. I just have ID1050X and the HTP fuel pump now. One hose going from tank to injector rail.


* Last updated by: danmin on 1/12/2026 @ 8:21 AM *

Link | Top | Bottom

bryan468


Joined: 03/29/16

Posts: 31

RE: Gen2 ZX14 Stage 2 RCC Turbo Build
01/12/26 3:50 PM

Danmin,

I have gone through your build thread a couple times. It’s an excellent resource in regards to all of the problems you may run into and it seems you’ve run into almost all of them. I want to keep the oem injectors in the throttle bodies and run big injectors in the secondary rail. I think that will give me the ability to fine tune the normal riding and ride ability areas with the primary injectors and tune the under boost areas with the secondary injectors.

I looked at the hpt fuel pump and it looks nice but it appears you would loose the fuel gauge which is something I really want to have, especially since I will be running e85.

I have the same velocity stacks you do. On my gen 1 I had velocity stacks from factory pro and they worked great. I was thinking about running them again but I felt like the price was too high for them. I was able to get the AG Motorsports velocity stacks to fit quite easily. When I get to that update I will post pictures of how I did it.


* Last updated by: bryan468 on 1/12/2026 @ 3:52 PM *


Bamperformance.Us@gmail.com 507-571-2777

Link | Top | Bottom

Puck


Joined: 12/19/25

Posts: 9

RE&#x3a&#x3b; Gen2 ZX14 Stage 2 RCC Turbo Build
01/13/26 9:31 AM

@Bryan468 Fuel gauge works as it should with HTP setup. Your "Low Fuel" mode will trigger though, but to disable it just run that 3rd wire to a GND in line with a 1k resistor a d it will disable that. Nice to not get your screen covered by that annoying message anyway - once done, the fuel estimate will continue showing till empty but note that its very innaccurate under ~20mi.

I tried both leaving that line open and connecting straight to GND and both resulted in constant "Low Fuel" warning, but tossing a 1k resistor got rid of it.


* Last updated by: Puck on 1/13/2026 @ 9:33 AM *

Link | Top | Bottom

bryan468


Joined: 03/29/16

Posts: 31

RE: Gen2 ZX14 Stage 2 RCC Turbo Build
01/13/26 1:49 PM

Puck,

That’s good to know. I have the fuel system installed now but if I have any issues with it I may consider the htp pump. Do you know how much power it will support on e85?


Bamperformance.Us@gmail.com 507-571-2777

Link | Top | Bottom

bryan468


Joined: 03/29/16

Posts: 31

Update 4
01/13/26 4:59 PM

When checking rod bearing clearances I discovered that one of the bearing halves was different from the rest. The part number had been updated and the bearing was different. I probably could have assembled it with the two different bearings however I didn’t like the idea of having two different bearing halves in one rod. The other problem was the updated bearing half had damage to it. I decided I would just order a new set. The new set of bearings showed up and had the same damage, so I sent an email, a new set was sent to me and only one of the two bearings was free of damage, I sent another email to which I received a phone call, I was told that the damage was acceptable and reputable engineer builders would run the bearings, I refused to run them and finally received a damage free set. This whole ordeal cost me a few weeks and a lot of frustration. I run a business and I would never sell my customers damaged products or try to convince them it’s okay to run damaged parts.


Bamperformance.Us@gmail.com 507-571-2777

Link | Top | Bottom

bryan468


Joined: 03/29/16

Posts: 31

Update 5
01/13/26 5:42 PM

While I waited for a good set of rod bearings I moved on to other stuff.

• Installed APE shift fork shafts.
• Installed factory pro shift star kit.
• Assembled rods and pistons.
• Installed a APE oil pump cover, high volume oil pump gear, and DME pressure relief valve.
• Cleaned the case bolts and replaced the copper washers.
• Cleaned the case halves up
• Installed new crank bearings.
• Installed the crank.
• Put the case halves together.
• Installed 3 of the pistons and rods.
• Installed APE cylinder head studs.

A couple things to note. I was wondering why the manual specified replacing the copper washers. When I received the new ones I noticed they actually have a wave to them and are not flat. I’m not sure how critical it is to replace them but I did.

If you do the oil pump gear you will need to press the old one off and the new one on. I found that it was moderately difficult to press off. You have to support the gear right around the shaft or it will bend and flex. It required a surprisingly large amount of force for such a small shaft.


Bamperformance.Us@gmail.com 507-571-2777

Link | Top | Bottom

bryan468


Joined: 03/29/16

Posts: 31

Update 6
01/13/26 6:31 PM

• Installed the fourth piston and rod.
• Sanded the oem clutch basket down slightly.
• Sanded the rod bolt down slightly to avoid clearance issues with the clutch basket.
• Installed DME 8” extended swingarm.
• Installed new wheel bearings, seals, and spacers.
• Installed MTC clutch plates and steels.
• Installed MTC 2 stage lock up clutch.

At first I tried to only remove material from the clutch basket to gain rod bolt clearance but it was looking like it was going to require removing a lot of material to gain the clearance I needed so I ended up sanding the rod bolt down instead.

The swingarm installation went well. I had some issues with the quality of the powder coating which they ended up refunding me for. The chain guard holes didn’t quite line up either but I was able to fix that easily.


* Last updated by: bryan468 on 1/13/2026 @ 6:33 PM *


Bamperformance.Us@gmail.com 507-571-2777

Link | Top | Bottom

bryan468


Joined: 03/29/16

Posts: 31

Update 7
01/13/26 11:16 PM

• Turbo kit showed up. Went with a stage 2 RCC Turbo Kit with an upgraded fuel pump and 1450cc injectors in the secondary rail.
• Plugged the holes in the air plenum.
• Disassembled the throttle bodies and removed the secondary butterflies, shaft, tps sensor, and shaft motor.
• Filled the shaft holes in with epoxy.
• Sanded them down.
• Assembled the throttle bodies.
• Ziptied all of the hoses on the throttle bodies. Probably unnecessary but certainly won’t hurt.

Everything with the turbo kit appears to be in good condition. The only issue I had is I was expecting the blow off valve plate to be setup for a blow off valve but it wasn’t so I had to buy another one that was setup for a tial bov.

Removing the secondary butterfly system went pretty smooth. I used marine weld jb weld to fill the holes in. The whole process took about three days. Day 1, fill holes on one side of the throttle bodies. Day 2, flip the throttle bodies and fill the remaining holes. Day 3, sand the throttle bodies and reassemble. I made reference marks on the throttle bodies which I used to align them properly when I put them back together. I purchased a heal tech stve06 box which prevents codes from deleting the secondary throttle butterfly system but it turns out I won’t need it since I decided to go with a maxx ecu.


Bamperformance.Us@gmail.com 507-571-2777

Link | Top | Bottom

bryan468


Joined: 03/29/16

Posts: 31

Update 8
01/14/26 12:53 AM

• Installed the AG Motorsports velocity stacks.
• Installed the secondary fuel rail.

I spent a lot of time thinking about how I was going to install the velocity stacks with the secondary fuel rail while I was working on everything else up to this point. I decided to drill a hole in the velocity stacks for the fuel rail mounting bolts, then cut a groove in the bottom for an o-ring.

I started by taking some measurements to find the center point between the velocity stack holes on the x axis, then I determined where I wanted the hole on the y axis to get the injectors centered over the velocity stacks holes. After drilling the holes and doing a test fit I discovered that the bolt spacing on the fuel rail doesn’t line up with the centered holes on the velocity stacks. Not a big deal, I just made the holes into slots to accommodate the bolt spacing on the fuel rail. Then I cut the o-ring groove, did a test fit on the bench, installed o-rings, applied a lot of red thread locker to the velocity stack screws, installed the velocity stacks, drilled the holes in the air plenum using the velocity stacks as a guide for the drill bit.

Once the velocity stacks were installed I installed the secondary fuel rail. In order to get the secondary fuel rail to fit properly I had to mill .300” off the included spacers for the secondary fuel rail. Before installing the fuel rail I applied some silicone gasket maker to the bottom of the spacers. After installing the fuel rail I drilled a hole in the air plenum, installed the fitting which allows the wires to run through the plenum, then I applied silicone gasket sealer to the wires to seal them up.


Bamperformance.Us@gmail.com 507-571-2777

Link | Top | Bottom

Rook


Rook's Gravatar

Joined: 03/28/09

Posts: 21691

RE: Gen2 ZX14 Stage 2 RCC Turbo Build
01/16/26 3:51 PM

In my opinion, the Evo shift star is no improvement over stock in feel or shift reliability and it weighs more than stock. Ceramic bearings in the detent arm make no difference either. It won't hurt, it just isn't an improvement. I wouldn't have known my Gen1 had it if I didn't install it myself. It was exactly the same as the stock shifting mechanism with 40-some thousand miles on it.


08 MIDNIGHT SAPPHIRE BLUE ZX-14 Now Deceased, will be resurected 2024 ZX-14R bran friggin NEW!

Link | Top | Bottom

bryan468


Joined: 03/29/16

Posts: 31

RE: Gen2 ZX14 Stage 2 RCC Turbo Build
01/17/26 3:47 AM

Rook,

I had the factory pro shift star kit on my gen 1 and I felt like it was an improvement over the stock setup.


Bamperformance.Us@gmail.com 507-571-2777

Link | Top | Bottom

Rook


Rook's Gravatar

Joined: 03/28/09

Posts: 21691

RE: Gen2 ZX14 Stage 2 RCC Turbo Build
01/17/26 1:38 PM

It could have been my bike then. It never felt rough except for high rpm shifts from second to third, the pedal would snap back at my toe. Even the Evo didn't cure that. I would try an Evo for a Hayabusa, it looks smaller than OEM which tells me it's got to be faster. I really have to study how that shift mechanism works the next time I have the clutch cover off of a ZX-14. The retractable claw on the shift arm is especially interesting.


08 MIDNIGHT SAPPHIRE BLUE ZX-14 Now Deceased, will be resurected 2024 ZX-14R bran friggin NEW!

Link | Top | Bottom

bryan468


Joined: 03/29/16

Posts: 31

Update 9
01/21/26 12:08 AM

• Removed the oem fuel pump
• Modified the fuel pump plate
• Installed fuel outlet bulk head fitting
• Cut the tail section undertray to make clearance for the fuel filter and outlet hose
• Installed fuel lines
• Installed throttle bodies

This all went pretty smooth for me but I’m not sure how most people would modify the fuel pump plate to install the bulk head fitting. Part of the bracket has to be sanded down so the washer doesn’t hit it. The problem is you have to be careful not to damage the sealing surface under the bracket. I happen to have a 1” endmill that I was able to use to machine the bracket and plate to provide a good sealing surface for the bulk head fitting washer. I also installed the throttle bodies on the bike so I could get the fuel lines installed and also to avoid installation issues associated with the velocity stacks.


Bamperformance.Us@gmail.com 507-571-2777

Link | Top | Bottom

bryan468


Joined: 03/29/16

Posts: 31

Update 10
01/21/26 12:53 AM

• Installed a brembo rear brake caliper
• Installed a new rear brake caliper bracket
• Designed, 3D printed, and installed ram air block off plates
• Extended the wires for the air temp sensor
• Mounted the air temp sensor in the left block off plate
• Modified the brake and clutch fluid reservoir in preparation for a new lower mounting location
• Made new brake and clutch fluid reservoir mounting brackets

I decided to install a brembo rear brake caliper on the bike. It turns out the brembo caliper hole spacing is shorter than the oem caliper so I had to find a new bracket or make a new one. I managed to find one on webbike. The hole spacing was good but the caliper positioning in relation to the brake rotor was not so good. The bracket was already pretty thin in the caliper mounting area so I decided to remove some material off the brake caliper to get it centered on the rotor.


Bamperformance.Us@gmail.com 507-571-2777

Link | Top | Bottom

danmin


danmin's Gravatar

Location: Granbury, Texas

Joined: 03/19/25

Posts: 298

RE&amp&#x3b;&#x23&#x3b;x3a&#x3b&#x3b; Gen2 ZX14 Stage 2 RCC Turbo Build
01/21/26 8:55 AM

Make sure you DROWN the silicone intake stack plate bolts in the strongest loctite money can buy. You will be buying a new motor if any of them loosen and fall into the intake. Supposedly you are supposed to check tightness every couple thousand miles- just as insurance. That is one reason I got rid of my secondary rail. It is almost impossible to check torque with it there. I found a 12" long flexible hex that could get to almost all the bolts. I cut the intake stacks to correctly mount the rail, the hole drilled through is much cleaner. I worry about overall height of the rail relative to the airbox however. But it looks like you made it work.

Someone asked what HP the standard HTP pump supports- A lot. I will be running 500whp on E85 with mine. If you wanted to run methanol, you would need their upgraded pump though. But that is likely not where any of us here are headed. Do yourself a favor and put the intake hose clamps on and tight before you put the engine in. I tried to stab the engine into the frame after installing the rail and silicone intake stacks. Literally took me 2 weeks to do it "my way". But you might be smarter/less hard-headed than me.

I would make the argument that a Tiger Tail is a good upgrade to make while you have everything apart. Supposed to give you some extra room for the Maxx to live under the tail as well. It's a really tight fit. There's a lot of crap under the seat now. I was forced to put my air compressor in the battery box


* Last updated by: danmin on 1/21/2026 @ 9:03 AM *

Link | Top | Bottom

danmin


danmin's Gravatar

Location: Granbury, Texas

Joined: 03/19/25

Posts: 298

RE: Gen2 ZX14 Stage 2 RCC Turbo Build
01/21/26 9:01 AM

What would it take to get some of those ram air block offs? I just have a sheet of JB weld and an alum plate as my block off. I mudded the sheet like you do a classic car, so it's got legitimately 2-3 pounds of JB weld. The 3D printing specialists I brought my spare fairings to couldn't make a block-off that would seal the ram air entirely. I am looking for any solutions. I even toyed with the idea of moving a heat exchanger for the intercooler inline with the ram air outlet to add distance from the hot radiator as well as force cold air through it on a hit.

Link | Top | Bottom

bryan468


Joined: 03/29/16

Posts: 31

RE: Gen2 ZX14 Stage 2 RCC Turbo Build
01/21/26 4:22 PM

Danmin,

If you look at the picture of the velocity stacks from the bottom of the bike you can see the screws have a lot of thread locker on them. I prefer vibratite thread locker. It will provide resistance even after removing a screw multiple times. I was able to access all of the screws with the rail installed using a t handle Allen wrench with a ball end on it. The HTP fuel pump looks and sounds like a good option. If I have any issues with this setup I may switch to it. The upgraded fuel pump I have from RCC is supposed to support around 550whp on e85.

I should have my max ecu and wiring harness next week. I will see how everything looks. If it’s tight I may consider a different tail section.

I can put a ram air block off plate kit together for you. I added my business email and number to my signature. Feel free to contact me on either one.


Bamperformance.Us@gmail.com 507-571-2777

Link | Top | Bottom


Welcome to zx14ninjaform.com!
 
New Topic Reply
Next Page

Page: 1 2

Previous Page

New Post

Please login to post a response.