Move Close
Welcome to zx14ninjaform.com!

You are not logged in.
New Topic Reply
Next Page

Page: 1 2

Previous Page

Thread: Gen2 ZX14 Stage 2 RCC Turbo Build

Created on: 01/10/26 03:52 PM

Replies: 49

danmin


danmin's Gravatar

Location: Granbury, Texas

Joined: 03/19/25

Posts: 298

RE: Gen2 ZX14 Stage 2 RCC Turbo Build
01/21/26 8:16 PM

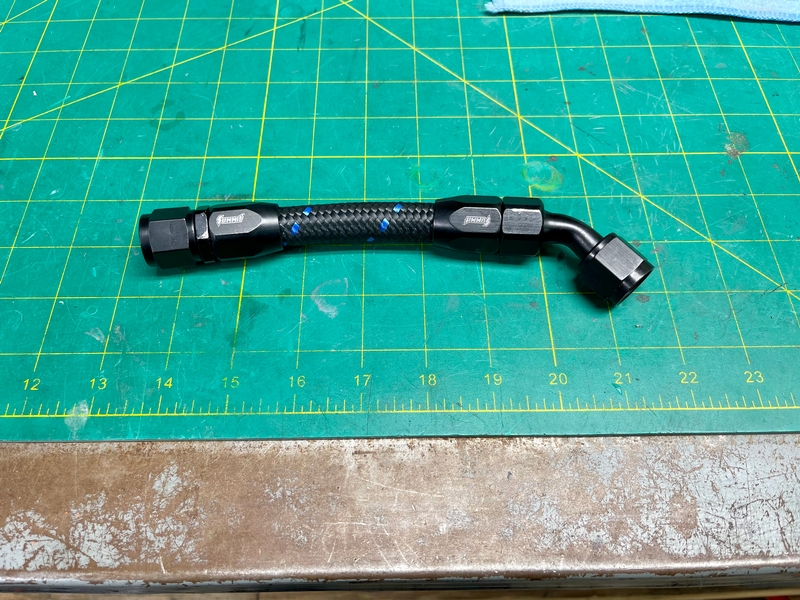
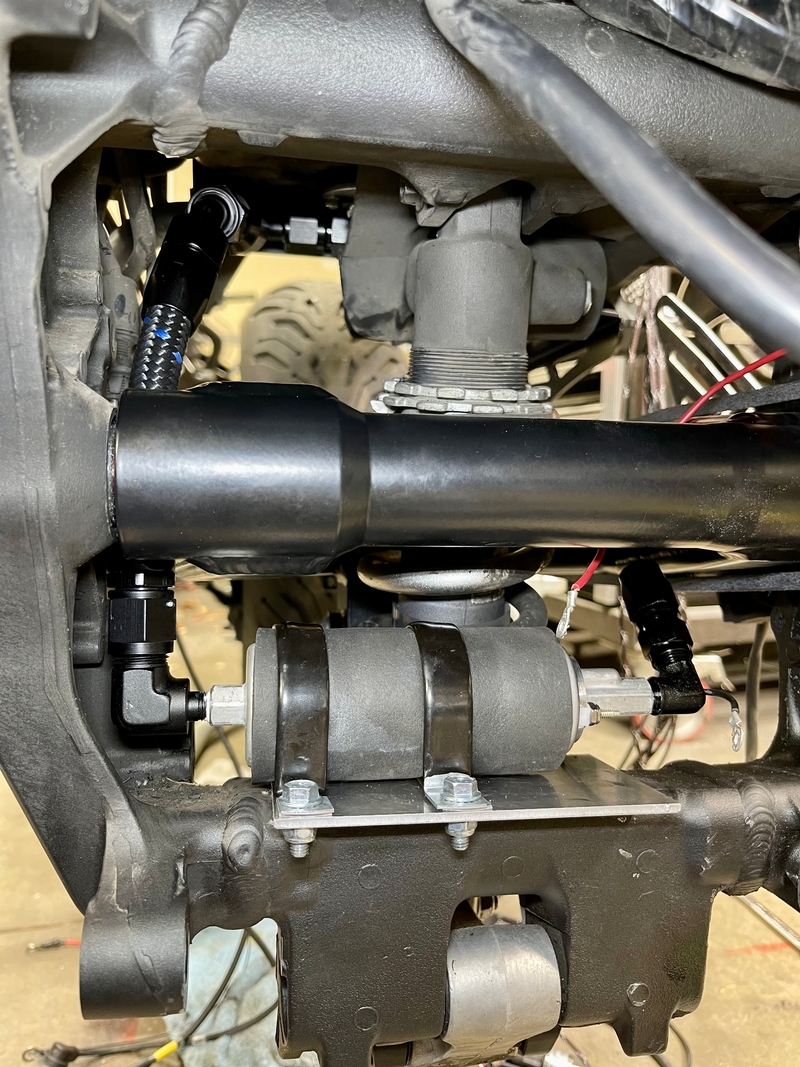
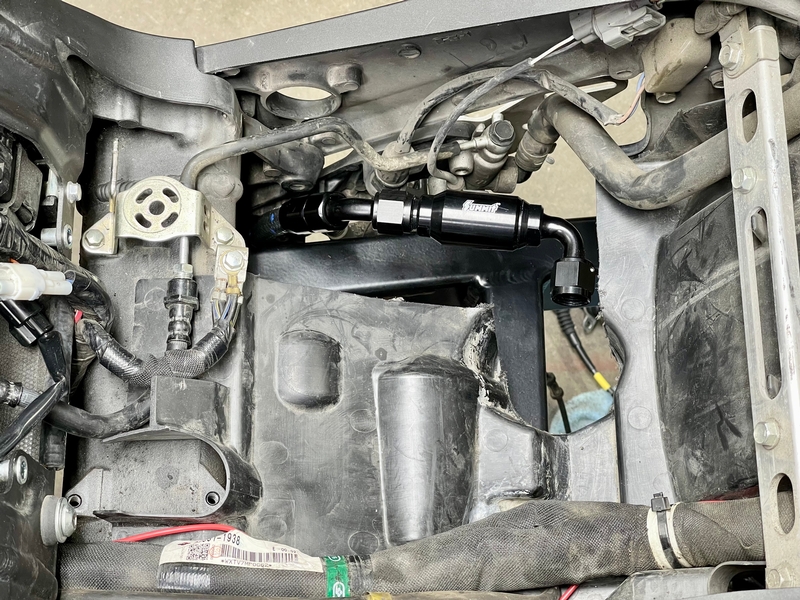
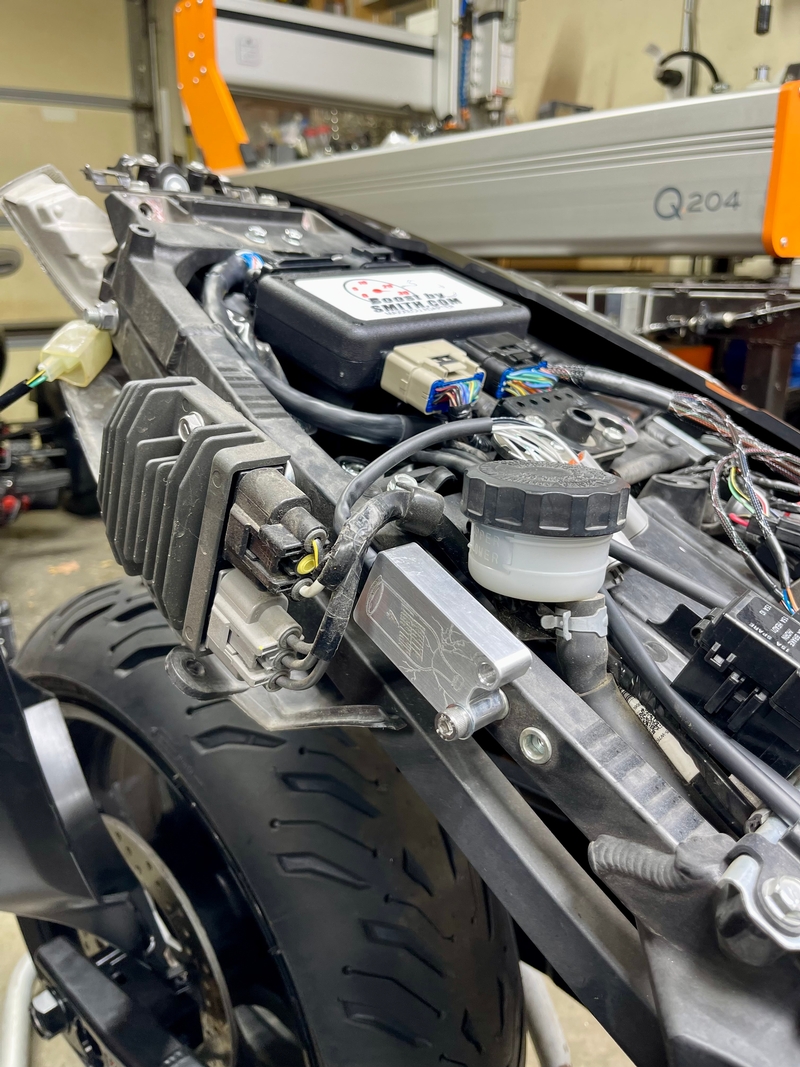
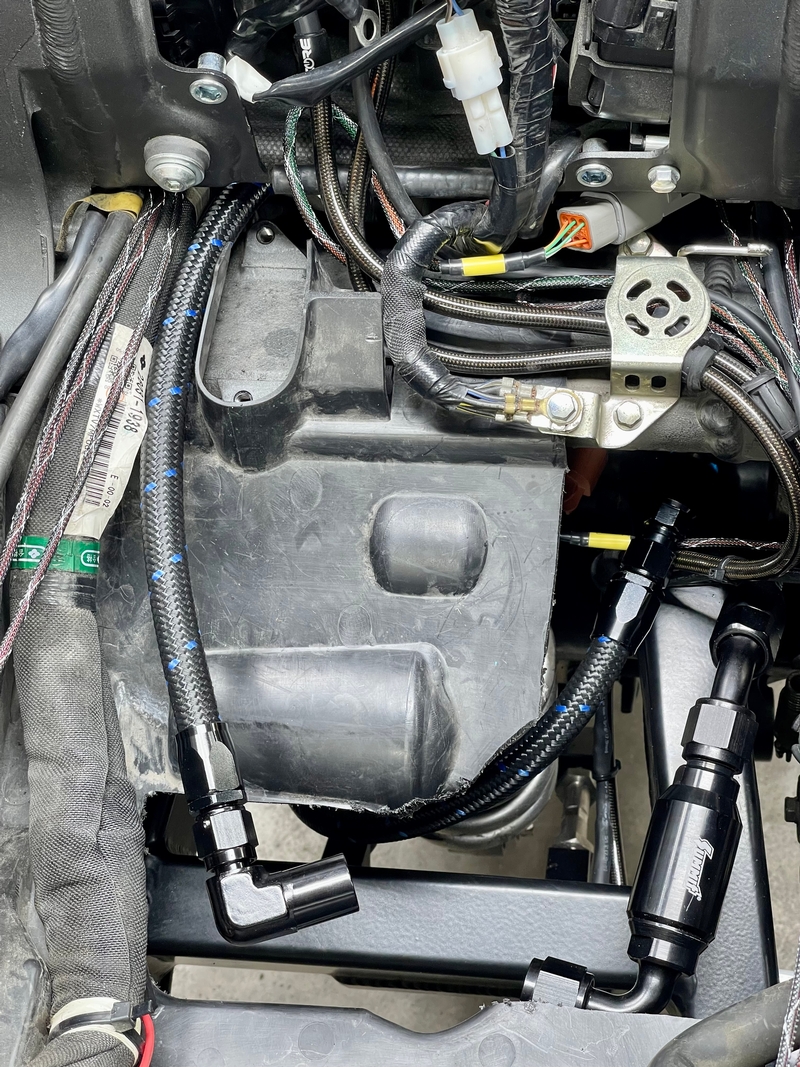
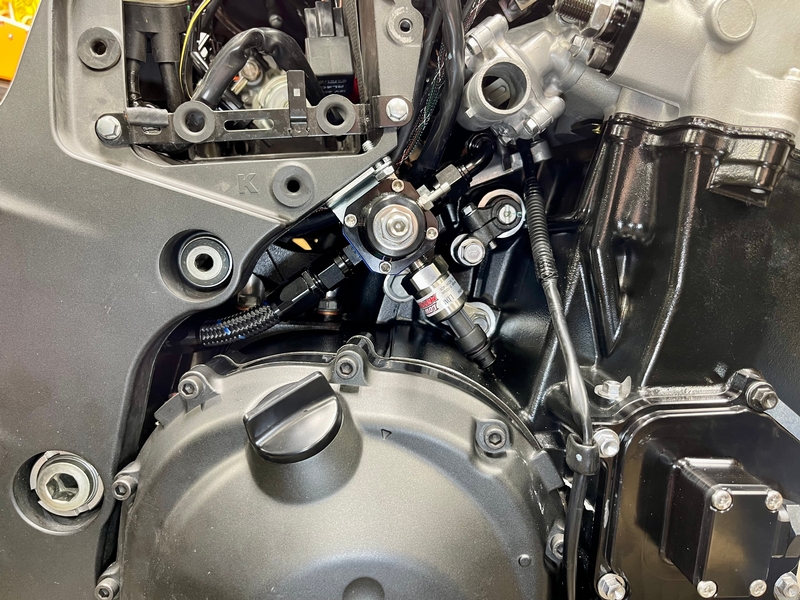
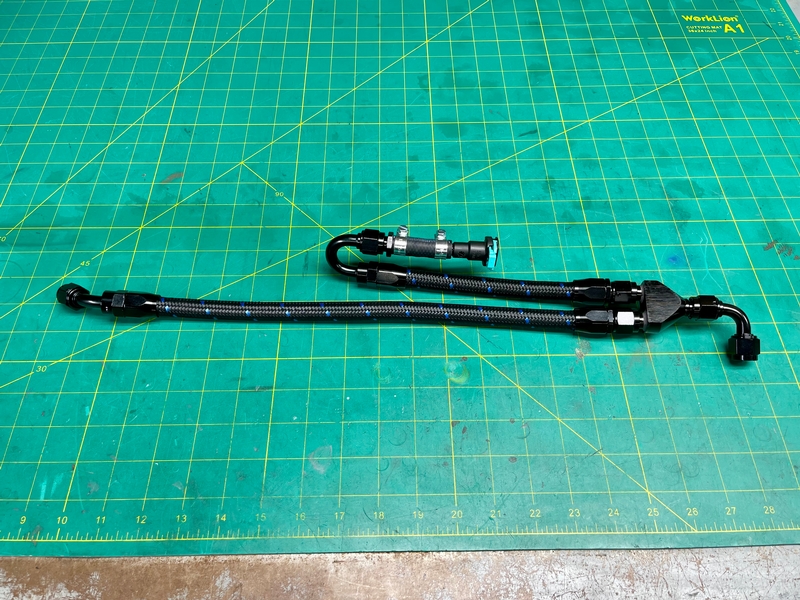
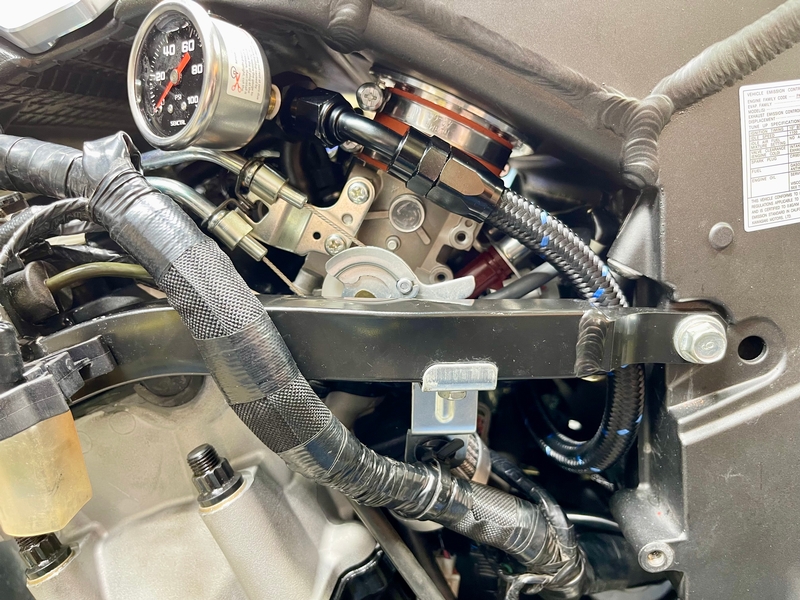
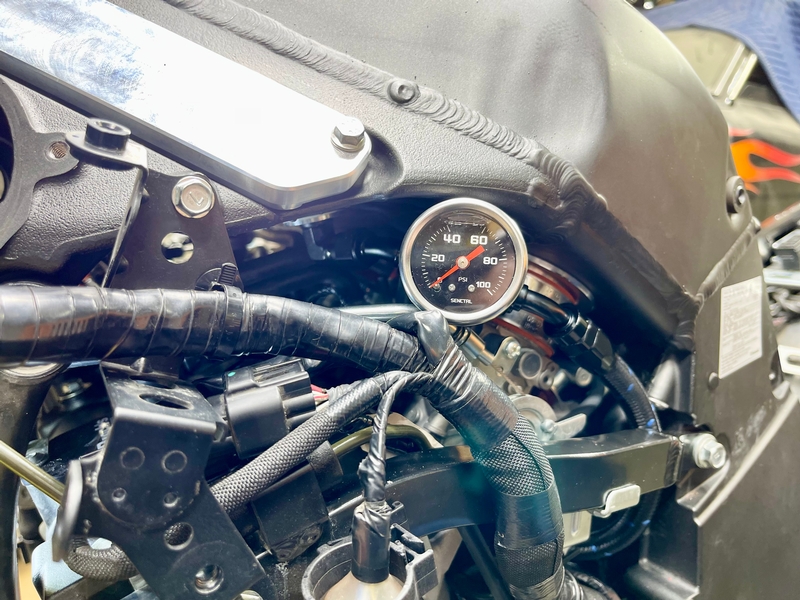
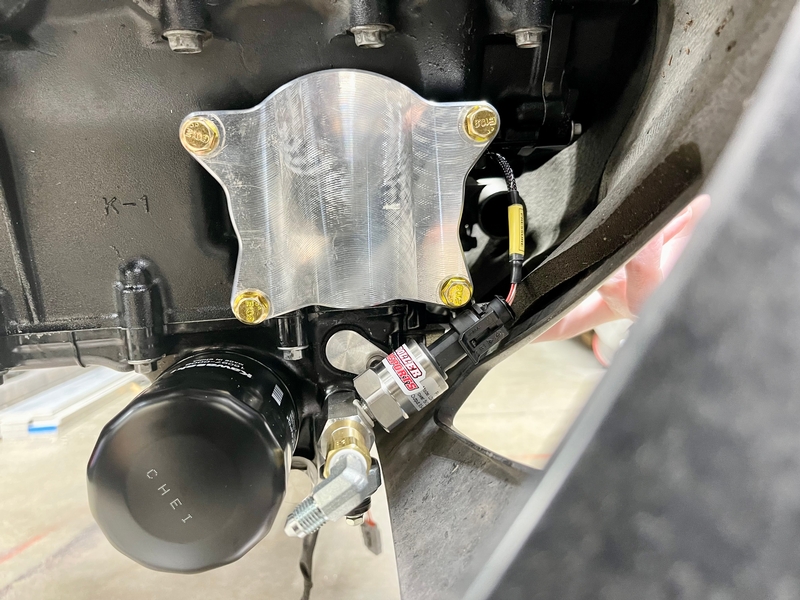
I ended up going with vibratite on mine as well, for peace of mind. I'll reach out when I wrap up my current tasks and don't need to budget for any big-ticket upgrades. My RCC fuel lines dry rotted in only a few months. Bike is kept in a garage in the Dallas area. Dry rot isn't common here unless things are 20+ years old. I didn't want to risk corroding rubber lines from running E, after taking the time to install new hoses. Went full PTFE hose.

Good luck on the build

Link | Top | Bottom

bryan468


Joined: 03/29/16

Posts: 31

RE: Gen2 ZX14 Stage 2 RCC Turbo Build
01/21/26 10:43 PM

Danmin,

Sounds good. I planned to upgrade the fuel lines. I have some braided AN hose that’s ptfe lined. I’m going to try to upgrade to that. If that doesn’t work for some reason I have some e85 fuel hose as well. When I replaced the fuel filter on my gen 1 I noticed that the fuel lines were starting to deteriorate after about a year and I only ran pump gas in that.


Bamperformance.Us@gmail.com 507-571-2777

Link | Top | Bottom

Rook


Rook's Gravatar

Joined: 03/28/09

Posts: 21691

RE: Gen2 ZX14 Stage 2 RCC Turbo Build
01/22/26 12:50 AM

I just want to pop in and thank you guys who do these helpful turbo build threads.


08 MIDNIGHT SAPPHIRE BLUE ZX-14 Now Deceased, will be resurected 2024 ZX-14R bran friggin NEW!

Link | Top | Bottom

danmin


danmin's Gravatar

Location: Granbury, Texas

Joined: 03/19/25

Posts: 298

RE: Gen2 ZX14 Stage 2 RCC Turbo Build
01/22/26 11:17 AM

If I'm not mistaken, I think Greg just posted a pic of your MaxxEcu kit all assembled. No Air Shifter?

Link | Top | Bottom

bryan468


Joined: 03/29/16

Posts: 31

RE: Gen2 ZX14 Stage 2 RCC Turbo Build
01/22/26 8:18 PM

Rook,

You’re welcome.

Danmin,

He did in fact post a picture of it. I’m going to see how it goes without an air shifter. If shifting is an issue then I will get one.


Bamperformance.Us@gmail.com 507-571-2777

Link | Top | Bottom

danmin


danmin's Gravatar

Location: Granbury, Texas

Joined: 03/19/25

Posts: 298

RE: Gen2 ZX14 Stage 2 RCC Turbo Build
01/24/26 12:52 PM

I'd budget for it now. I thought the same. 2-Stage lockup on the street + a quickshifter. Didn't work for me. I had to decel every time I wanted to upshift since the lockup made my clutch pull require 400 pounds or something crazy. I didn't want to force shift it.

Link | Top | Bottom

Puck


Joined: 12/19/25

Posts: 9

RE: Gen2 ZX14 Stage 2 RCC Turbo Build
01/30/26 5:13 PM

bryan,

Not sure how I missed that question and it looks like you went a different route but here is the data sheet for the pump used in the HTP setup. It has the fuel flow at different line pressures so you can calculate what power it can support with your injectors and desired fuel pressure. I crossed out the charts for the other model and highlighted the correct one. Looks like it will support about 550hp on E85 in a boosted application at 13.8v. Unfortunately, while they state it can handle up to 18v they don't show how the fuel flow or current draw scales with voltage so theoretically it could support more than that 550 with a "boost-a-pump" style setup to increase FP voltage while as a bonus dropping current being pulled through the harness.

Link | Top | Bottom

bryan468


Joined: 03/29/16

Posts: 31

Update 11
02/03/26 10:15 PM

• Replaced all serrated head M6 bolts with smooth head bolts for a better sealing surface.
• Sanded the clutch cover spacer and delivered it to the powder coater.
• Made revisions to the ram air block off plates for improved fit and strength.
• Received the Maxxecu, harness, and sensors.
• Received the cylinder head.
• Purchased some AN fittings in preparation for converting fuel lines to AN fittings with braided lines.
• Purchased aeromotive fuel pressure regulator.
• Purchased a new fuel filter.
• Built and installed lines and filter for the fuel pump inlet.
• Installed oil squirter block off plates.
• Installed new shims to get the valve clearances within spec.
• Installed the head on the engine.


* Last updated by: bryan468 on 2/3/2026 @ 10:17 PM *


Bamperformance.Us@gmail.com 507-571-2777

Link | Top | Bottom

danmin


danmin's Gravatar

Location: Granbury, Texas

Joined: 03/19/25

Posts: 298

RE: Gen2 ZX14 Stage 2 RCC Turbo Build
02/04/26 9:31 AM

Are you using an MTC 2-stage? Can you snag a picture of the springs it came with? I dropped my clutch springs into my bucket of other similarly sized springs and don't know if I've got the right ones in.

Link | Top | Bottom

bryan468


Joined: 03/29/16

Posts: 31

RE: Gen2 ZX14 Stage 2 RCC Turbo Build
02/05/26 5:23 PM

Danmin

I am using the MTC 2 stage clutch. I don’t take any pictures of the springs but I can tell you that the springs it came with were sanded on the top and bottom.


Bamperformance.Us@gmail.com 507-571-2777

Link | Top | Bottom

Puck


Joined: 12/19/25

Posts: 9

RE: Gen2 ZX14 Stage 2 RCC Turbo Build
02/06/26 9:13 AM

Interested in how you like the MaxxECU. I'll likely be going that route once I build my bottom end, for now I am using woolich for ignition tables and idle/vacuum tuning and a powercommander+3bar map for fueling under boost. Simplifying that to one unit and getting traction control back along with boost by gear would be nice lol, first few gears are a handful at stock wheelbase/gearing.

Link | Top | Bottom

danmin


danmin's Gravatar

Location: Granbury, Texas

Joined: 03/19/25

Posts: 298

RE: Gen2 ZX14 Stage 2 RCC Turbo Build
02/06/26 6:48 PM

apparently the traction control isn't that impressive. according to my tuner anyways. i might ask him to include it anyways on mine...

Link | Top | Bottom

bryan468


Joined: 03/29/16

Posts: 31

Update 12
02/10/26 9:50 PM

• Installed the cam chain guides.
• Installed a new cam chain.
• Installed a APE manual cam chain tensioner.
• Installed APE adjustable camshaft gears.
• Installed the cam shafts.
• Made a spacer for my degree wheel.
• Made a mounting plate for my dial indicator.
• Degreed the intake and exhaust camshafts.
• Installed the valve cover.
• Installed the coils.
• Installed the stator cover.
• Installed the timing cover.
• Installed the water pump.
• Installed a new oil pickup and o-ring.
• Installed the oil pan.
• Removed the engine from the engine stand.


Bamperformance.Us@gmail.com 507-571-2777

Link | Top | Bottom

Rook


Rook's Gravatar

Joined: 03/28/09

Posts: 21691

RE: Gen2 ZX14 Stage 2 RCC Turbo Build
02/11/26 3:29 PM

• Installed APE adjustable camshaft gears.

I see you also degreed the cams. Are the adjustable camshaft gears to tweak the timing further? I'm assuming the gears can be loosened on the shaft and turned forward or back a few degrees.

Simply intriguing builds you guys are doing. It's really cool you guys came along when you did. I'd like to see more of this in addition to the great information we already have in the older turbo threads. I hope you stick with us, I'm going to need some guidance when I do this. Definitely planning to buy the bike this summer and then we get started on the turboing.


08 MIDNIGHT SAPPHIRE BLUE ZX-14 Now Deceased, will be resurected 2024 ZX-14R bran friggin NEW!

Link | Top | Bottom

bryan468


Joined: 03/29/16

Posts: 31

RE: Gen2 ZX14 Stage 2 RCC Turbo Build
02/12/26 11:25 PM

Rook,

Happy to help. The APE cam gears have slots in them so you can adjust the camshaft timing. It’s quite a process to degree cams and I don’t think there are too many videos out there that explain how to do it on a motorcycle. It’s something I would only worry about if you do cams.


Bamperformance.Us@gmail.com 507-571-2777

Link | Top | Bottom

Puck


Joined: 12/19/25

Posts: 9

RE: Gen2 ZX14 Stage 2 RCC Turbo Build
02/13/26 2:50 PM

Its a slippery slope, Rook!

I thought I would be fine with pump gas and 7psi, barely a month later I ordered bigger injectors for E85 and 10psi. I already know next year I'll likely build the motor up like bryan(maybe not as in depth, mainly rods and pistons) and push it again to 13-14. Boost is addicting.

Link | Top | Bottom

bryan468


Joined: 03/29/16

Posts: 31

Update 13
02/17/26 11:32 PM

• Installed the engine.
• Installed air plenum block off plates using smooth flanged head bolts with gasket sealer applied to them.
• Finished installing core moto brake lines.
• Installed a short WiFi/bluetooth antenna on the maxxecu.
• Ran all of the wires for the maxxecu.
• Mounted the coil igniter for the maxxecu.
• Mounted the intake air control valve box for the maxxecu.
• Installed the wires/pins in the wire plug for the secondary injectors.
• Installed heat shrink tubing on the secondary injector wires.
• Drilled a hole in the frame to use for mounting the fuel pressure regulator.
• Milled a slot in the fuel pressure regulator mounting bracket.
• Installed aeromotive fuel pressure regulator.
• Installed flex fuel sensor under the frame behind the FPR.
• Installed braided fuel lines with AN fittings.
• Ordered a intercooler kit from RCC.

Installing the engine went very smooth. I installed the throttle bodies first, applied silglide to the intake boots, lined everything up, jacked it up into place, and installed the bolts and front engine mount brackets. I also chamfered the edges of the upper rear engine mount spacer to make it easier to slide into place.

I have been working on the brake lines since December. Definitely frustrating, they sent me a rear set that didn’t replace the rubber lines so I had to wait a long time to get a set that went all the way to the abs module.

So far installing the maxxecu and running all the wires has gone very smooth. Everything has fit well and all of the wires have been long enough.

Installing the fuel pressure regulator and converting the entire fuel system over to braided lines with AN fittings has been a lot of work. The fuel pressure regulator looks quite small and compact but once you start installing fittings it gets quite large and becomes very difficult to mount discreetly.


* Last updated by: bryan468 on 2/17/2026 @ 11:39 PM *


Bamperformance.Us@gmail.com 507-571-2777

Link | Top | Bottom

Rook


Rook's Gravatar

Joined: 03/28/09

Posts: 21691

RE: Gen2 ZX14 Stage 2 RCC Turbo Build
02/18/26 3:02 PM


08 MIDNIGHT SAPPHIRE BLUE ZX-14 Now Deceased, will be resurected 2024 ZX-14R bran friggin NEW!

Link | Top | Bottom

danmin


danmin's Gravatar

Location: Granbury, Texas

Joined: 03/19/25

Posts: 298

RE: Gen2 ZX14 Stage 2 RCC Turbo Build
02/19/26 8:46 AM

Careful with the rife sensors touching anything that vibrates. On a drag vehicle it matters a little less, since they run a lot less than street bike. Those sensors aren't cheap to replace and vibration will eat them up. I zip-tied my sensors to the coolant hoses around the bike to isolate them. My fuel pressure sensor is on my fuel line to the injector rail, and I have it wrapped in 1/8" rubber to keep it from damage if it touches my frame. I'll snag a photo later.

I did diy brake lines first and hated them. Shelled out the $350 or whatever for the coremoto lines to just get it over with. Probably spent $600 total by trying to avoid the off-the-shelf coremoto lines. Curious about your bluetooth antenna for the maxx. Which maxx are you running? Street or Sport?


* Last updated by: danmin on 2/19/2026 @ 8:49 AM *

Link | Top | Bottom

bryan468


Joined: 03/29/16

Posts: 31

RE: Gen2 ZX14 Stage 2 RCC Turbo Build
02/19/26 4:06 PM

Danmin,

I have heard a couple times now that these RIFE sensors are sensitive to vibrations however I’ve done some research on that and what I’m finding is the opposite. Here’s a quote from google on the subject. “RIFE sensors (by Motion Raceworks) are specifically designed to be highly resistant to vibrations, rather than sensitive to them in a detrimental way. They are engineered for harsh, high-vibration environments such as drag racing, road racing, and marine applications.”

So, with that information I plan to mount the sensors without any further vibration dampening measures. If they fail then I will come up with a way to isolate them. The fuel pressure sensor should see almost no vibration but the oil pressure sensor will see some vibrations.

I wasn't very impressed with the core moto lines. If Luke would have responded to me sooner the second time I contacted him I would have helped redesign the lines to fit better but by the time he got back to me I just didn’t have time to deal with it. Eventually I will put together a custom set of front lines so I have a brake line going to each front caliper instead of one line to the front right and a crossover line from the right to the left caliper.

I have the sport ecu. I just found a couple short WiFi/bluetooth antennas on Amazon and ordered them. I used the one that fit best. I don’t know how well the antenna will work yet though. Here’s a picture of the ecu with the antenna installed.


Bamperformance.Us@gmail.com 507-571-2777

Link | Top | Bottom

danmin


danmin's Gravatar

Location: Granbury, Texas

Joined: 03/19/25

Posts: 298

RE: Gen2 ZX14 Stage 2 RCC Turbo Build
02/20/26 6:22 PM

Ah dang. I didn't realize that was your trouble with coremotos. If you ordered them for a non-abs gen 2, they come as two independent lines right off the master cylinder. Nice progress still. Hopefully the sensors don't quit on you. Who's your tuner?

Link | Top | Bottom

danmin


danmin's Gravatar

Location: Granbury, Texas

Joined: 03/19/25

Posts: 298

RE: Gen2 ZX14 Stage 2 RCC Turbo Build
02/23/26 6:16 PM

Before you put it on the dyno. Add two 0.050" washers under each clutch spring. Otherwise you'll slip at low RPM like no tomorrow. I mentioned how bad my slip was on my thread a long time ago. I had a set of random springs I had been using in the lockup that made the clutch feel like stock and never slip. My tuner suggested the two washers under each spring as a remedy to the slip. I'll stop bossing you around now

Link | Top | Bottom

bryan468


Joined: 03/29/16

Posts: 31

RE: Gen2 ZX14 Stage 2 RCC Turbo Build
02/23/26 9:26 PM

Danmin,

I wanted to try to keep the abs for now. If it bothers me I will delete it. The only sensor I’m worried about seeing a lot of vibrations is the dome pressure sensor so I do plan to remote mount that. I will be very surprised if the other two sensors have any issues. I haven’t decided who I will have tune the bike yet. I know at this point I will have to drive a ways to find someone decent though as there aren’t any good tuners in Minnesota that I’m aware of.

Right now I have the springs that were included with the lockup clutch installed and a .025” spacer under each spring. Once I get the sprocket cover on I will see how hard it pulls. If it feels soft I will add some washers.


Bamperformance.Us@gmail.com 507-571-2777

Link | Top | Bottom

bryan468


Joined: 03/29/16

Posts: 31

Update 14
02/23/26 10:53 PM

• Installed a magnetic oil drain plug.
• Installed a new chain.
• Bled the brakes using motul rbf 700 brake fluid.
• Installed an oil pressure sensor adapter.
• Installed the oem and RIFE oil pressure sensors.
• Test fit the plastic to make sure everything clears okay so far.
• Sanded down the wastegate flange a little bit to improve the surface flatness.
• Made a mounting bracket for the boost control solenoids.
• Installed the boost control solenoids.

I ordered a 150 link chain when I started this project thinking that would be long enough but it turns out it was a little bit short. I had to move the wheel forward about an inch to make it work. I used a laser alignment tool to align the rear wheel which worked good.

Clearance with the plastic was tight around the fuel pressure regulator, fuel pressure gauge, oil pressure sensor, and the boost control solenoids. The plastic may need a little trimming but nothing too serious.

The wastegate flange had a low spot in the middle and some pitting on the surface which was bothering me so I sanded it down to fix it.


Bamperformance.Us@gmail.com 507-571-2777

Link | Top | Bottom

bryan468


Joined: 03/29/16

Posts: 31

Update 15
03/01/26 4:38 PM

• Finished sanding the wastegate flange.
• Installed titanium header studs.
• Installed a titanium sprocket nut.
• Installed the sprocket cover.
• Added shims to the clutch springs.
• Swapped three of the MTC clutch springs out for three Brock’s purple springs to increase static pressure.
• Installed the header and turbo.
• Installed the wastegate.
• Made an oil return hose using 10AN hose with the 8AN push lock fittings.
• Made a mounting bracket for the dome pressure sensor.
• Installed the dome pressure sensor.
• Made a mounting bracket for the oil pressure sensor.
• Installed the oil pressure sensor.
• Made an oil line for the oil pressure sensor using 4AN fittings and hose.
• Installed vacuum/boost reference lines.
• Installed the coolant reservoir.

The wastegate flange wasn’t perfectly flat so I marked it, used a precision ground flat stone to identify the low spots, then I used a precision ground surface plate with sandpaper to sand it by hand until I had it nice and flat. I had to cut an Allen wrench down so I could tighten the wastegate bolts.

With the clutch springs that MTC supplied with the 2 stage lockup clutch it seemed to pull pretty easy so I added 2 .050” shims under three of the MTC springs and used three purple springs from a Brock’s clutch kit to increase the static pressure.

I talked to Greg at boosted by smith about these rife sensors and it turns out that they are in fact sensitive to vibrations and he has had actual cases where sensors have failed from vibrations on motorcycles so based on that information I decided to remote mount the oil pressure and dome pressure sensors.


Bamperformance.Us@gmail.com 507-571-2777

Link | Top | Bottom


Welcome to zx14ninjaform.com!
 
New Topic Reply
Next Page

Page: 1 2

Previous Page

New Post

Please login to post a response.