Move Close
Welcome to zx14ninjaform.com!

You are not logged in.
New Topic Reply
Next Page

Page: 1 2 3 4 5

Previous Page

Thread: Gen2 ZX14 Stage 2 RCC Turbo Build

Created on: 01/10/26 03:52 PM

Replies: 108

bryan468


bryan468's Gravatar

Joined: 03/29/16

Posts: 62

Dyno Slip
04/23/26 10:55 AM

Here’s a picture of the dyno slip. He saved it as 14psi so I’m not sure if this was done at 14 or 15 psi of boost. I’ll have to take a look at the tune when I get a chance or ride it and see what boost level I’m at.

Red is 91 octane no ethanol premium which is the best we can get at the pump here.
Blue is one ethanol E85S


* Last updated by: bryan468 on 4/23/2026 @ 10:57 AM *


Bamperformance.Us@gmail.com 507-571-2777

Link | Top | Bottom

Puck


Joined: 12/19/25

Posts: 34

RE: Gen2 ZX14 Stage 2 RCC Turbo Build
04/24/26 12:53 PM

Great results. I'm really liking the MaxxECU, did you need to do anything special for it to work with stock gauges? Also, have you tried or do you plan on trying the laser wheelie control??

Thanks for sharing! What clutch springs are in there??


Rocket powered land yacht

Link | Top | Bottom

bryan468


bryan468's Gravatar

Joined: 03/29/16

Posts: 62

RE: Gen2 ZX14 Stage 2 RCC Turbo Build
04/24/26 10:15 PM

Puck,

You’re welcome. I bought the maxxecu from Greg at boosted by smith. It’s expensive but he builds a custom wiring harness and provides an adapter box so everything is plug and play. No cutting, splicing, soldering, crimping ect. Just make the ecu fit, route and run the wires, and plug everything in. He also includes a map with the ecu and it was pretty good. I was able to start, run, and ride the bike with no issues. Well worth the money in my opinion.

I don’t plan to do anything with wheelie control right now. I need to ride it and see how it works. If wheelies are an issue I may look into that.

I currently have 3 Brock’s purple clutch springs and 3 MTC clutch springs with .100” worth of shims under them. The clutch lever is fairly stiff so I didn’t really want to go with 6 of the Brock’s purple springs. I don’t think they would be enough to prevent the clutch from slipping anyway. With the setup I had at the dyno appointment the lock up clutch would start to engage enough that you couldn’t pull the lever in around 5k rpm and the clutch started slipping around 7k rpm so I think the best way to fix that issue is by adding weight to the lock up clutch arms. I’ve added a washer to each arm but I haven’t had a chance to ride it yet to see how it works.


Bamperformance.Us@gmail.com 507-571-2777

Link | Top | Bottom

bryan468


bryan468's Gravatar

Joined: 03/29/16

Posts: 62

Update 21
04/26/26 9:05 PM

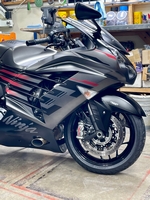
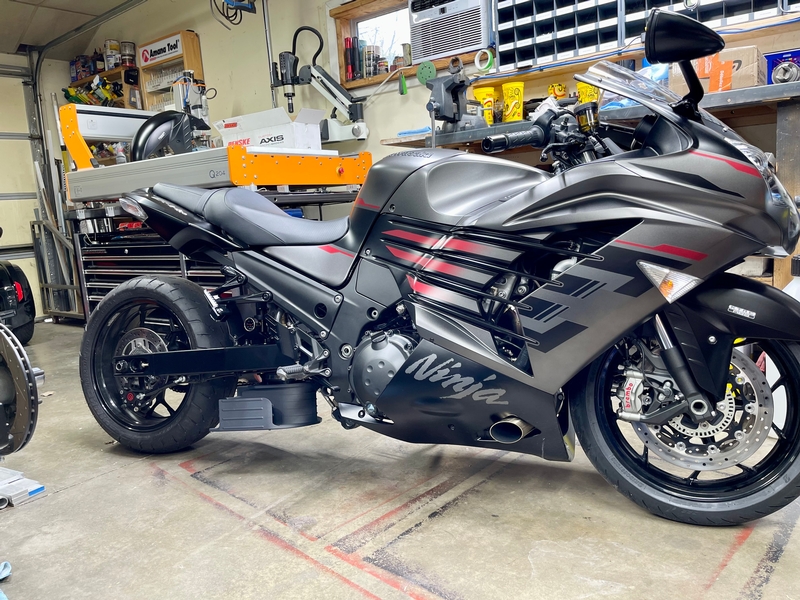
• Trimmed, sanded, fit and installed the new set of plastic.
• Installed the new fuel tank.
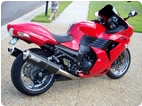
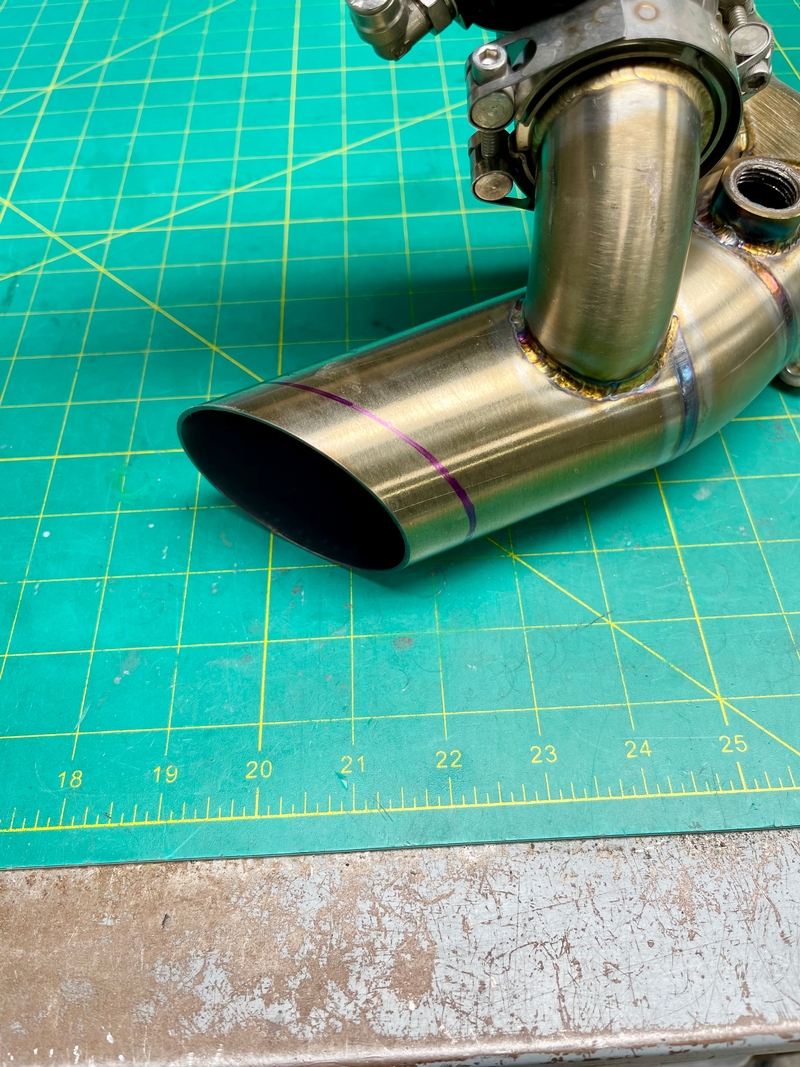
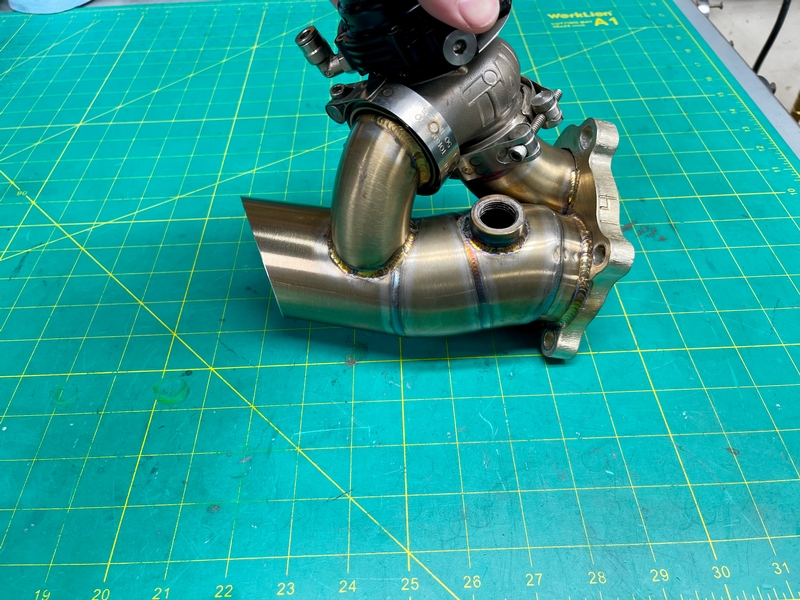
• Cut about 3/4” off the end of the exhaust.
• Installed a vortex fuel cap assembly.
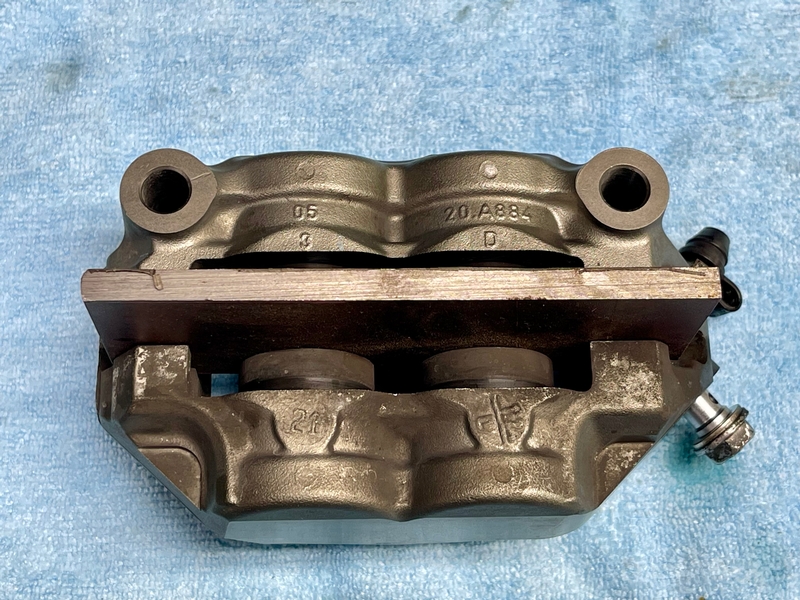
• Disassembled the front brake calipers and cleaned them.
• Reassembled the front brake calipers, installed them, and bled the brakes.
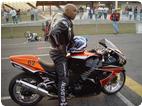
• Went for a short ride.

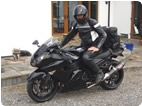
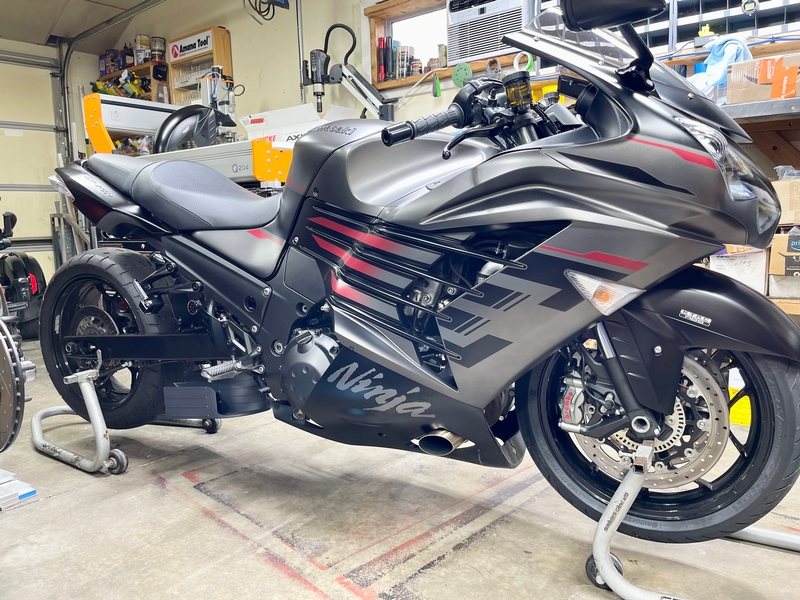
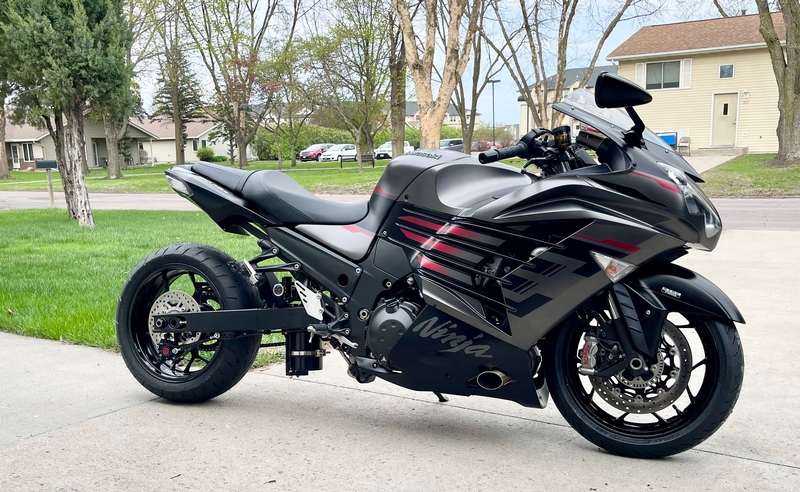
The weather has been bad here since I came back from getting the bike tuned so I’ve been staying busy working on the bike. On the left side plastics I cut the lower to fit around the air cleaner, on the right side plastics instead of cutting the lower plastic to fit around the clutch cover which sits out about a inch farther than stock I chose to use a spacer behind the lower bolt holes. I also had to sand the plastic slightly around the exhaust. On the upper plastic that goes around the fuel tank I cut the front bolt portion out so I can install it without having to remove the steering damper.

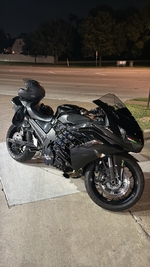
On my last zx14 I had an issue with scraping the exhaust in corners so I wanted to avoid that on this one. I marked a line all the way around the exhaust where I wanted to cut it, used a grinder to cut it, cleaned it up on the belt sander and reinstalled the exhaust. I think it looks better with the exhaust a little shorter.

The OEM fuel cap was looking a little faded and rough so I decided to replace it with a vortex fuel cap assembly. I had one on my last zx14 and I liked it.

I’m going to be installing some new pads and rotors soon so I wanted to take the calipers apart and clean them up. The pistons were full of brake dust and dirt so they needed to be cleaned bad.

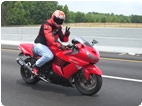
Finally, I was able to go for a ride. I have some work to do with cold starts. Aside from that the bike ran great. I was able to put about 20 miles on and do a couple short pulls before I got rained on. I checked the bike over when I got home and the only issue I found is I have a small oil leak around the oil pressure sensor I need to fix. I will be doing more work to the bike throughout the year but at this point it’s rideable.


Bamperformance.Us@gmail.com 507-571-2777

Link | Top | Bottom

Rook


Rook's Gravatar

Joined: 03/28/09

Posts: 21941

RE: Gen2 ZX14 Stage 2 RCC Turbo Build
04/27/26 2:13 PM

On the upper plastic that goes around the fuel tank I cut the front bolt portion out so I can install it without having to remove the steering damper.

I was planning to do the same with my Gen1. I had thought about making an aluminum spacer to replace the circular portion of fuel tank cover that would be trimmed out. The spacer would have a flat vertical tab that would rest behind the front edge of the fuel tank cover. Drill a hole in each tab and insert a well nut. Drill matching holes in the front edge of the fuel tank cover and put screws in. The front of the fuel tank cover is fastened down as per OEM and you can still take the cover off and leave the steering damper on. Also, the solid mounting surface would probably be better for the damper than the rubber grommet in the OEM fuel tank cover.

I think it looks better with the exhaust a little shorter.

I agree. Looks cool!


08 MIDNIGHT SAPPHIRE BLUE ZX-14 Now Deceased, will be resurrected, 08 Hayabusa, 2024 ZX-14R bran friggin NEW and 2026 hayabusa!

Link | Top | Bottom

Puck


Joined: 12/19/25

Posts: 34

RE: Gen2 ZX14 Stage 2 RCC Turbo Build
04/28/26 10:54 AM

Looks great! I was worried about the wideband catching air so put a short little sidewinder with a turn at the end to keep the exh and flashes from hitting my foot but it does scrape on the quicker and longer sweepers :(. Might shorten it now though, it looks sick!


Rocket powered land yacht

Link | Top | Bottom

bryan468


bryan468's Gravatar

Joined: 03/29/16

Posts: 62

Update 22
05/05/26 8:41 PM

• Disassembled front brake calipers and cleaned the pistons.
• Reassembled front brake calipers.
• Installed Ferodo xrac brake pads.
• Bled brakes.
• Cut the exhaust hanger portion off rear passenger peg brackets.
• Removed rear footpeg assemblies, rear brake lever, heel guards, and bolts for powder coating.
• Dropped off parts for powder coating.
• Installed powder coated parts
• Installed Penske Drag shock.
• Designed, 3D printed, and installed a locking collar for the co2 tank regulator.
• Installed a new high pressure gauge for the co2 tank.
• Installed new OEM handlebars and bar ends. Mine were faded and scratched up pretty bad.
• Designed, 3D printed, and test fit an aero attachment for the bottom of the co2 tank.

The weather here still hasn’t been very good for riding so I’ve been working on the bike quite a bit. The pistons in the front calipers were full of brake dust and debris that couldn’t be wiped off easily so I removed the pistons from the calipers, cleaned them, and reinstalled them. I don’t have a set of caliper piston pliers so I just used compressed air to push them out. I also installed ferodo brake pads as they have worked well for me in the past.

I thought about removing the rear passenger pegs from the bike but it looks like something is missing with them removed and the mating surface of the subframe is pretty beat up so I decided to keep them on the bike. They also help hide the co2 tank a little bit. In order to make them look a little better I cut the exhaust hanger portion off the peg brackets and had them powder coated black along with the rear brake lever and heel guards.

I noticed that the adjustment knob on the co2 tank regulator was really easy to turn so I decided to make a locking collar for it. This also prevents someone from messing with it.

With the little extra free time I’ve had here and there I’ve been messing around with some different designs for aero attachments for the bottom of the co2 tank. I was thinking it would be cool to come up with an attachment that looked good, redirected the air, and possibly provided some downforce. I haven’t settled on a design I like yet but I will attach a picture of one that I did print and test fit.


Bamperformance.Us@gmail.com 507-571-2777

Link | Top | Bottom

bryan468


bryan468's Gravatar

Joined: 03/29/16

Posts: 62

RE: Gen2 ZX14 Stage 2 RCC Turbo Build
05/05/26 8:53 PM

Rook,

Right now the bolt that would normally go through the front of the tank plastic is installed without a spacer. I just put some red thread locker on it and snugged it up. Eventually I will 3d print a spacer and install one. I really want to avoid having to remove the tower pin bracket for the steering damper because I had to put rtv on the threads of those bolts to get them to seal and not leak air under boost. If I remove them I will have to pull the blow off valve off the bike so I can clean up the pieces of rtv that will fall into the airbox and then reapply rtv to the threads when I install the bolts. Just a big hassle I don’t want to deal with.


Bamperformance.Us@gmail.com 507-571-2777

Link | Top | Bottom

bryan468


bryan468's Gravatar

Joined: 03/29/16

Posts: 62

RE: Gen2 ZX14 Stage 2 RCC Turbo Build
05/05/26 8:56 PM

Puck,

On my gen 1 the o2 sensor was closer to the end of the pipe and it still worked okay after I shortened it so I wasn’t worried about it on this one. It’s really not a good feeling when you scrape that pipe in the middle of a corner so I wanted to avoid that.


Bamperformance.Us@gmail.com 507-571-2777

Link | Top | Bottom

Rook


Rook's Gravatar

Joined: 03/28/09

Posts: 21941

RE: Gen2 ZX14 Stage 2 RCC Turbo Build
05/06/26 1:56 PM

Just a big hassle I don’t want to deal with.

It's a big enough hassle even if you don't need to worry about sealing the threads.


08 MIDNIGHT SAPPHIRE BLUE ZX-14 Now Deceased, will be resurrected, 08 Hayabusa, 2024 ZX-14R bran friggin NEW and 2026 hayabusa!

Link | Top | Bottom

danmin


danmin's Gravatar

Location:

Fort Worth, Texas

Joined: 03/19/25

Posts: 338

RE: Gen2 ZX14 Stage 2 RCC Turbo Build
05/08/26 2:51 PM

Congrats on the bike! Looks fantastic and that's plenty of power to play with.

How's it compare to your gen 1 turbo bike?

Link | Top | Bottom

bryan468


bryan468's Gravatar

Joined: 03/29/16

Posts: 62

RE: Gen2 ZX14 Stage 2 RCC Turbo Build
05/09/26 8:38 PM

Danmin,

Thank you, I’m slowly getting there. This one definitely has more power and feels faster. The only other major difference I have noticed is that the gen 1 started a lot better. I have the cranking fuel dialed in pretty good but on cold starts I have to give it some throttle and keep it running for a minute or so.

I’ve put a couple hundred miles on it in the last couple days and it seems to run good. I’m struggling to get it to hook at the moment. I need to get my suspension dialed in.. the drag shock I installed is way too stiff so I ordered a couple softer springs. I also discovered that the right front brake rotor is bent so that’s pretty annoying. The brake rotors I want from braketech are not available so I may buy a set of braketech rotors for a zx10 if I can find someone who has them in stock.


* Last updated by: bryan468 on 5/9/2026 @ 8:39 PM *


Bamperformance.Us@gmail.com 507-571-2777

Link | Top | Bottom

danmin


danmin's Gravatar

Location:

Fort Worth, Texas

Joined: 03/19/25

Posts: 338

RE&#x3a&#x3b; Gen2 ZX14 Stage 2 RCC Turbo Build
05/10/26 2:35 PM

I folded and bought a set of Galfer front rotors. ~$800 delivered. My OEMs were warped pretty quickly after getting the turbo.

An extra 12v lithium battery wired in series to your starter might be the next upgrade if you start hating the cold start behavior.

I think tire spinning is a side effect of 400whp. You might be able able to figure out how to ramp the boost in slower or depending on gear through MUnit. Not sure if you are willing to experiment though. Could also drop a couple teeth on the rear sprocket...

Interesting to hear that the gen 2 is such a difference compared to the gen 1. apples to oranges i suppose

What is the front stand you are using for the bike? The front stands I have been using like to slip or are an absolutely massive pain to use


* Last updated by: danmin on 5/10/2026 @ 5:05 PM *

Link | Top | Bottom

Rook


Rook's Gravatar

Joined: 03/28/09

Posts: 21941

RE: Gen2 ZX14 Stage 2 RCC Turbo Build
05/10/26 7:13 PM

Pit Bull has been absolutely reliable for the almost 20 years since I've gotten into this. i have two Pit Bull front stands and never had the slightest problem. The steering stem stand is just a little bit tricky but i have a tutorial on how to use it. I have a pit bull trailer restraint too. It's not simple to use but when you get it right, it's a hundred percent reliable. I might risk the bike when i ride but when I'm wrenching, I don't risk anything. I go expensive on stands and so far, I've been impressed.


08 MIDNIGHT SAPPHIRE BLUE ZX-14 Now Deceased, will be resurrected, 08 Hayabusa, 2024 ZX-14R bran friggin NEW and 2026 hayabusa!

Link | Top | Bottom

Puck


Joined: 12/19/25

Posts: 34

RE: Gen2 ZX14 Stage 2 RCC Turbo Build
05/11/26 1:06 PM

When you say slow start, is it cranking slow or for a long time (like the starter doesnt have the juice), or just stalls and doesnt want to stay running until its up to temp?

If its not the starter or battery and just bad manners when cold, on E85 I noticed that anything below like 60*F outside the starting gets more difficult. At 60ish it just cranks for a bit longer, no big deal. At 50ish I have to give it a light bit of throttle to get it started, but at 40 or below I have to give it gas and hold the idle higher for a bit, and its still prone to stalling for the first minute or two until it gets some heat in it. While there is no fuel enrichment/cold start mode on the stock setup, I was able to greatly improve it by adding like 25% extra fuel (on top of my initial E85 enrichment)while RPM is on the starter but below idle range (think I did 300-600 RPM range).

With your aftermarket ECU, I'm sure you can use proper coolant temp vs enrichment tables to only add extra fuel during cold starts.

...and yes, I have had some clenching moments with exhaust scraping the road on a long sweeper or sharp turn and its NOT fun lol. Will def shorten my exh when I swap turbos in the next week or two.


Rocket powered land yacht

Link | Top | Bottom

bryan468


bryan468's Gravatar

Joined: 03/29/16

Posts: 62

RE: Gen2 ZX14 Stage 2 RCC Turbo Build
05/11/26 7:28 PM

Danmin,

I’ve adjusted the boost by gear a little bit to improve traction. Boost ramping was setup on the dyno and so far I like how it’s setup so I haven’t messed with it. Getting the suspension dialed in will help a lot.

The stands I’m using are nothing special. I think they’re made by a company called gp1. I bought them 10-15 years ago. They were cheap because they were scratched and the stickers were messed up. I ended up making my own front fork brackets because I didn’t want to spend any extra money to buy theirs. I took some square tubing, drilled a hole in the end, tapped it, and installed a bolt. It works good because you can adjust the depth of the bolt so it doesn’t slip out of the bottom of the fork. If I were to buy a new set now I’d probably go with a set of pitbull stands.

Danmin, puck,

As far as the starting situation goes it’s not that bad I’m just being fussy. I have the cranking fuel dialed in pretty good. When cranking the bike turns over pretty good and it fires within 1-2 seconds. If the bike is warm it will stay running without any issues. If the bike is cold I have to give it about 1% throttle for about a minute before it will stay running on its own.

The reason this is different from the gen 1 I had is because on the gen 1 there’s a mechanical linkage that’s tied into the secondary butterflies shaft that will open up the primary butterflies when the bike is started and until it’s warmed up. This provides the extra air that’s needed. The gen 2 uses an intake air control valve. There are 4 hoses that go from the valve to barbs that allows air to enter the throttle bodies under the butterflies. On this bike naturally aspirated that valve works great but with a turbo and much lower compression you need more fuel which also requires more air and it cannot supply enough air.

I have an idea on a way to fix this issue but I don’t want to mess with it now. I may mess with it in the fall or winter.


Bamperformance.Us@gmail.com 507-571-2777

Link | Top | Bottom

Puck


Joined: 12/19/25

Posts: 34

RE: Gen2 ZX14 Stage 2 RCC Turbo Build
05/12/26 9:30 AM

Interesting, that may be my issue as well since I have the same problem - when cold, especially if temps are 50 or below, the bike will idle low after initial starting and is easy to stall until it gets some temp in it. Runs and starts perfect once up to temp. I bandaided it by adding some fuel under 600rpm and bumping my idle RPM up to 1500 up from ~1200 which helped, and as a bonus helped my mechanical scavenge pump not build up oil at idle from my low mounted turbo, and likely wont mess with it again until winter when it becomes an issue since there is only like 1-2 months where it gets below ~55ish here lol.

Will be nice to not worry about oil anymore after next weekend though since I am converting to one of the newer oil-less turbos so I can ditch all the extra oil lines, remove the mechanical scavenge pump, and never worry about an oily air filter again :).


Rocket powered land yacht

Link | Top | Bottom

Puck


Joined: 12/19/25

Posts: 34

RE: Gen2 ZX14 Stage 2 RCC Turbo Build
05/12/26 9:52 AM

This is still on the GT28rs turbo the kit comes with? If so, any plans to change or are you happy with the combo? You are making a LOT of power for that setup, and I'm sure the intercooler and E85 helps but IMO you're pretty much maxing that setup out according to the compressor map.

I bet you can drop IATs considerably and make an extra 10whp at the same psi from a larger frame turbo, while also having an easier time managing boost since it will come in a bit later. It should also tolerate a bit more timing.


Rocket powered land yacht

Link | Top | Bottom

bryan468


bryan468's Gravatar

Joined: 03/29/16

Posts: 62

RE: Gen2 ZX14 Stage 2 RCC Turbo Build
05/12/26 11:19 AM

Puck,

What are your coolant temps like in stop and go traffic with your idle that high? I ended up getting stuck in some traffic by the college here last week and I was seeing 230-240. I had my idle set around 1200-1300rpm. I’ve lowered it to around 1100 now. I also bought a couple of the cooling fans from Schnitz. Once they get here I will see if I can get them both to fit.

I’m honestly not even sure what turbo I have. Whatever the stage 2 kit comes with. I know Richard claims they’re good for around 430whp on e85. I plan to ride it and try to get everything dialed in and working properly this year. If I get bored with the power it has I may go with a bigger turbo next year. So far I haven’t done any long pulls with it as I currently only have a 3d printed set of license plate brackets. Once I get the metal brackets on the bike I’ll do some 2-6 gear runs. So far the weather here has been 60-70°F and I’ve only done 2-4 gear pulls so intake air temps have been great… normally 80-100°F


Bamperformance.Us@gmail.com 507-571-2777

Link | Top | Bottom

Puck


Joined: 12/19/25

Posts: 34

RE: Gen2 ZX14 Stage 2 RCC Turbo Build
05/12/26 1:05 PM

My fans are set to 194f (90c) and they rarely come on. If its ~90* out and I get stuck in traffic it goes up to ~210-212F. In normal stop and go riding it hangs out one bar above the middle on the temp gauge, ~185ish. Once im on the highway it stays on the bottom two bars, it wont even hit middle of the gauge lol.

Few things that are relevant though - I'm tuned slightly rich on E85 so it gets lots of fuel (.95-.99 lamda when in vacuum and .80 when at 2psi or higher), and I didn't delete my oil cooler or mod my rad or anything crazy so my cooling system is all stock. I removed the all the engine->fairing insulation blocks and the rubber sound isolation sheets around it that block hot air from hitting the rider, which can be annoying in the summer but i'd rather my motor be cool than my thighs. Also, and probably very important, I dont start making boost until about 3k rpm, and my header is wrapped+coated with the turbo in a blanket so the turbo adds very little radiant heat if I'm not beating on it. I'm also making a LOT less power than you, so less heat to worry about. I'm maybe 315-320 crank??? You're probably around 400 or more. I consider it anecdotal since I didn't test it myself, but supposedly the turbo adds 15-20f to oil temps and although thats not a 1:1 ratio with coolant temps, I would still expect a little higher temps especially at your power levels.

I guess on paper 430w might be possible with that turbo with intercooler and E85, but I def wouldn't try to push it that far since you'd be waaayyy out of its efficiency range and the pressure ratio would be 2.5+ (ideally under 2.0 is the goal). Its rated for 375hp or something like that, and 14psi is right about where efficiency takes a huge dive if you start pushing anymore boost so IATs would start jumping higher and higher.


Rocket powered land yacht

Link | Top | Bottom

bryan468


bryan468's Gravatar

Joined: 03/29/16

Posts: 62

RE: Gen2 ZX14 Stage 2 RCC Turbo Build
05/12/26 9:34 PM

I suspect my radiator isn’t working as good as it should. It’s kind of beat up and dirty. I’ve cleaned it a few times but it still looks pretty rough so I may just install a new radiator when I do the fans. I know they can get pretty hot in stop and go traffic but that seemed pretty high for a 70° day.

It sounds like your temps are pretty good. I was thinking about ceramic coating the header but I had it installed already when I thought about it so I skipped it.


Bamperformance.Us@gmail.com 507-571-2777

Link | Top | Bottom

Puck


Joined: 12/19/25

Posts: 34

RE: Gen2 ZX14 Stage 2 RCC Turbo Build
05/13/26 7:44 AM

Sorry I wasnt specific, my header wasnt ceramic coated although I might have that done on the next one I make. I header wrapped it with ti wrap, then coated it with the DEI silicone header wrap spray that waterproofs it and keeps the wrap from falling apart. It works better to hold in heat than ceramic coating alone, but works best on pipes that are coated first. Definitely not recommended for steel exhausts, only stainless since even with the "waterproof" spray coating it will still hold moisture and rust out mild steel. Its crazy how much it helps though, so much less heat radiating from the header and turbo.


Rocket powered land yacht

Link | Top | Bottom

bryan468


bryan468's Gravatar

Joined: 03/29/16

Posts: 62

RE: Gen2 ZX14 Stage 2 RCC Turbo Build
05/13/26 10:17 AM

Okay, I’ve wrapped quite a few headers. The titanium wrap holds up a lot better than the fiberglass stuff.


Bamperformance.Us@gmail.com 507-571-2777

Link | Top | Bottom

Puck


Joined: 12/19/25

Posts: 34

RE: Gen2 ZX14 Stage 2 RCC Turbo Build
05/13/26 12:13 PM

I do a lot of 2stroke stuff and the ti wrap is awesome. It helps a ton to coat it with the DEI wrap spray once its fully dried and cured, especially on mild steel pipes that are prone to getting destroyed by trapped moisture. As a bonus it helps keep the ends of the wrap from fraying.


Rocket powered land yacht

Link | Top | Bottom

danmin


danmin's Gravatar

Location:

Fort Worth, Texas

Joined: 03/19/25

Posts: 338

RE&#x3a&#x3b; Gen2 ZX14 Stage 2 RCC Turbo Build
05/14/26 12:16 PM

Might need to run more water in your coolant mix. And there's a chance you've got an air bubble still. Notorious to have an air bubble in the lines after doing a full drain/engine disassembly. Gotta squeeze and move all the hoses a million times. I usually see a big air bubble come out after squeezing and moving the right-side big hose that comes right off the engine and goes to the radiator.

Some aftermarket radiators have more capacity and more fins. Here is a radiator as specified: https://ebay.us/m/apzoMe

All my bikes get bigger radiators due to the region and how I ride them. Chinese upgrade versions have never disappointed me. Easily a couple degree improvement at all times, faster cooldowns, red light temps rise slower.

You may need to run a summer coolant mixture (same as what's in your intercooler) and swap to normal green stuff when it gets cold out. Some more food for thought- the oil pump upgrade also increases the speed at which your water pump moves coolant. Wonder if there is an issue with coolant moving too fast to be cooled (happened on my C3 corvette). And I wonder how red light temps are affected by the radiator shrouds still intact on your bike. I don't have any shrouds or foam on my radiator. Just the fans at the back. Also no "cockpit guard" (flat plastic fairing that goes above the front wheel and under the gauges. Maybe these help cool the radiator better while stopped.

Lots of variables. Running full 5qt of oil? Tune too lean when up to temp and stopped? Air bubble and coolant mixture are easy to fix/test.

Heat wrap was something I considered before as well. I didn't follow through because the definitive increase of cylinder head temps as a result of the wrap. Maybe not enough to matter, maybe just enough to hurt something...


* Last updated by: danmin on 5/14/2026 @ 12:29 PM *

Link | Top | Bottom


Welcome to zx14ninjaform.com!
 
New Topic Reply
Next Page

Page: 1 2 3 4 5

Previous Page

New Post

Please login to post a response.